
Winter transforms your hands into a canvas for self-expression.
The season brings opportunities to experiment with colors, textures, and patterns that celebrate both celebration and cozy comfort.
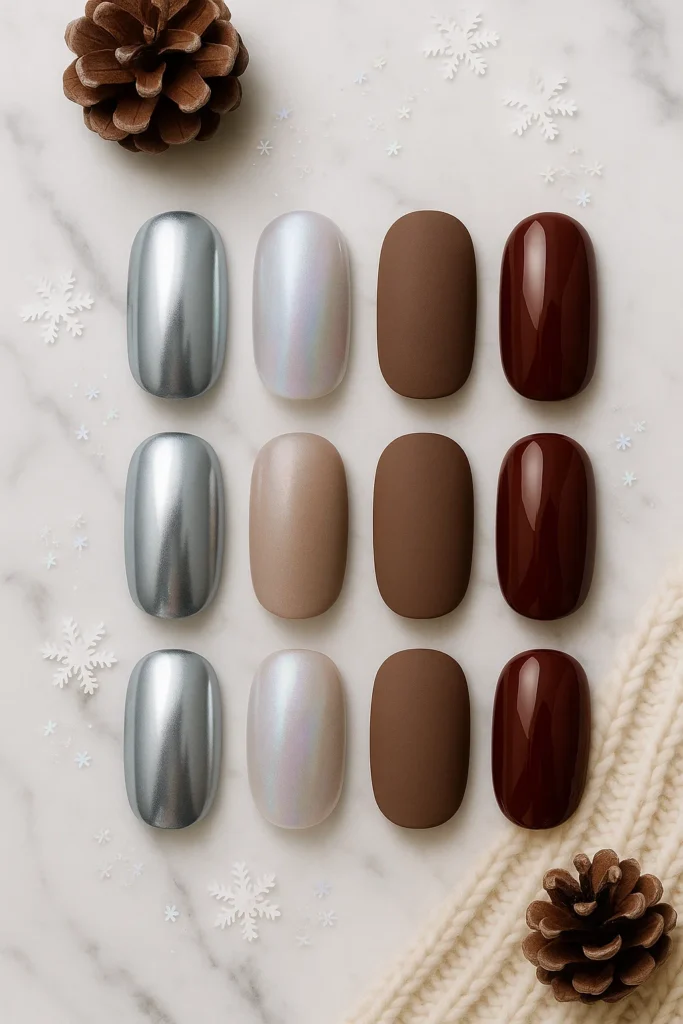
From icy blue chrome finishes that mirror frost-kissed windows to rich burgundy velvets reminiscent of holiday wines, winter 2025 offers nail art possibilities that speak to every style preference and skill level.
This year stands apart from previous seasons.
The winter 2025 nail scene balances bold statement-making with wearable minimalism, creating space for both the adventurous and the practical.
You’ll find designs featuring soft mocha tones perfect for daily wear alongside show-stopping aurora effects that command attention at holiday gatherings. The beauty of these trends lies in their accessibility—whether you’re holding a nail brush for the first time or you’re a seasoned professional, winter nail art welcomes you.
Winter doesn’t mean sacrificing nail health for beauty.
The strategies you’ll learn here protect your nails while creating looks you’ll want to photograph and share.
Let’s explore what makes your nails uniquely yours this season.
50+ Winter Nail Design Ideas: Your Complete Inspiration Gallery
Winter nail design inspiration should feel organized, not overwhelming.
This collection of 50+ designs addresses every mood, occasion, and skill level you might encounter during the cold months.
Each design includes specific details about color palettes, difficulty ratings, and practical application guidance to help you choose what works for your lifestyle.
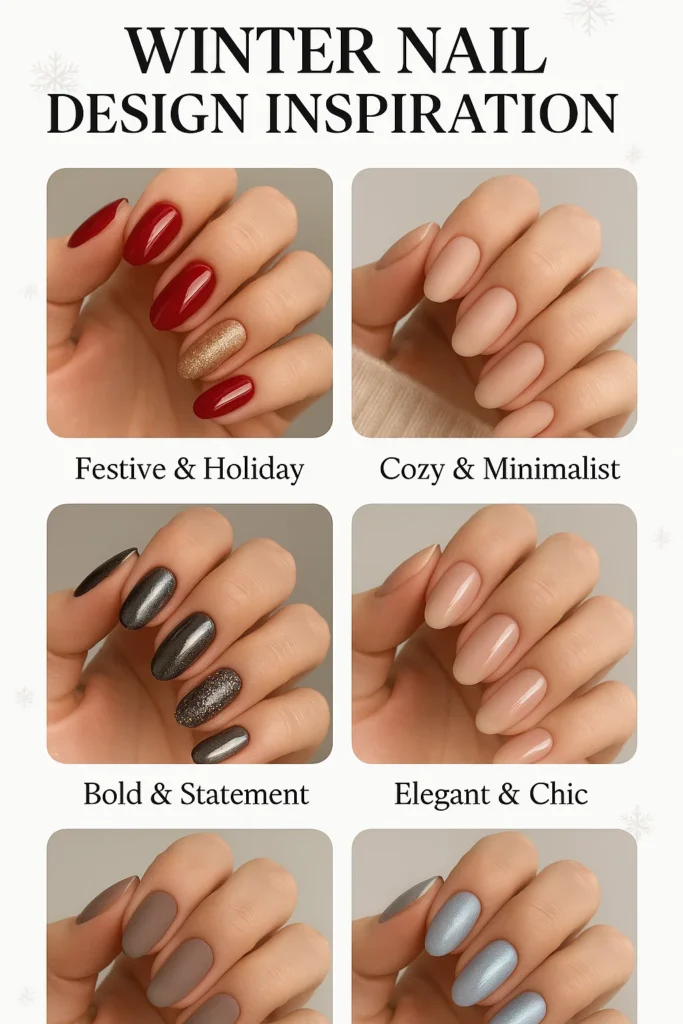
The gallery organizes designs into six distinct categories:
Festive & Holiday for seasonal celebrations, Cozy & Minimalist for everyday elegance, Bold & Statement for confident expression, Elegant & Chic for formal occasions, Everyday Wearable for professional settings, and Icy Blue & Frosty to highlight 2025’s standout color trend.
This structure helps you navigate directly to designs that match your immediate needs rather than scrolling through unrelated styles.
Festive & Holiday Winter Nails (12 Designs)
Holiday gatherings call for nails that reflect celebration.
These twelve designs range from classic reds and greens to modern metallic interpretations, giving you options whether you’re attending intimate family dinners or large New Year’s parties.
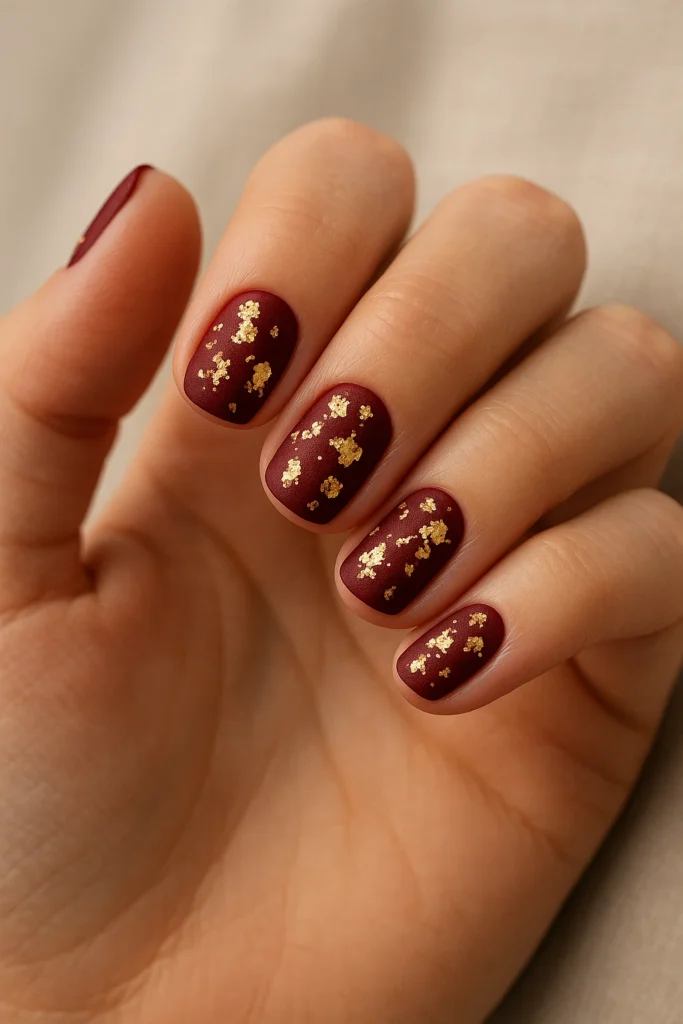
Red Velvet with Gold Foil: Deep crimson base meets irregular gold foil pieces for a luxurious effect.
The matte red polish (like Essie’s Bordeaux) creates depth, while random gold placement keeps the design organic. Difficulty: Beginner-Intermediate.
Apply gold foil over slightly tacky polish, then seal with top coat.
This design works beautifully on short to medium nails and lasts 7-10 days with proper top coat maintenance.
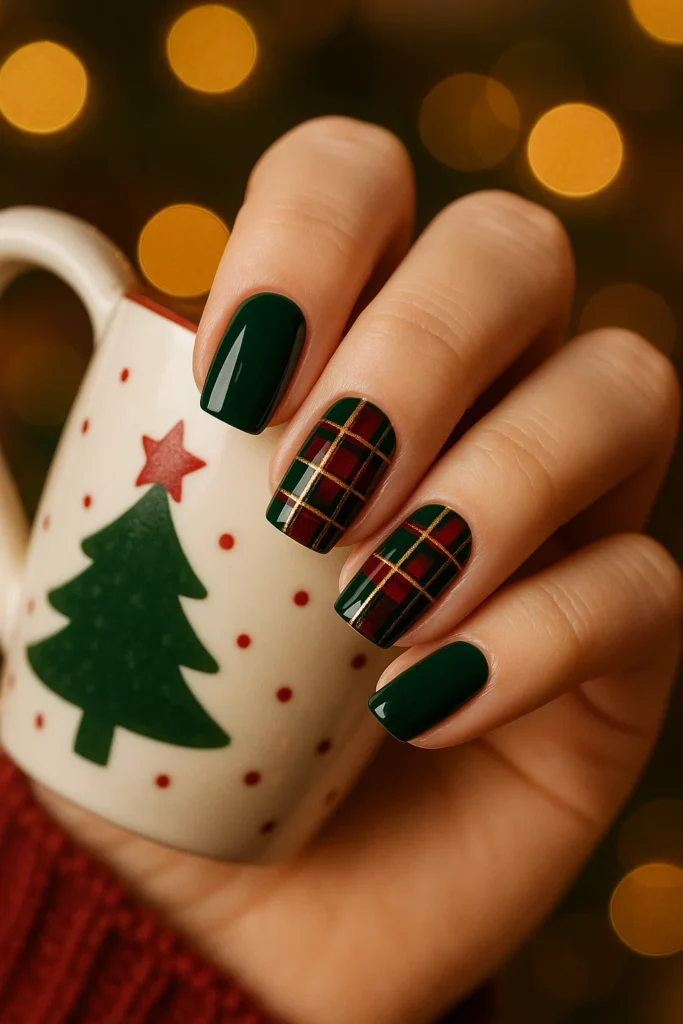
Green Plaid Accent: Classic holiday plaid appears on accent nails using deep forest green, burgundy, and gold striping.
The base nails feature solid forest green (OPI’s “Here Today…Aragon Tomorrow”).
Difficulty: Intermediate. Use striping brushes or thin tape to create intersecting lines.
Perfect for Christmas gatherings where you want festive without excessive glitter.
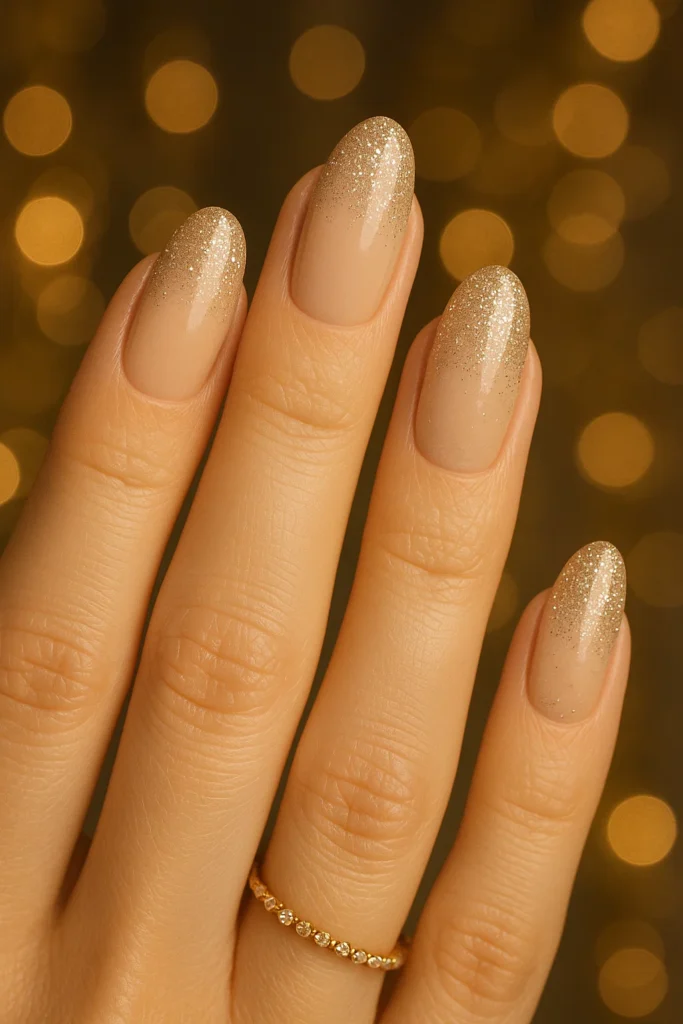
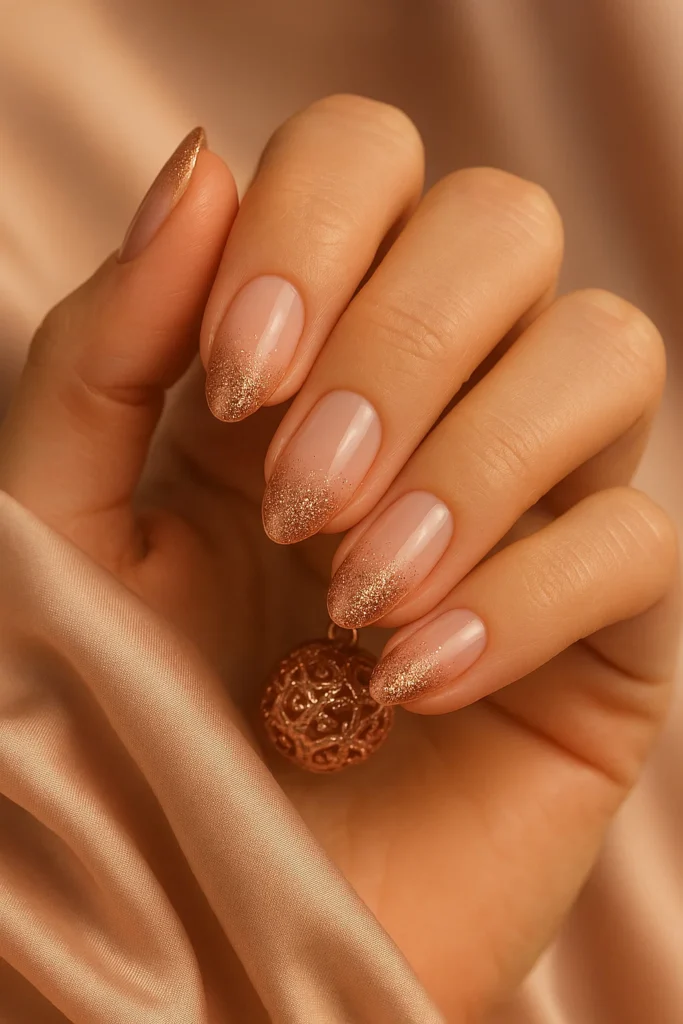
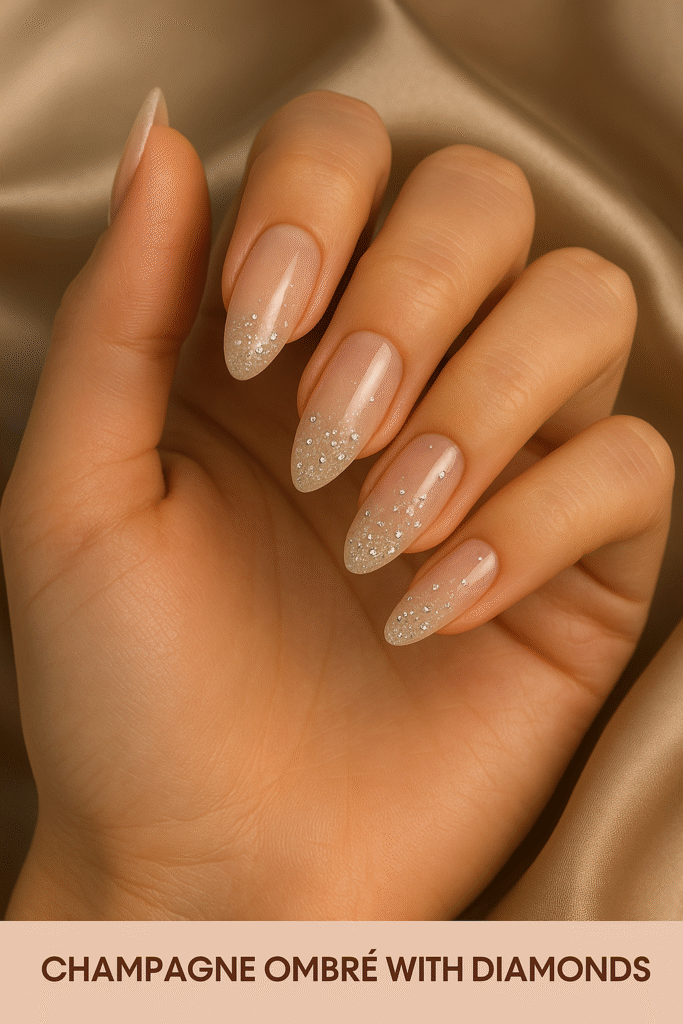
Champagne Glitter Ombré: Nude base transitions to champagne glitter at the tips, creating a sophisticated sparkle.
This design suits New Year’s Eve particularly well. Difficulty: Beginner.
Use a makeup sponge to dab glitter polish from tip toward cuticle, building intensity gradually.
Recommended products: OPI’s “Samoan Sand” base with China Glaze “Champagne Kisses” glitter.
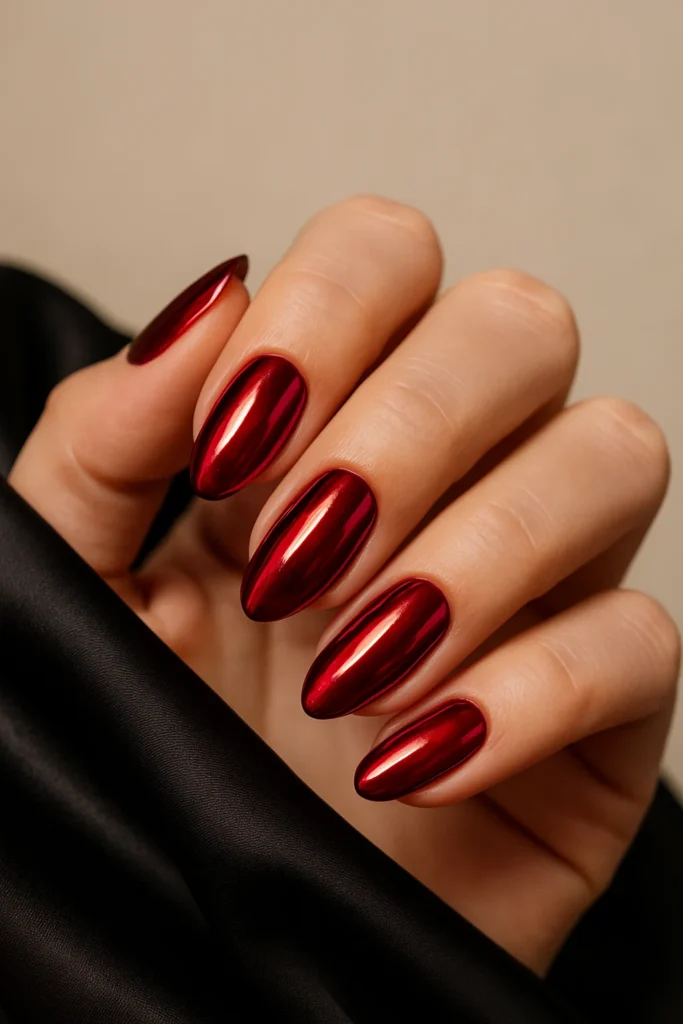
Ruby Red Chrome: High-shine chrome finish transforms classic red into something modern.
The mirror-like surface catches light dramatically. Difficulty: Intermediate.
Requires chrome powder application over red gel polish base.
Sally Hansen’s “Red My Lips” creates the base, while Born Pretty chrome powder (red/gold shift) adds dimension.
Lasts 10-14 days when properly sealed.
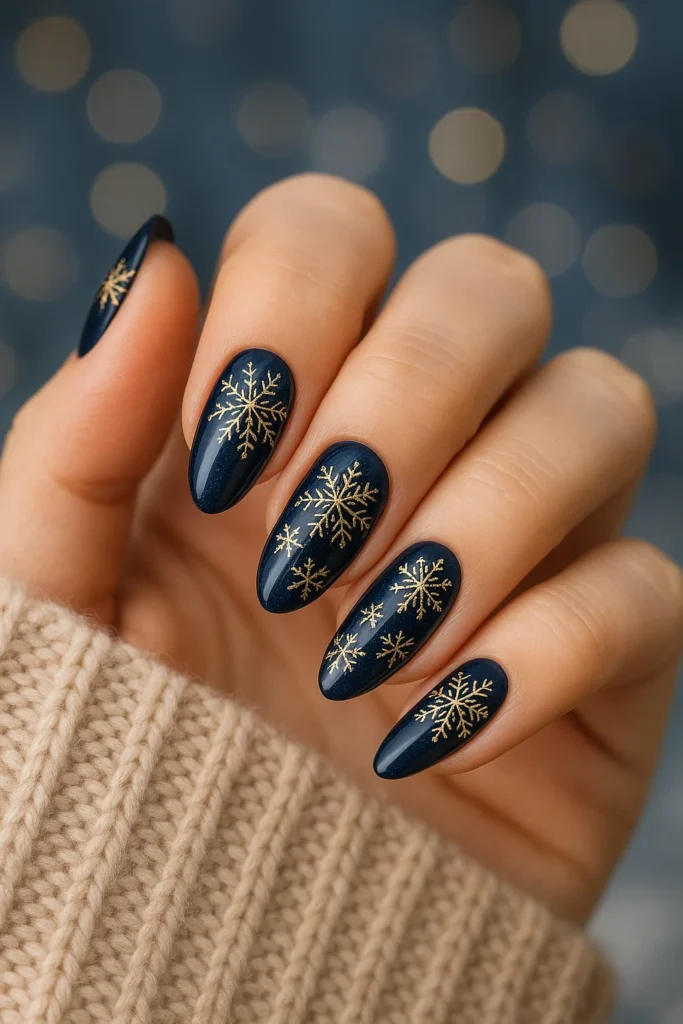
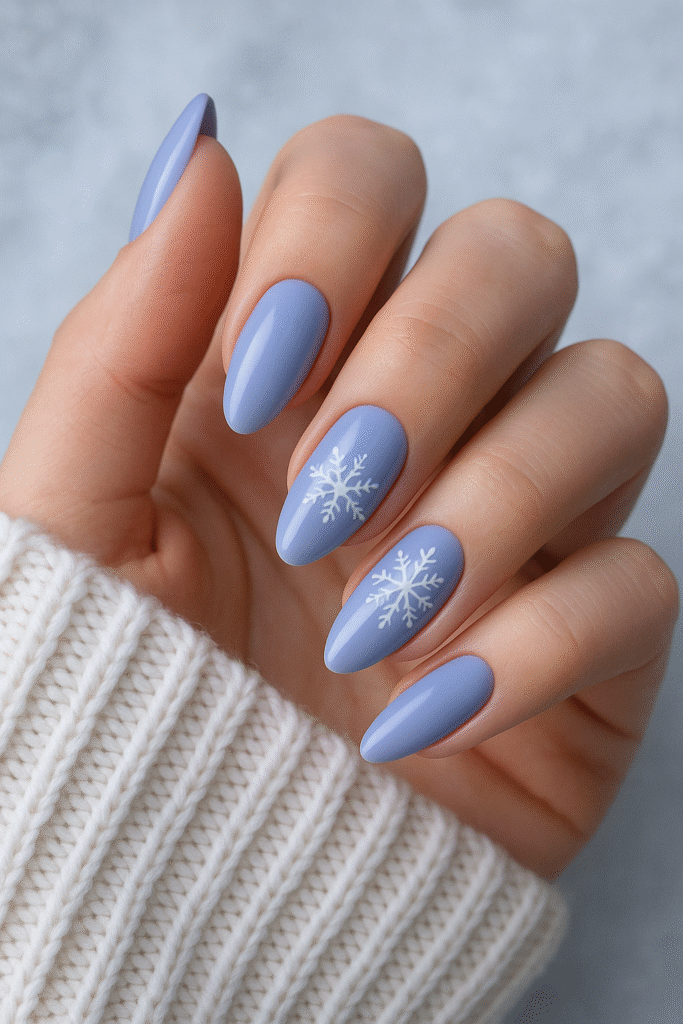
Gold Snowflakes on Navy: Midnight navy base (Essie’s “Midnight Cami”) provides contrast for delicate gold snowflake patterns.
Difficulty: Beginner with stickers, Advanced with hand-painting.
For beginners, apply snowflake nail stickers over navy base.
For advanced creators, use fine detail brush with gold metallic polish to paint custom snowflakes.
This design transitions beautifully from Thanksgiving through Valentine’s Day.
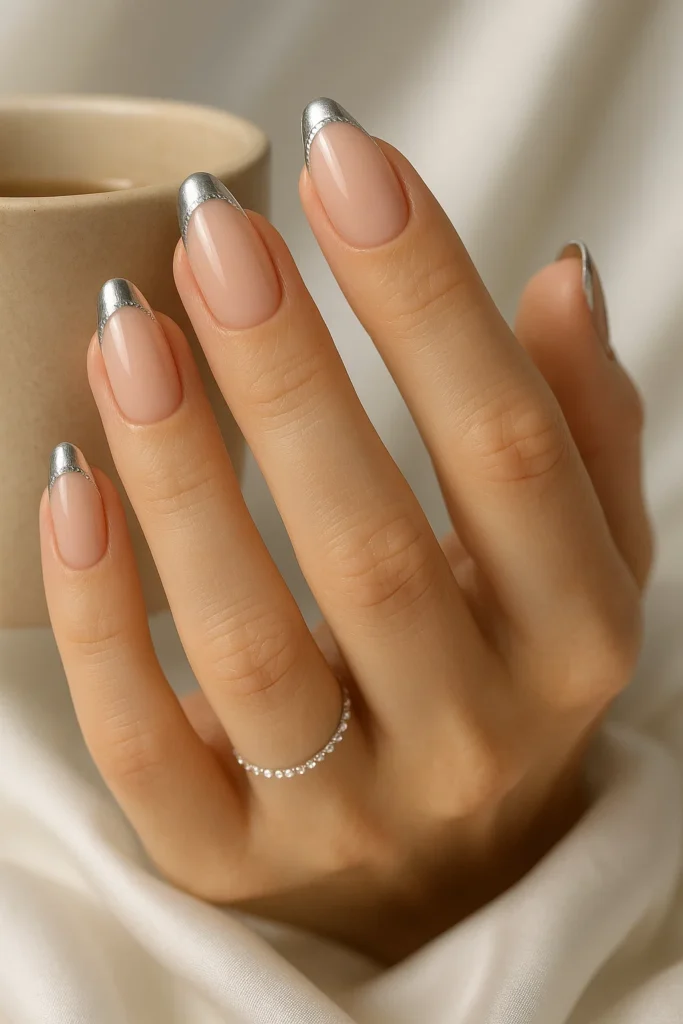
Silver French with Rhinestones: Classic French manicure gets winter elevation through silver metallic tips and tiny rhinestones along the smile line.
Difficulty: Intermediate. Use striping tape or guides for clean silver tips, then apply rhinestones with tweezers using top coat as adhesive.
This design photographs beautifully and suits formal holiday events.
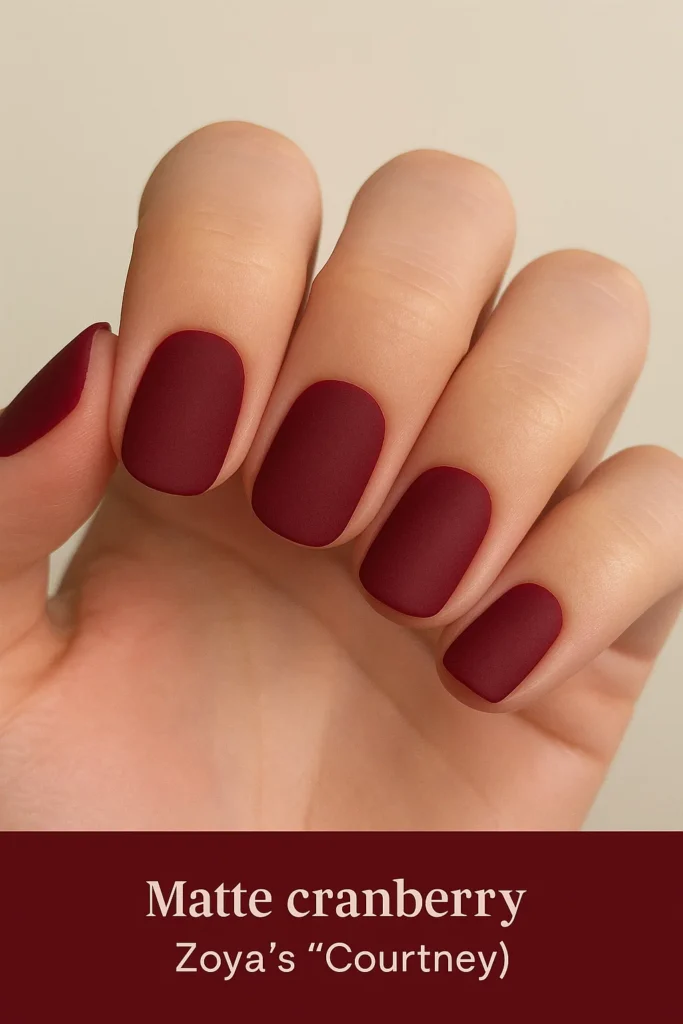
Cranberry Matte: Single-color matte cranberry nails deliver sophistication through simplicity.
The velvety finish feels seasonally appropriate without requiring intricate patterns.
Difficulty: Beginner. Apply two coats of cranberry polish (Zoya’s “Courtney”), then finish with matte top coat.
Add glossy top coat to one accent nail for contrast. Perfect for office holiday parties.
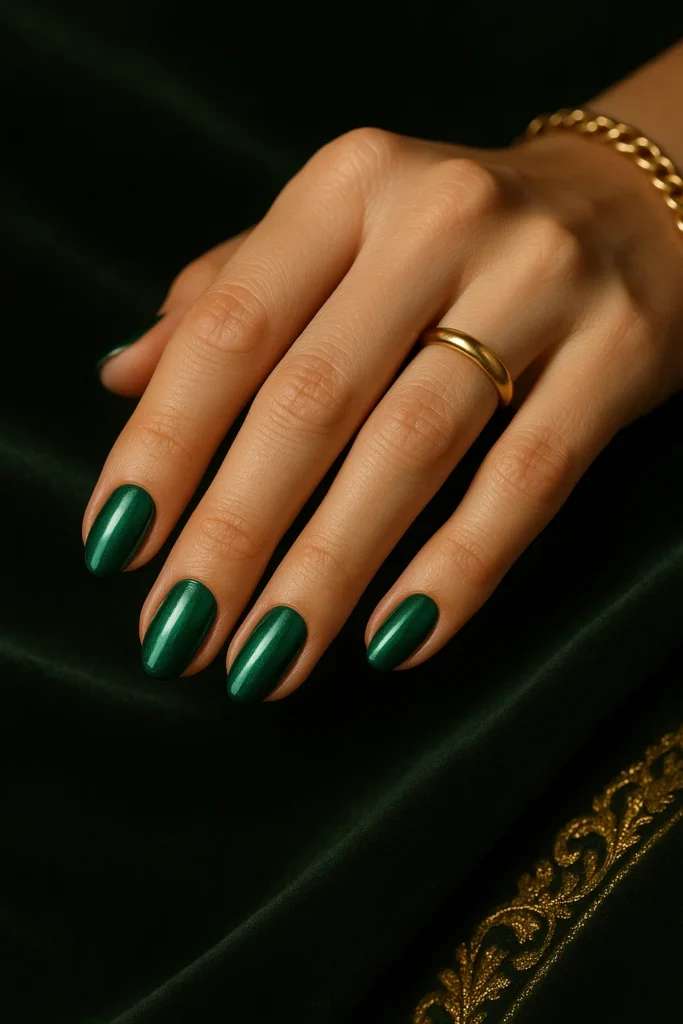
Emerald Green Metallic: Rich emerald with metallic sheen creates jewel-tone elegance.
This shade (like OPI’s “Stay Off the Lawn”) works particularly well on olive and deep skin tones.
Difficulty: Beginner. Two coats provide full opacity. The metallic particles within the polish eliminate the need for additional techniques.
Pair with gold jewelry for cohesive holiday styling.
Rose Gold Glitter Gradient: Warm rose gold glitter fades from tips on a soft pink base, creating romantic holiday sparkle.
Difficulty: Beginner. More forgiving than champagne tones on cool undertones.
Use OPI’s “Bubble Bath” base with Essie’s “Penny Talk” glitter. Application time: 40 minutes.
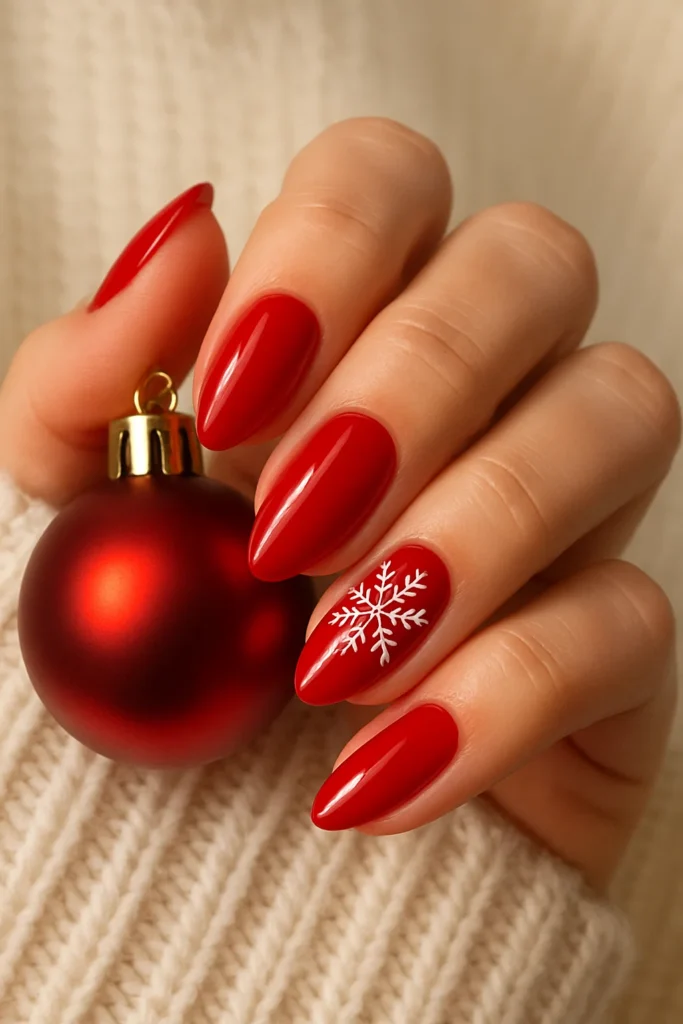
Classic Red with White Snowflakes: Timeless red (Essie’s “Really Red”) gains winter character through white snowflake decals.
Difficulty: Beginner. This design appeals to traditionalists who want seasonal touches without abandoning their favorite red.
Apply snowflakes to ring and thumb nails only for balanced design. Lasts 7-9 days.
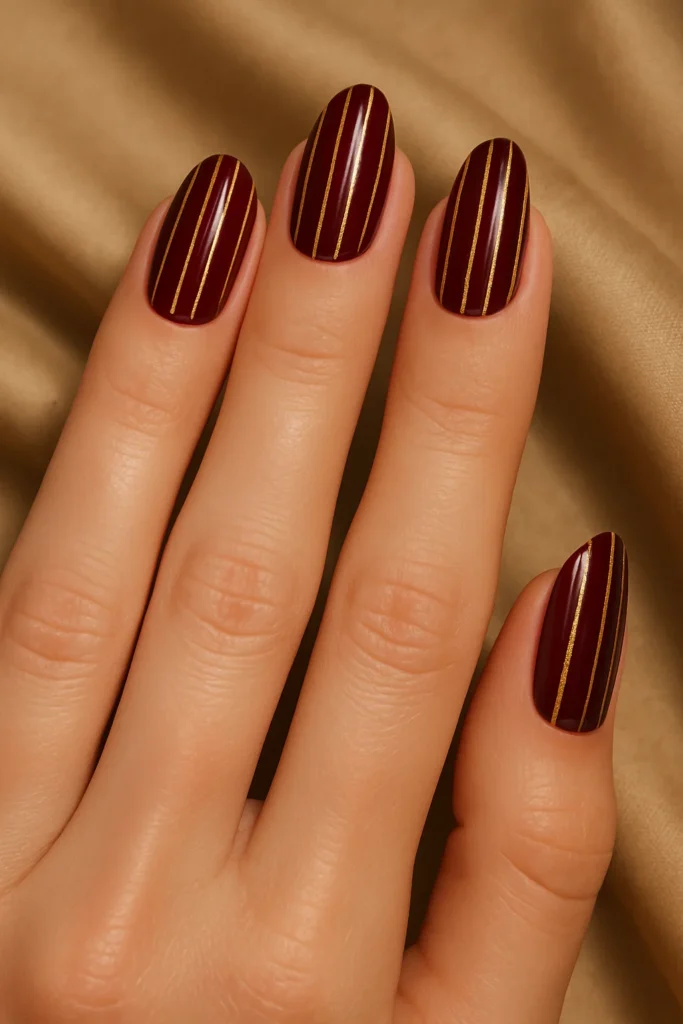
Burgundy with Gold Stripes: Deep burgundy base features thin vertical gold stripes for modern sophistication.
Difficulty: Intermediate. Use striping brush or thin nail tape to create evenly-spaced lines.
The vertical orientation elongates fingers visually.
Recommended: Zoya’s “Toni” burgundy with Sally Hansen’s gold striping polish.
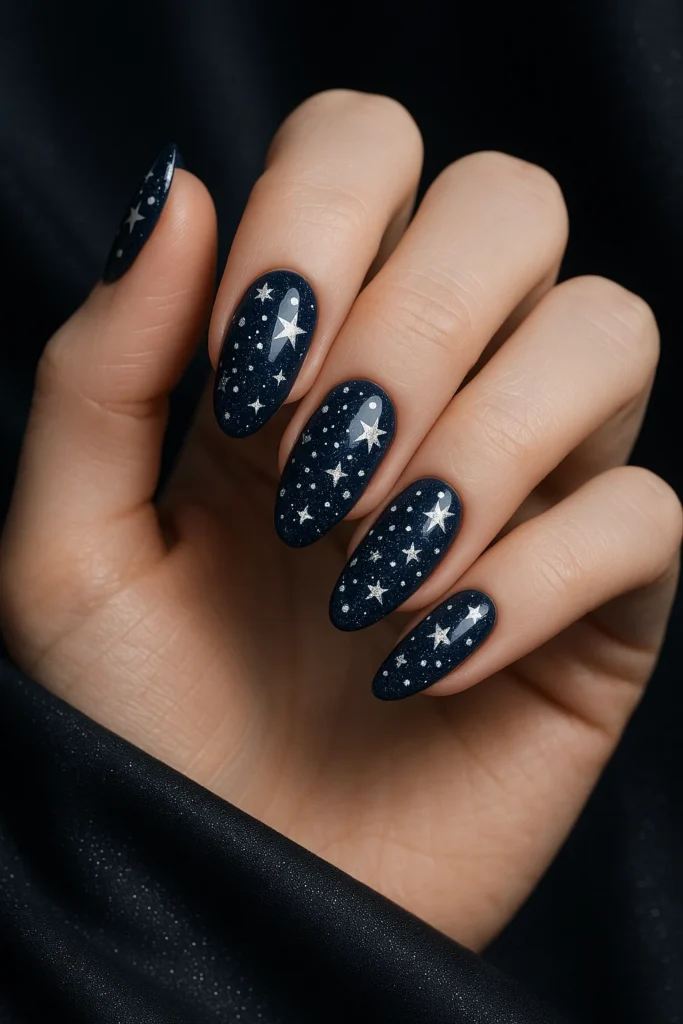
Midnight Blue with Silver Stars: Deep navy provides a night sky canvas for scattered silver star accents.
Difficulty: Intermediate. Hand-paint stars in varying sizes using dotting tools and detail brushes, or use star-shaped rhinestones for easier application.
This design references constellation patterns, making it conversation-starting for holiday gatherings.
Apply stars more densely on accent nails, sparsely on others for balance.
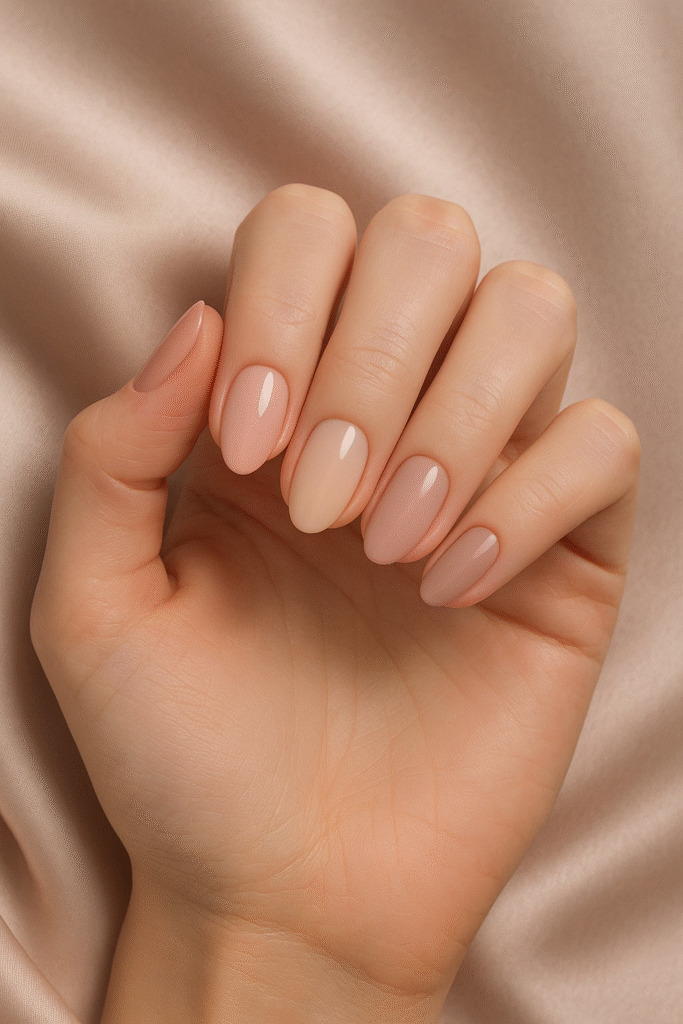
Cozy & Minimalist Winter Nails (10 Designs)
Minimalist designs answer the need for understated beauty that works in professional environments while still feeling seasonally relevant. These ten options prioritize wearability and low maintenance without sacrificing style.
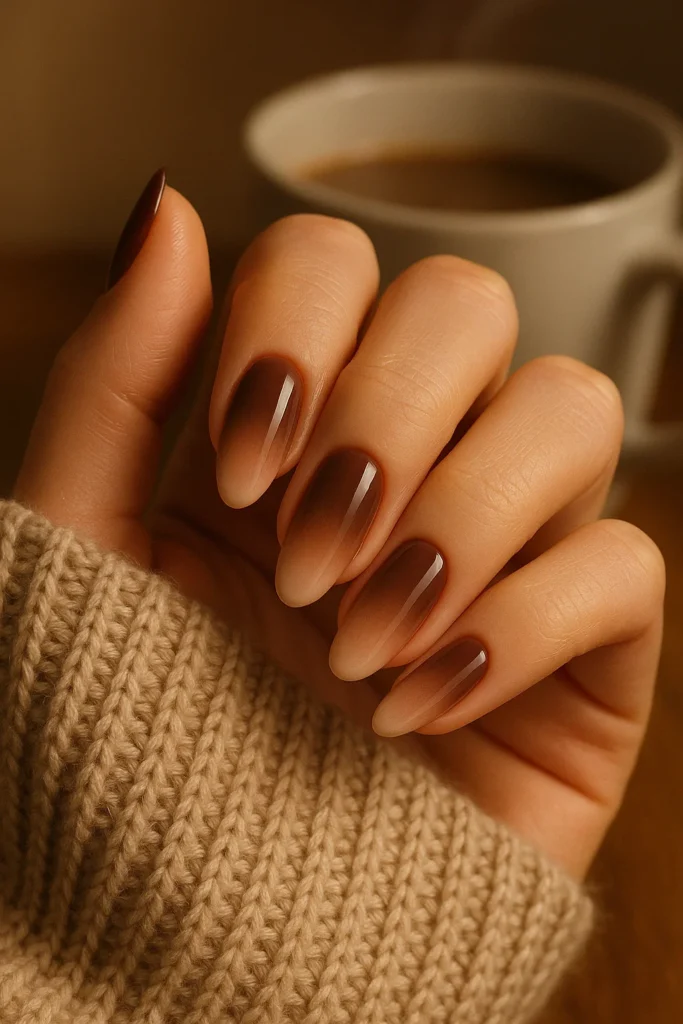
Mocha Latte Ombré: Warm brown gradient flows from deep mocha at the cuticle to creamy latte at tips.
This design mirrors your favorite winter beverage.
Difficulty: Beginner-Intermediate. Blend two shades (Essie’s “Sable Collar” and “Muchi Muchi”) using makeup sponge technique.
The brown family suits all skin tones and works in any professional setting. Application time: 50 minutes.
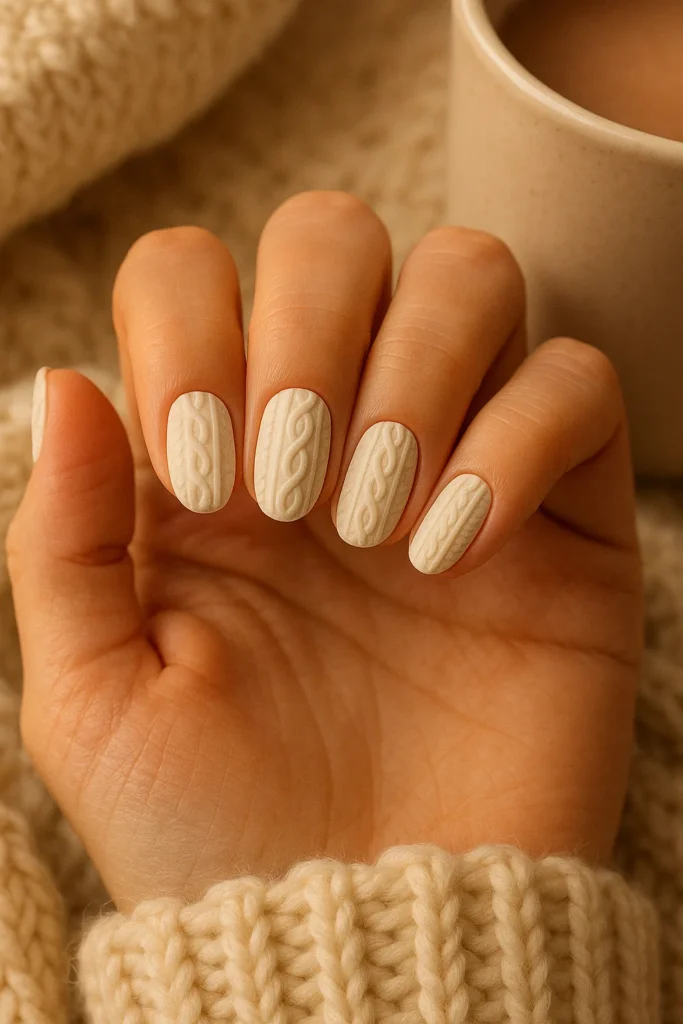
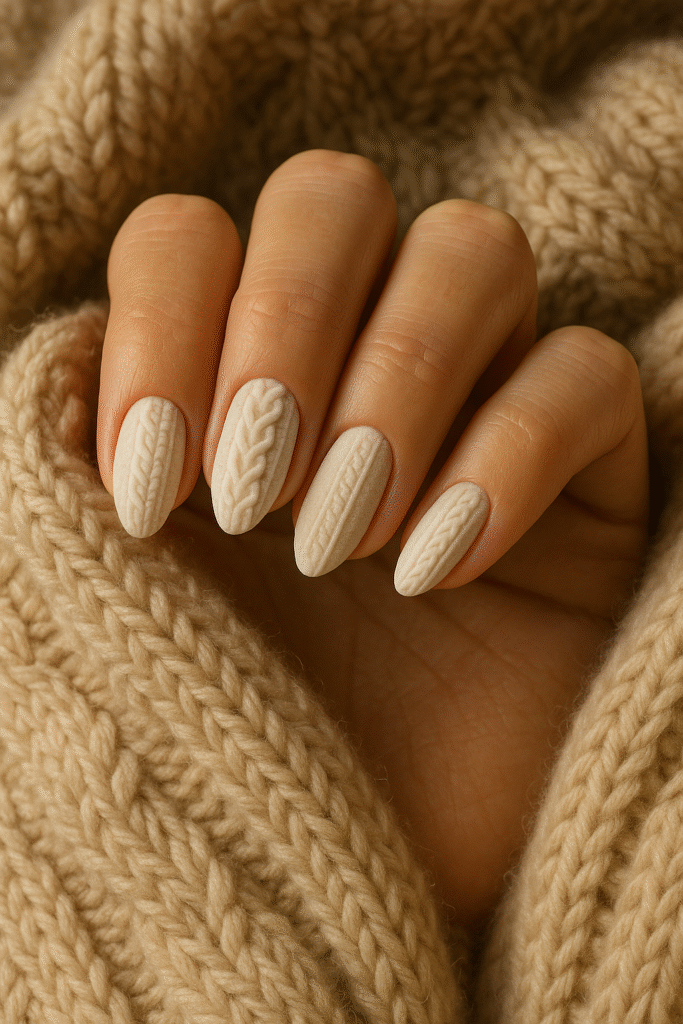
Cream Cable-Knit Texture: Raised cream-colored polish creates the illusion of knitted fabric on your nails.
This 3D effect captures cozy winter aesthetics.
Difficulty: Intermediate. Apply cream base (Sally Hansen’s “Créme de la Cream”), then use the same polish with a detail brush to draw interlocking cable patterns while polish is still workable.
Finish with matte top coat for authentic sweater appearance.
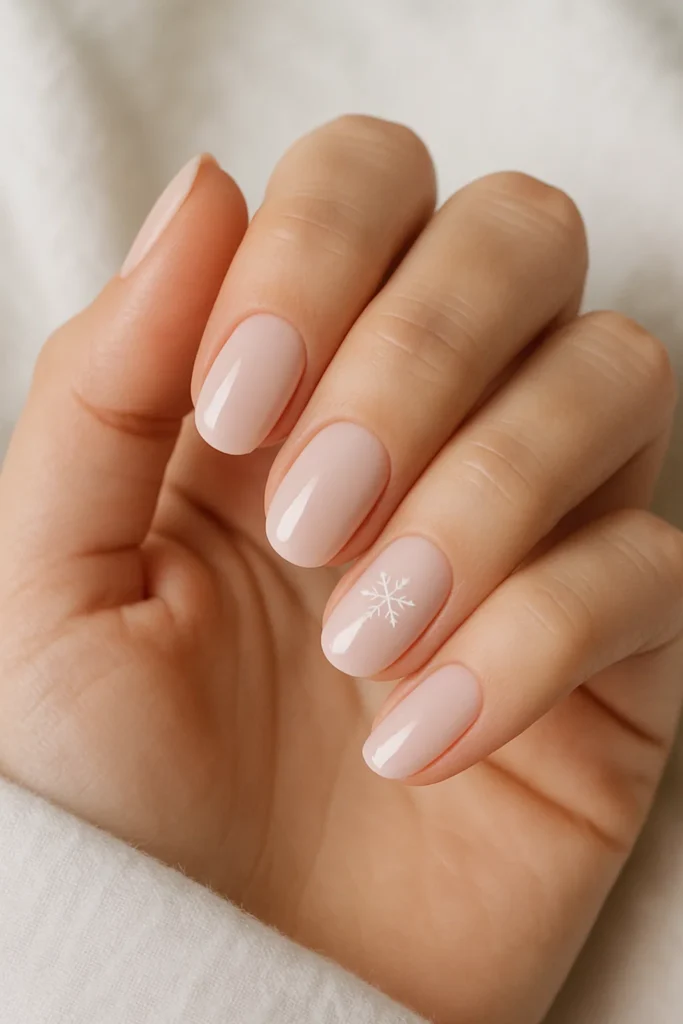
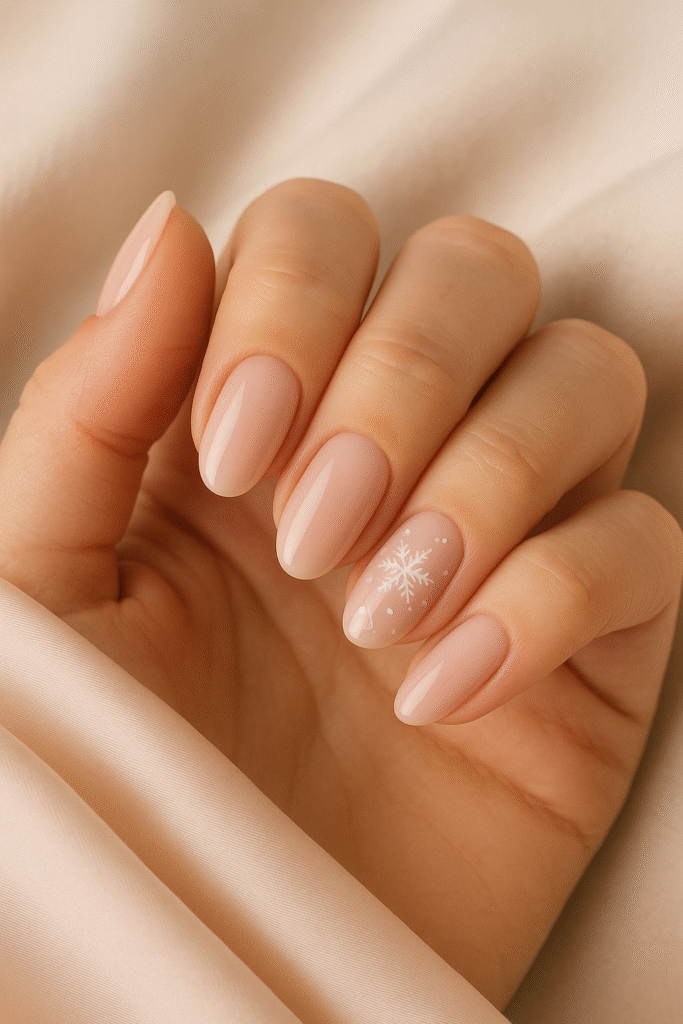
Soft Pink with Single Snowflake: Pale blush pink base features one delicate snowflake on the ring finger.
This design embodies “less is more” philosophy.
Difficulty: Beginner. Use Essie’s “Fiji” or OPI’s “Bubble Bath” as base. Apply single snowflake sticker or stamp.
Perfect for those who want winter acknowledgment without bold statements. Lasts 10-12 days.
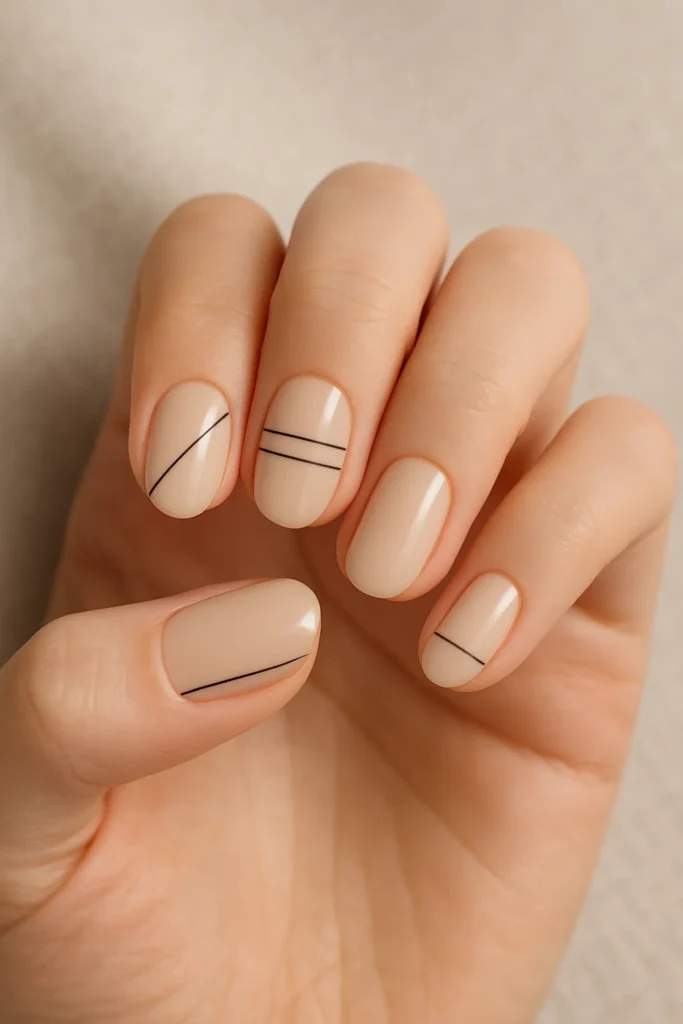
Beige Minimalist Lines: Nude beige base with thin black or brown lines creating simple geometric patterns.
Difficulty: Beginner-Intermediate. This design trends on Instagram among minimalist aesthetic followers.
Use striping brush to create single horizontal or diagonal lines across 2-3 nails.
The restraint makes it office-appropriate while maintaining visual interest.
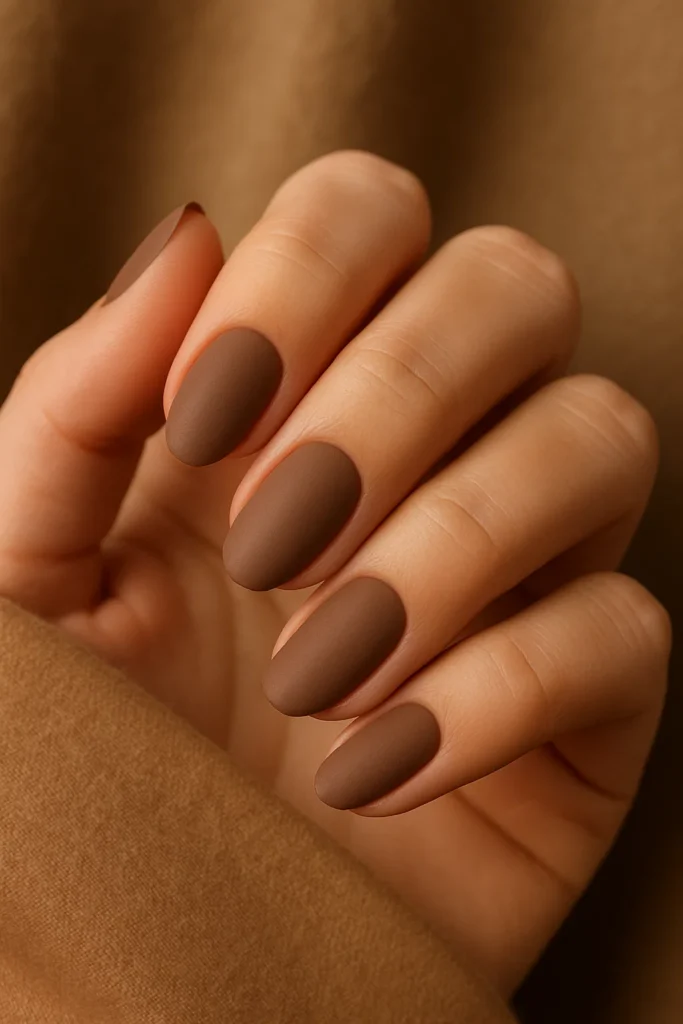
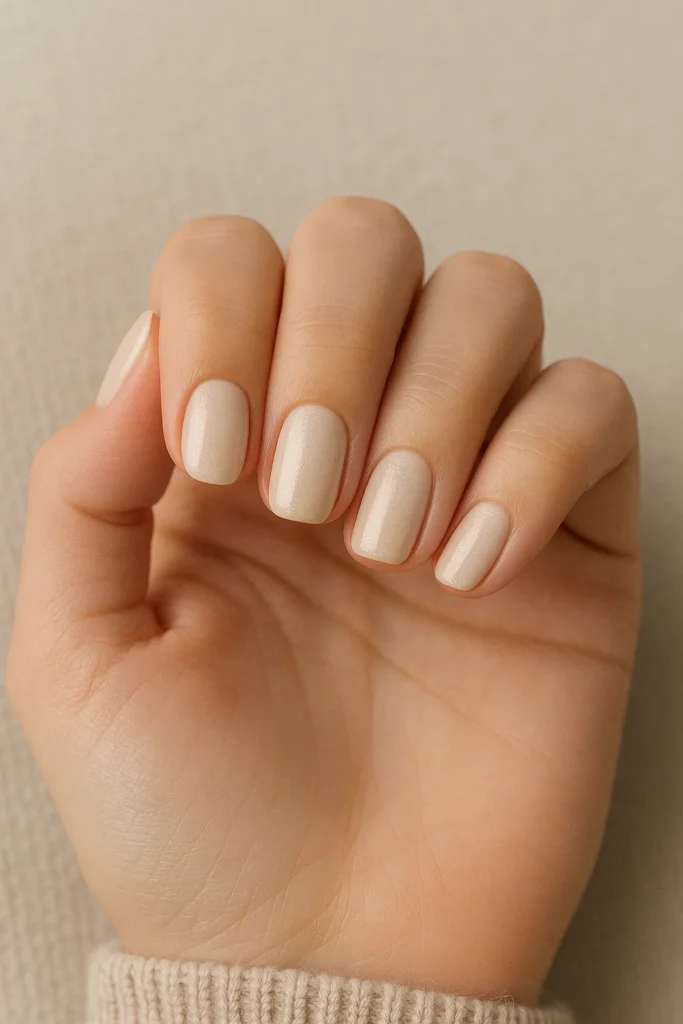
Latte Brown Matte: Single-shade matte brown in medium tone provides warmth and sophistication.
Difficulty: Beginner. OPI’s “Chocolate Moose” or Essie’s “Hot Coco” work beautifully. Two coats plus matte top coat complete the look in 30 minutes.
This shade complements camel coats and earth-tone winter wardrobes perfectly.
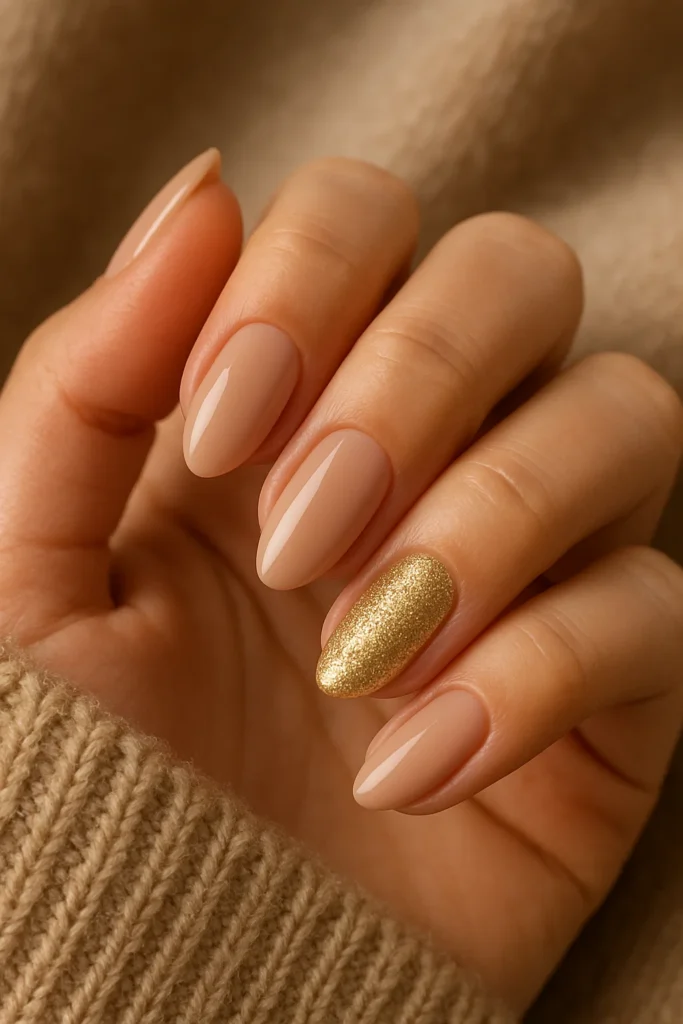
Warm Nude with Gold Accent: Neutral nude base features single gold accent nail (typically ring finger).
Difficulty: Beginner. Choose nude matching your skin undertone—peachy for warm, pink-toned for cool.
Sally Hansen’s “Natural” collection offers multiple nude options.
The gold accent (China Glaze’s “Golden Enchantment”) adds just enough sparkle for winter without reading as costume-like.
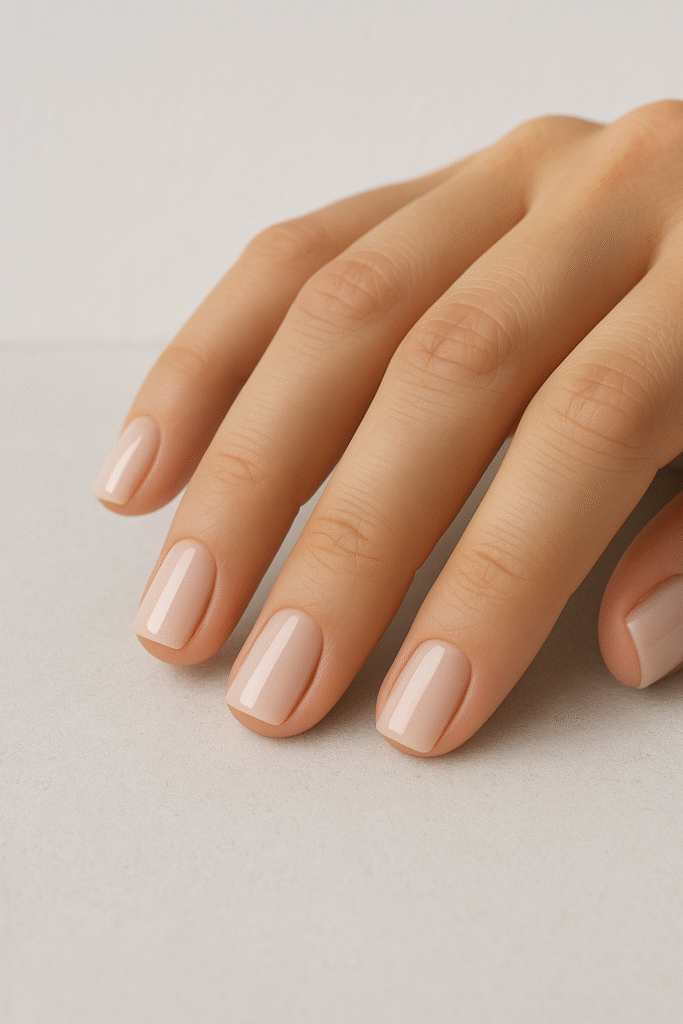
Oatmeal Squoval with Subtle Shimmer: Creamy oatmeal shade with fine shimmer particles catches light gently.
Difficulty: Beginner. This design works particularly well on shorter squoval nails—2025’s most popular shape. OPI’s “Tiramisu for Two” exemplifies this shade family.
The shimmer distinguishes it from flat nude while maintaining workplace appropriateness.
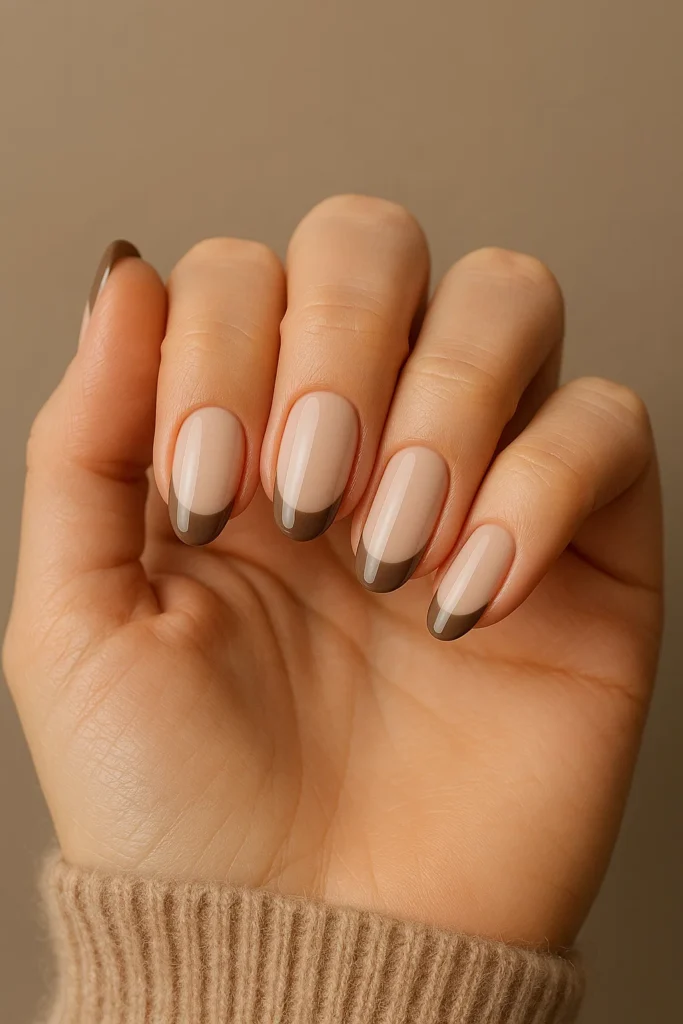
Cappuccino French Tips: Traditional French manicure reimagined with cappuccino brown tips instead of white.
Difficulty: Intermediate. This modern take feels fresh and seasonally relevant.
Use tape guides or freehand technique with brown polish (Essie’s “Smokin’ Hot”).
The neutral palette works across all skin tones and occasions.
Dusty Rose with White Dots: Muted mauve-pink base features tiny white dots in random or geometric patterns.
Difficulty: Beginner. Use dotting tool or toothpick to create uniform white dots.
This design reads as playful without being childish, making it suitable for adults who appreciate whimsy.
Zoya’s “Dot” creates perfect circles consistently.

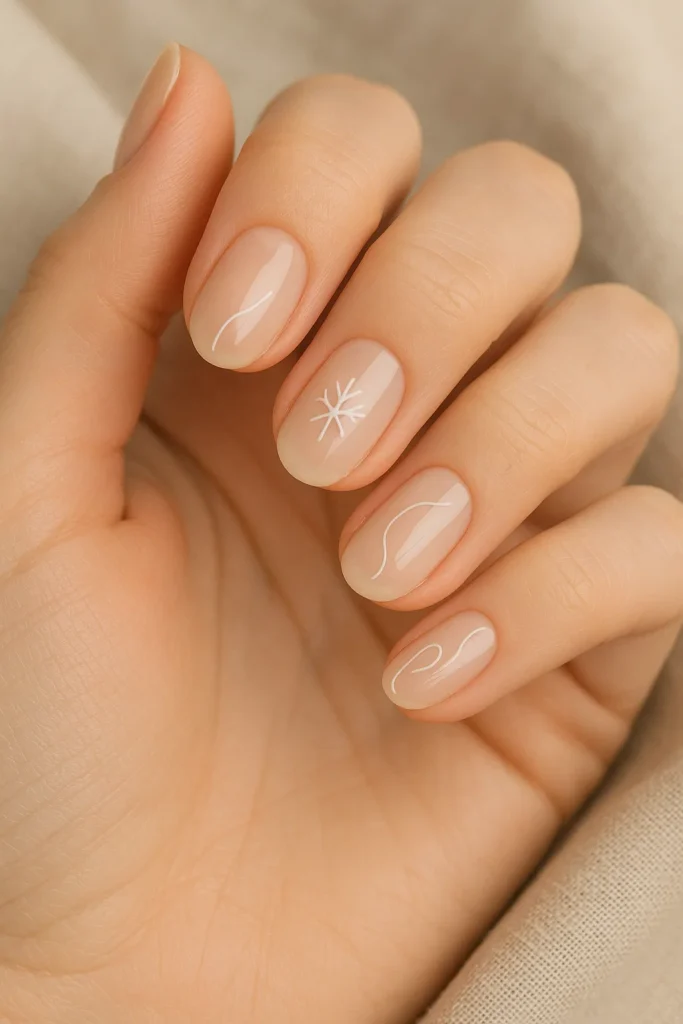
Minimal White Line Art: Clear or nude base with delicate white line drawings—branches, simple snowflakes, or abstract shapes.
Difficulty: Intermediate. This design requires steady hand but forgives imperfections since the aesthetic embraces organic irregularity.
Use white striping polish and fine detail brush. Each nail can feature different simple motif for variety. Application time: 45 minutes.
Bold & Statement Winter Nails (10 Designs)
Statement nails announce confidence. These ten designs incorporate dramatic colors, finishes, and techniques that create conversation-starting manicures perfect for those who view nails as wearable art.
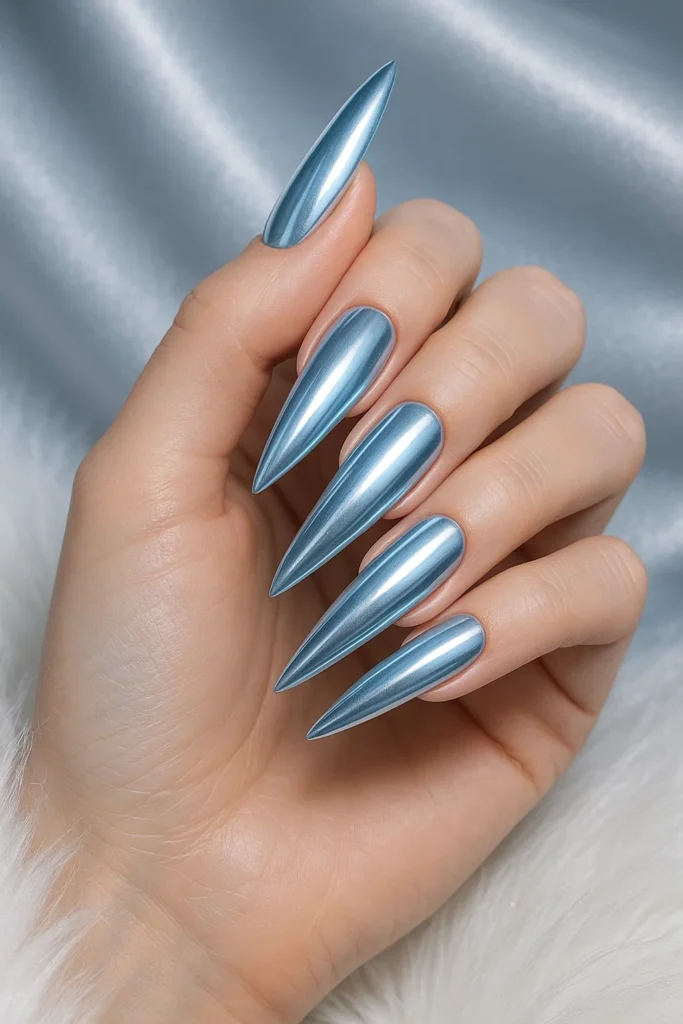
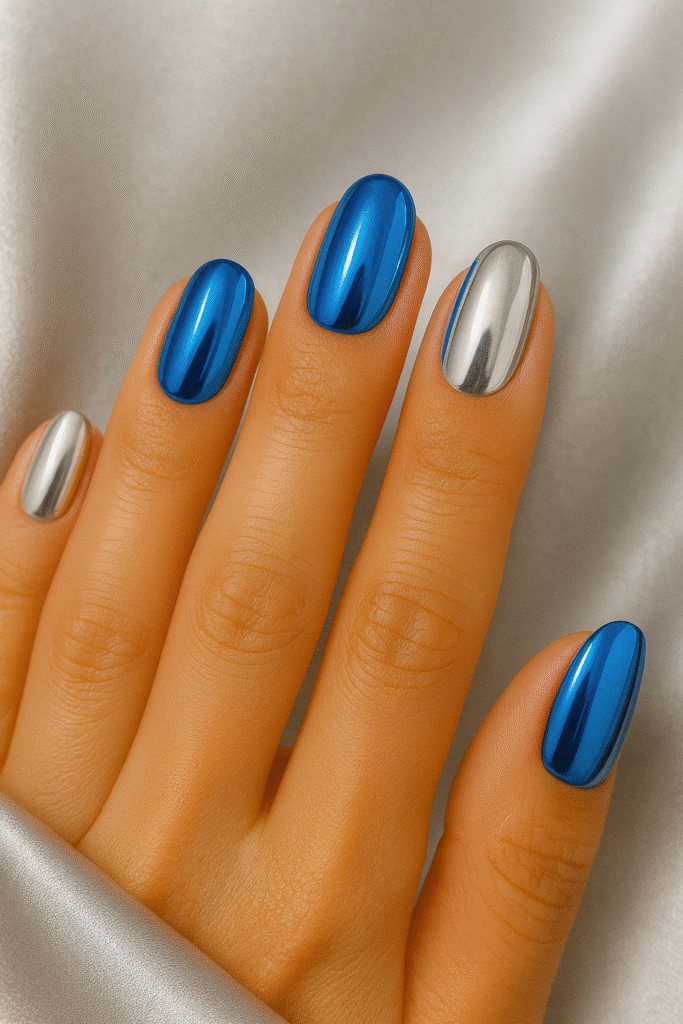
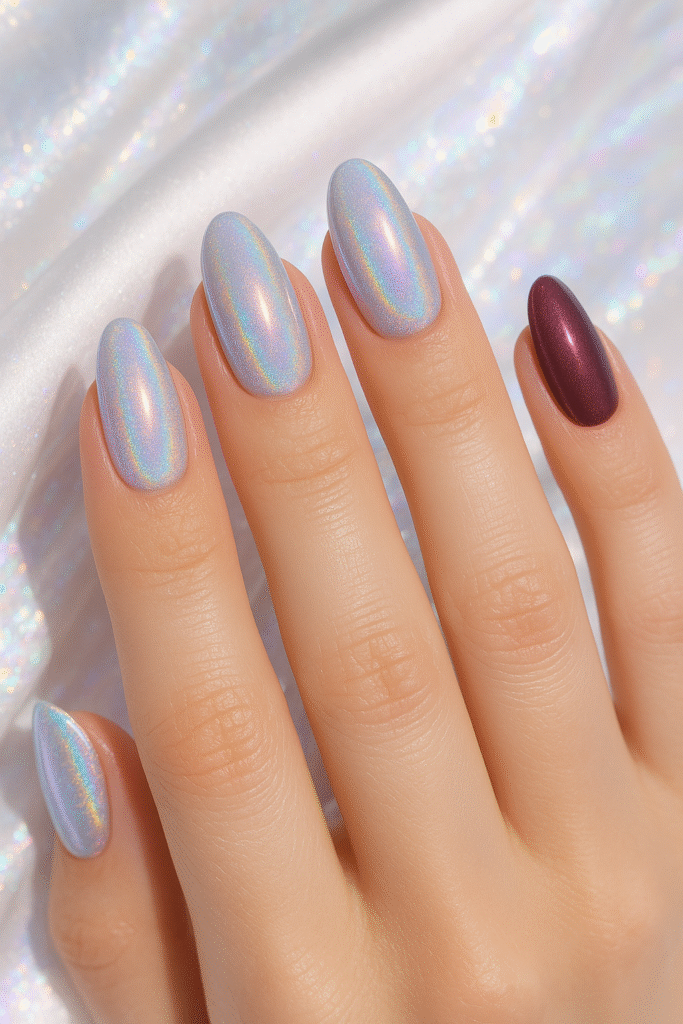
Icy Blue Chrome Stiletto: Pale blue chrome on long stiletto or almond nails creates ice queen drama.
The mirror finish reflects light dramatically. Difficulty: Advanced (shape) + Intermediate (finish).
Chrome powder over light blue gel base produces the effect.
This design suits special occasions and requires commitment to longer length (2.5cm/1 inch beyond fingertip).
Professional application recommended for shaping.
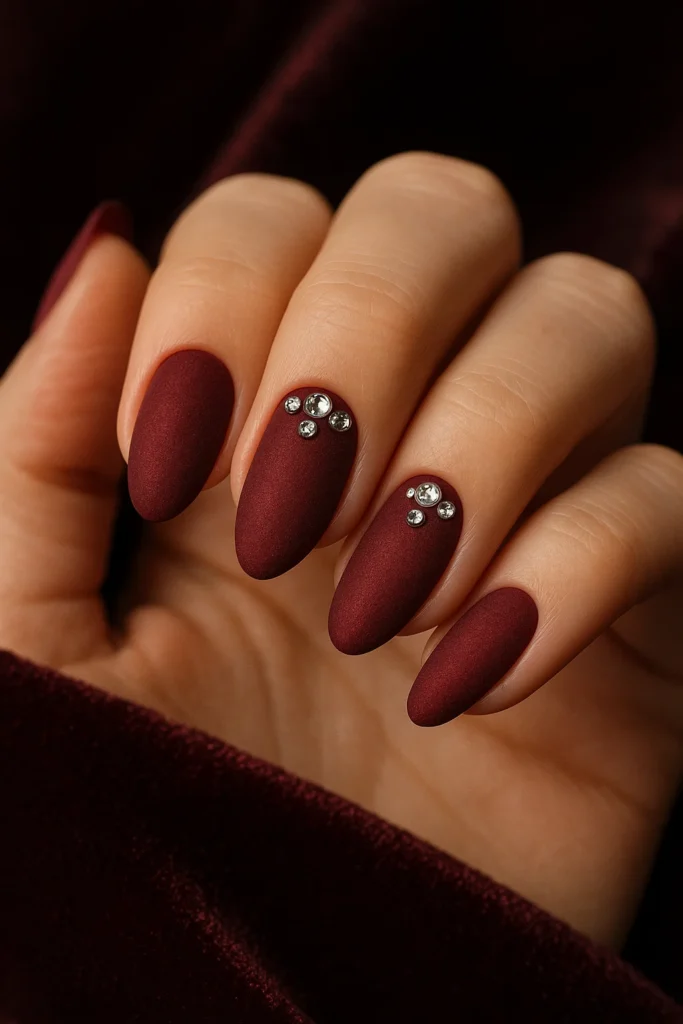
Deep Burgundy Velvet with Rhinestones: Rich wine-colored base with velvet finish features rhinestones clustered near cuticles.
Difficulty: Intermediate. The matte velvet texture (achieved through velvet powder or matte top coat) contrasts beautifully with glossy rhinestones.
OPI’s “Malaga Wine” provides the base color.
Place 3-5 small rhinestones on accent nails only to avoid overcrowding.
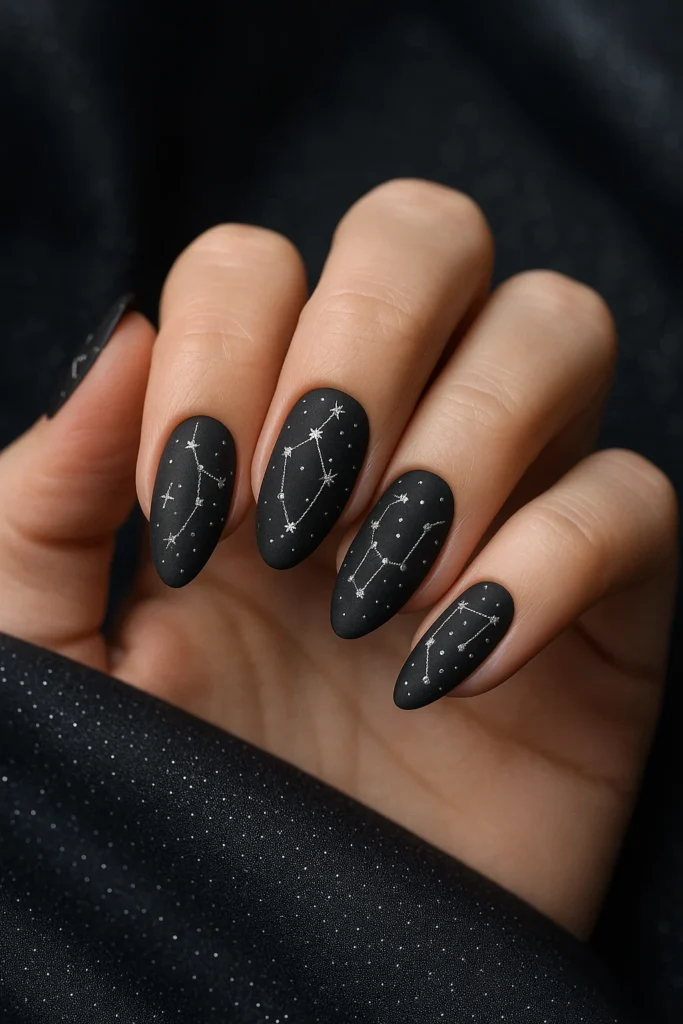
Black Matte with Silver Constellation: True black matte base features hand-painted silver constellation patterns.
Difficulty: Advanced. This design requires artistic skill and steady hand.
Paint recognizable constellations like Orion or Big Dipper using silver metallic polish and detail brush.
Star sizes vary for depth perception. The dramatic contrast reads as sophisticated, not gothic.
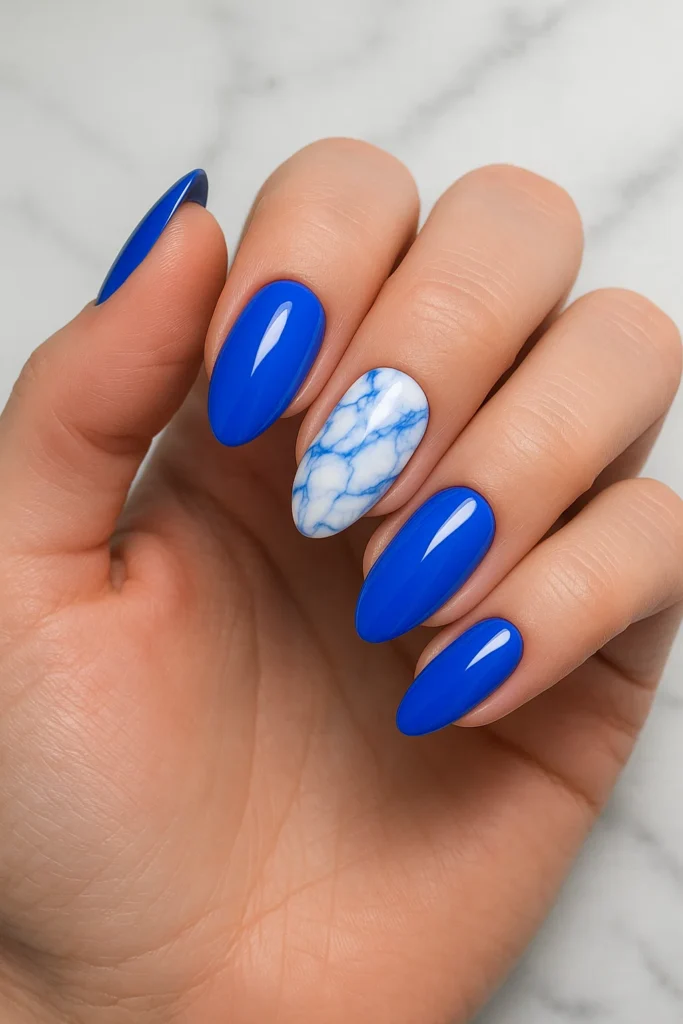
Cobalt Blue with White Marble: Vibrant cobalt base features white marble veining on accent nails.
Difficulty: Intermediate. Use water marbling technique or apply white polish in irregular strokes, then blur with small brush before drying.
Sally Hansen’s “Pacific Blue” creates the cobalt intensity needed.
This design pops on both fair and deep skin tones.
Purple Aurora Effect: Shifting purple-to-blue aurora borealis effect creates ethereal beauty.
Difficulty: Intermediate. Specialized aurora polishes (like ILNP’s “Birefringence”) or chrome powder over purple base produce this effect.
The color shift appears different in various lighting, making nails dynamic.
Best on medium to long nails where the effect has space to display.

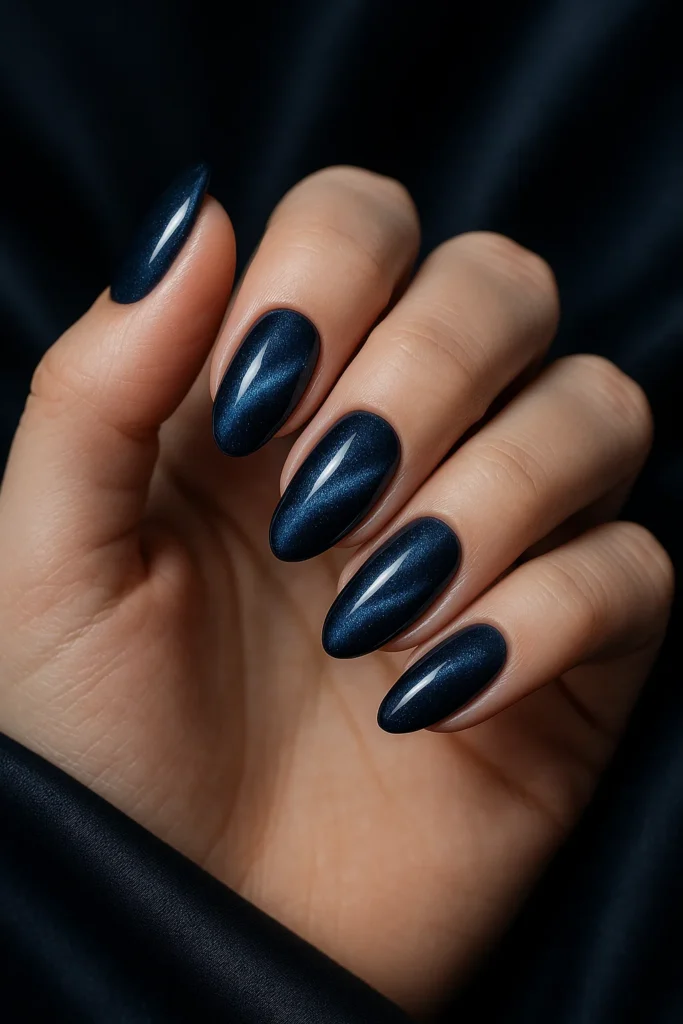
Magnetic Cat-Eye Navy: Deep navy polish with magnetic particles creates dimensional stripe effect.
Difficulty: Beginner-Intermediate. Cat-eye polishes (like Madam Glam’s collection) contain metallic particles that align when magnet is held over wet polish. The resulting stripe shifts as viewing angle changes.
Two coats with magnet application after each creates depth.
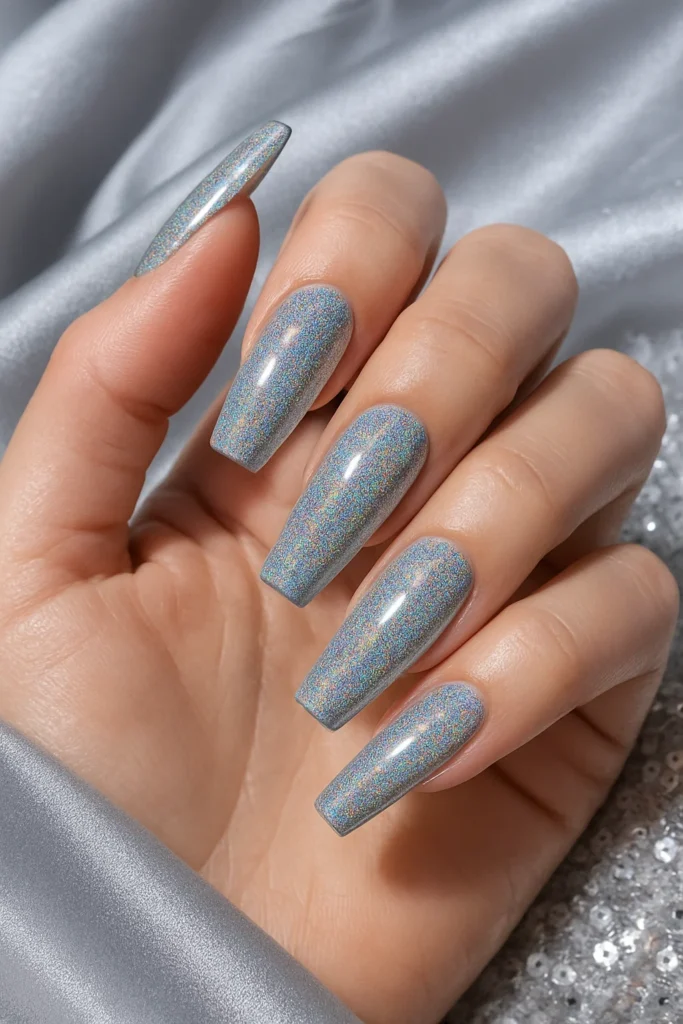
Holographic Silver Coffin Nails: Full holographic silver covers long coffin-shaped nails for maximum sparkle.
Difficulty: Intermediate. The shape requires maintenance, but the polish application is straightforward.
Holo polishes (ILNP’s “Mega” or Cirque Colors’ selections) contain microglitter that creates rainbow effect in direct light.
This design suits New Year’s Eve and winter parties.
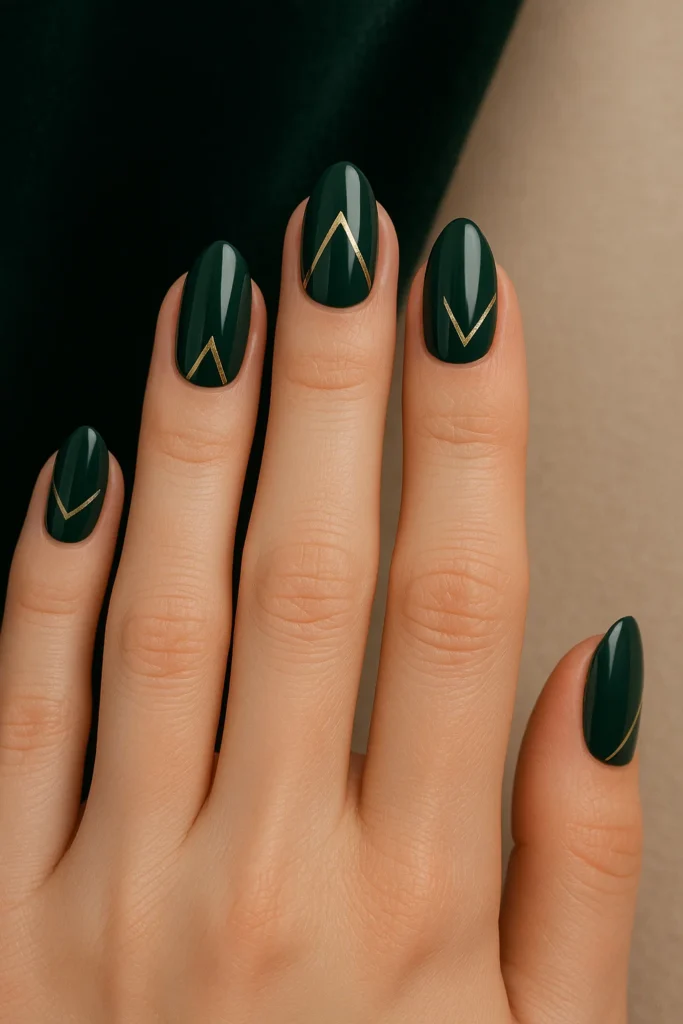
Dark Green with Gold Geometric: Forest green base features gold geometric patterns—triangles, chevrons, or abstract shapes.
Difficulty: Intermediate-Advanced. Use striping tape to create clean geometric sections, paint with gold, then remove tape.
Essie’s “Going Incognito” provides rich green base. The color combination feels seasonally festive without being Christmas-specific.
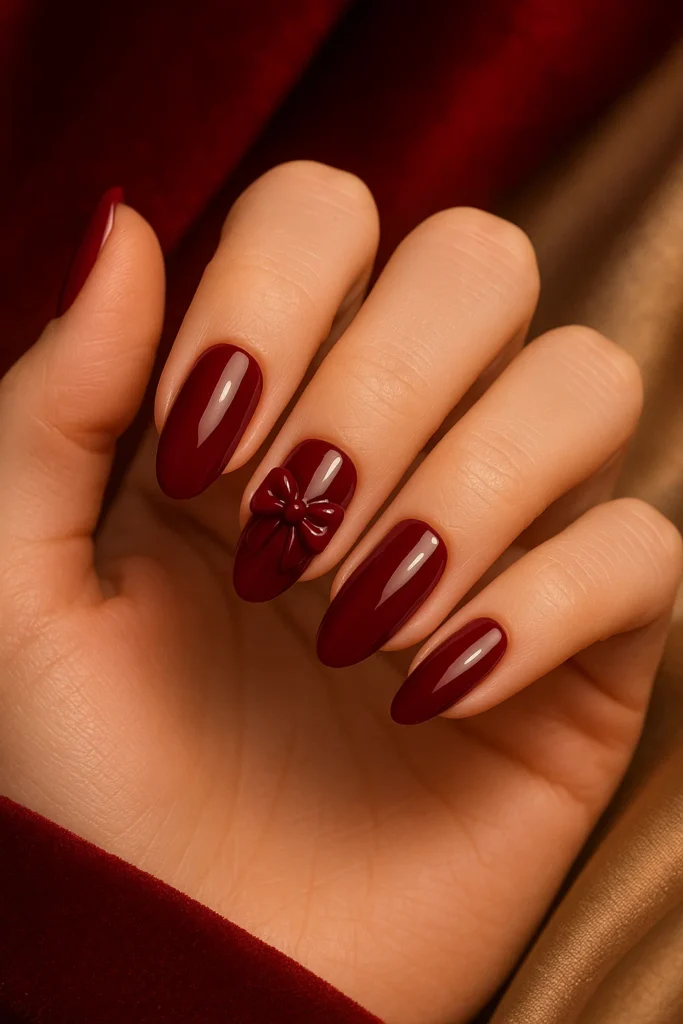
Wine Red with 3D Bows: Deep wine-colored base features sculpted acrylic or gel bows on accent nails.
Difficulty: Advanced. This design requires 3D nail art skills or pre-made bow embellishments.
The dimensional element creates texture and interest. Professional application recommended unless you have experience with sculpting.
The bows reference gift-wrapping for holiday connection.
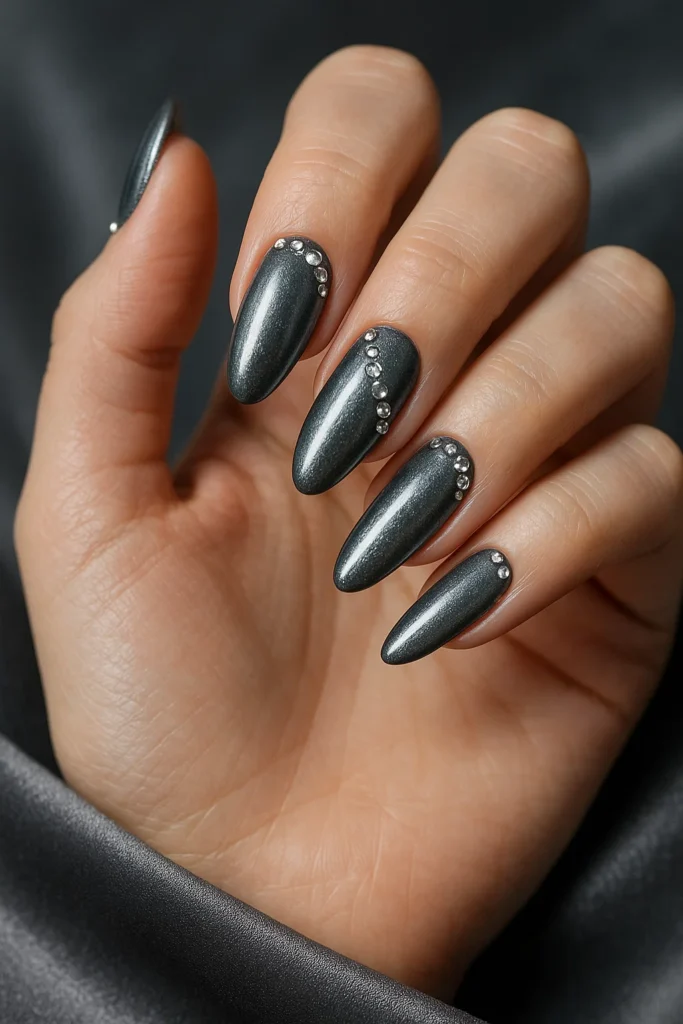
Metallic Pewter with Crystals: Gunmetal gray metallic polish serves as base for crystal rhinestone placement.
Difficulty: Intermediate. The cool-toned gray (like OPI’s “Lucerne-tainly Look Marvelous”) suits winter’s color palette.
Place crystals along cuticle edge or create diagonal pattern across nail. Use various crystal sizes for visual interest.
This design photographs beautifully and suits formal winter events.
Elegant & Chic Winter Nails (10 Designs)
Refined occasions demand manicures that complement formal attire without competing with it. These ten designs balance sophistication with personality, perfect for winter weddings, galas, and upscale events.
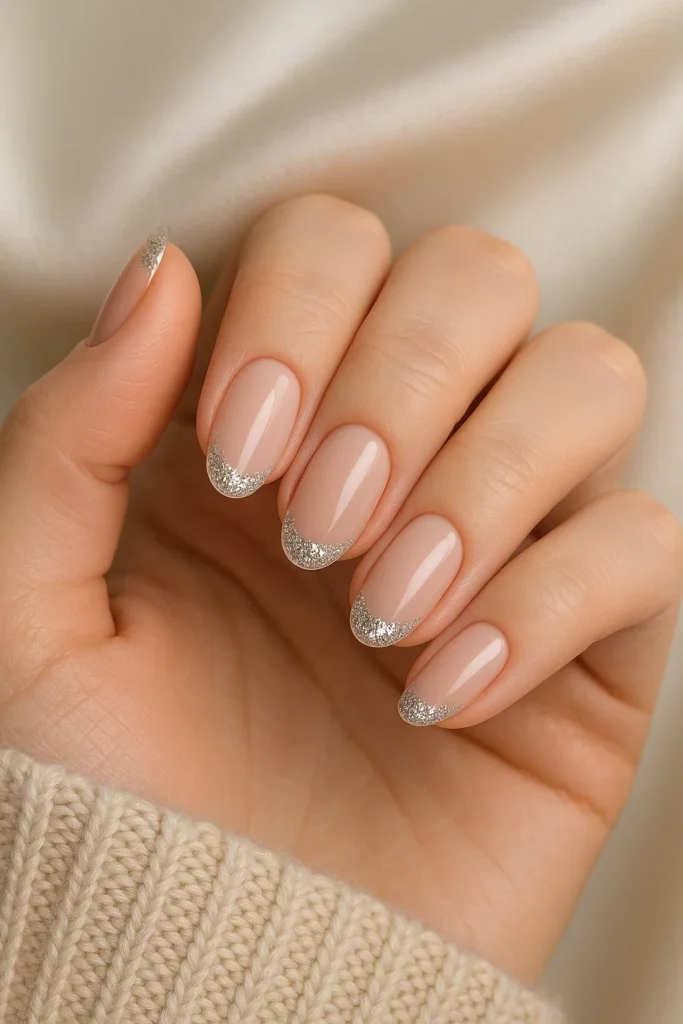
Classic French with Silver Glitter Tips: Traditional French manicure elevated through silver glitter at the free edge instead of solid white.
Difficulty: Intermediate. Create classic smile line, then apply silver glitter polish (Essie’s “Set in Stones”) to the tip area.
This design honors tradition while adding winter sparkle. Suits all nail lengths and shapes.
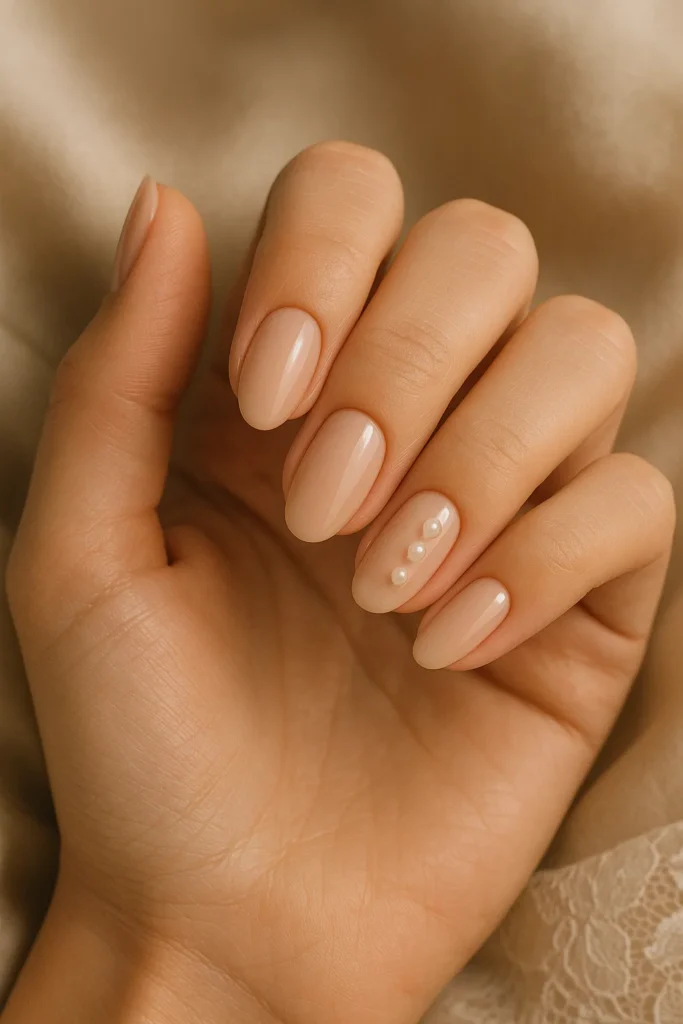
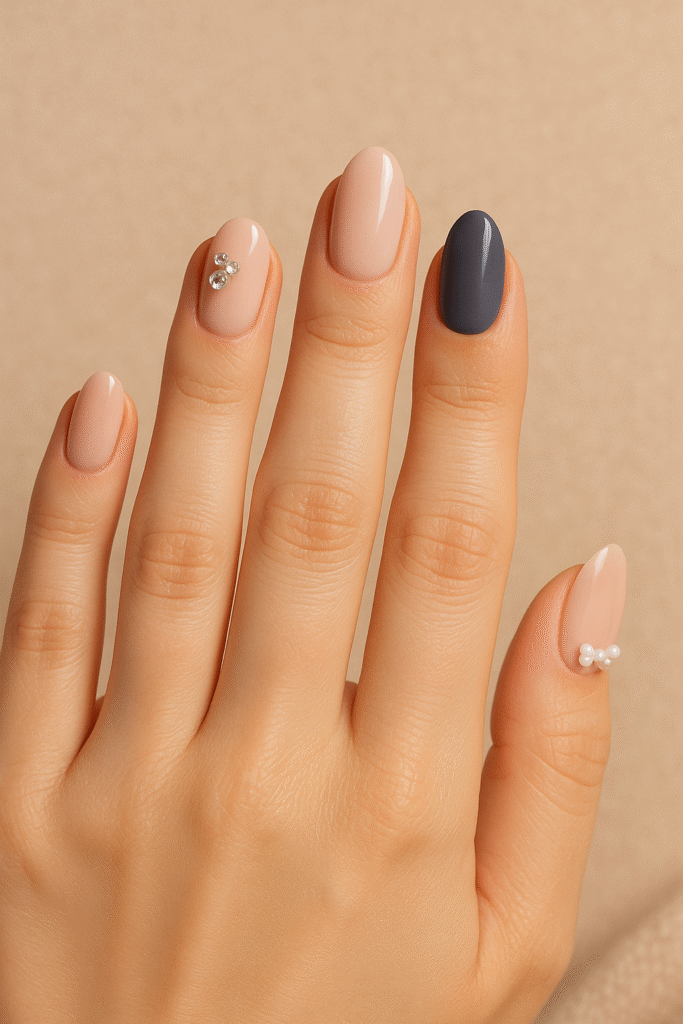
Nude with Pearl Accents: Neutral nude base features small pearl embellishments placed strategically.
Difficulty: Beginner-Intermediate. Choose nude matching your skin tone closely.
Apply 2-3 small pearl cabochons to each accent nail using top coat as adhesive.
The pearls add dimension without color, keeping the design suitable for any formal outfit. Lasts 7-10 days.
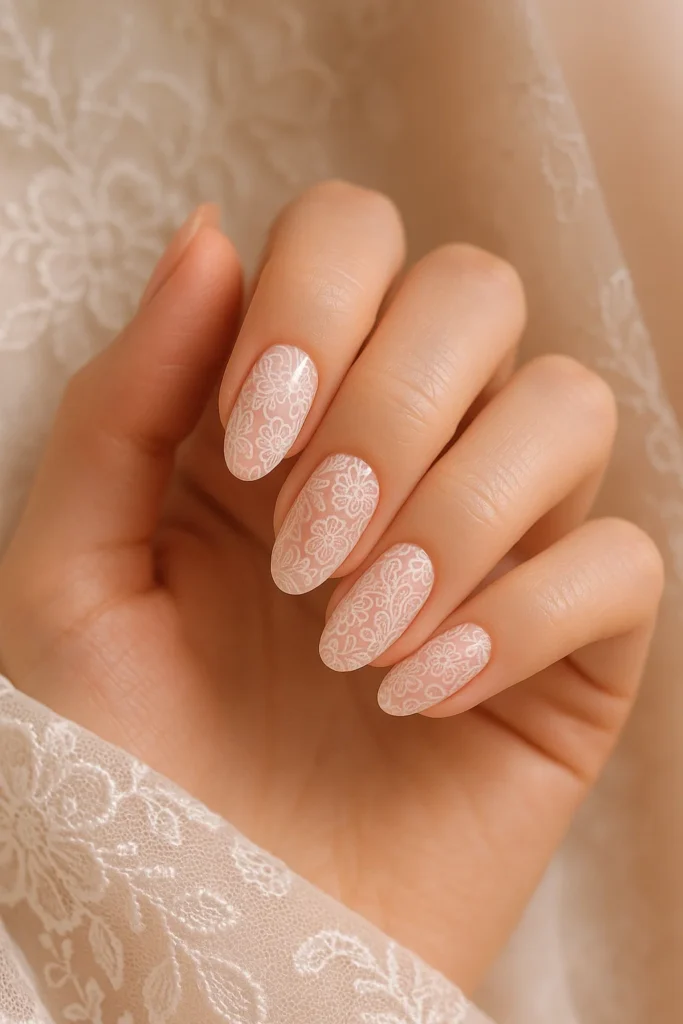
Blush Pink with White Lace Pattern: Soft ballet pink base features delicate white lace-inspired patterns.
Difficulty: Advanced or Beginner with stamps. Hand-painting lace requires skill, but lace stamping plates make this design accessible.
The romantic aesthetic suits winter weddings particularly well. OPI’s “Passion” provides the perfect pink base.
Application time with stamping: 40 minutes.
Champagne Chrome Almond: Warm champagne chrome on elegant almond-shaped nails creates timeless sophistication.
Difficulty: Intermediate. The shape flatters most hand types and elongates fingers visually.
Chrome powder over champagne/gold base gel creates the finish. Professional shaping recommended for optimal results.
This design suits both warm and cool skin undertones.

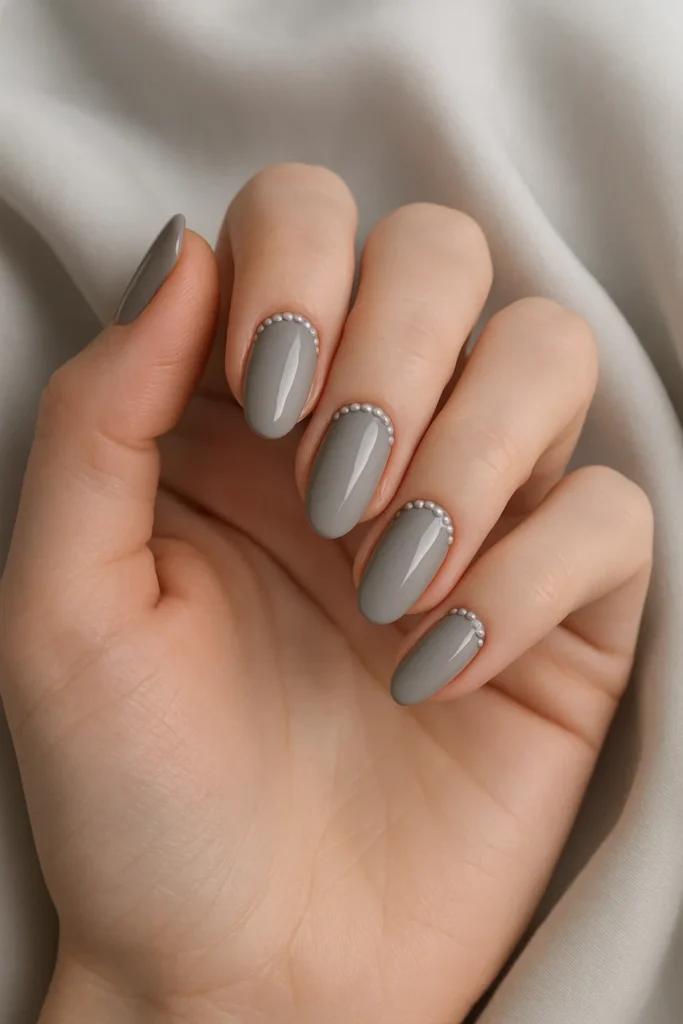
Soft Grey with Rhinestone Cuticle: Dove grey base features small rhinestones lined along the cuticle edge, creating a reverse French effect.
Difficulty: Intermediate. The grey (like Essie’s “Chinchilly”) provides neutral elegance.
Place rhinestones carefully with tweezers, sealing each with top coat.
This design works in professional and formal settings equally well.
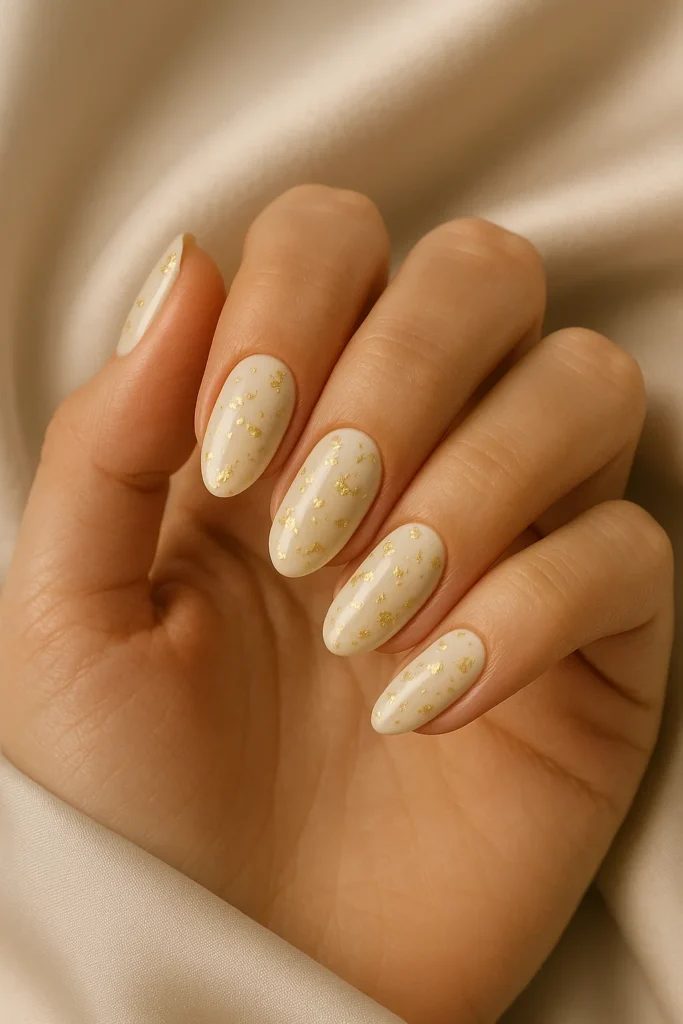
Ivory with Gold Foil Flakes: Creamy ivory base features random gold foil flakes creating organic shimmer.
Difficulty: Beginner-Intermediate. Apply gold foil pieces over slightly tacky clear or ivory polish, then seal.
The irregular placement feels artistic rather than crafted. Sally Hansen’s “Ivory Nail” creates the base. Perfect for winter white formal events.
Ballet Pink with Delicate Snowflakes: Classic ballet pink features tiny, precise snowflake details on accent nails.
Difficulty: Intermediate-Advanced. Use finest detail brush to paint miniature snowflakes with white polish.
The size and precision make this design read as delicate and refined rather than casual.
OPI’s “Bubble Bath” provides the perfect barely-there pink.
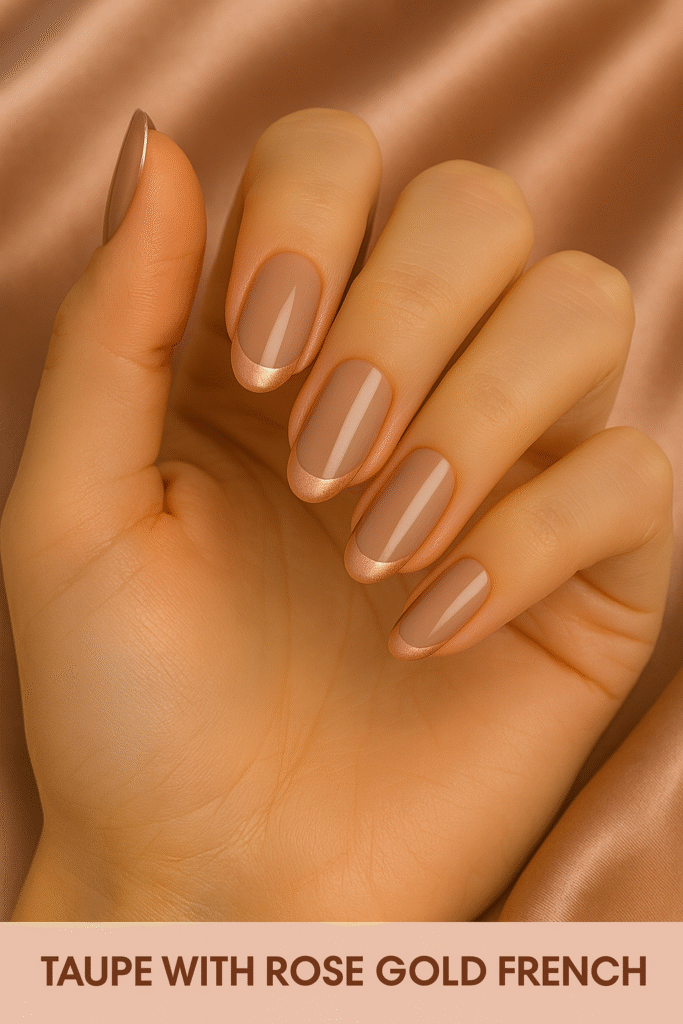
Taupe with Rose Gold French: Warm taupe base features rose gold French tips for modern sophistication.
Difficulty: Intermediate. The color combination suits warm undertones particularly well.
Use rose gold metallic polish (Essie’s “Penny Talk”) to create tip line.
This design bridges neutral and noticeable beautifully, working for office or evening events.
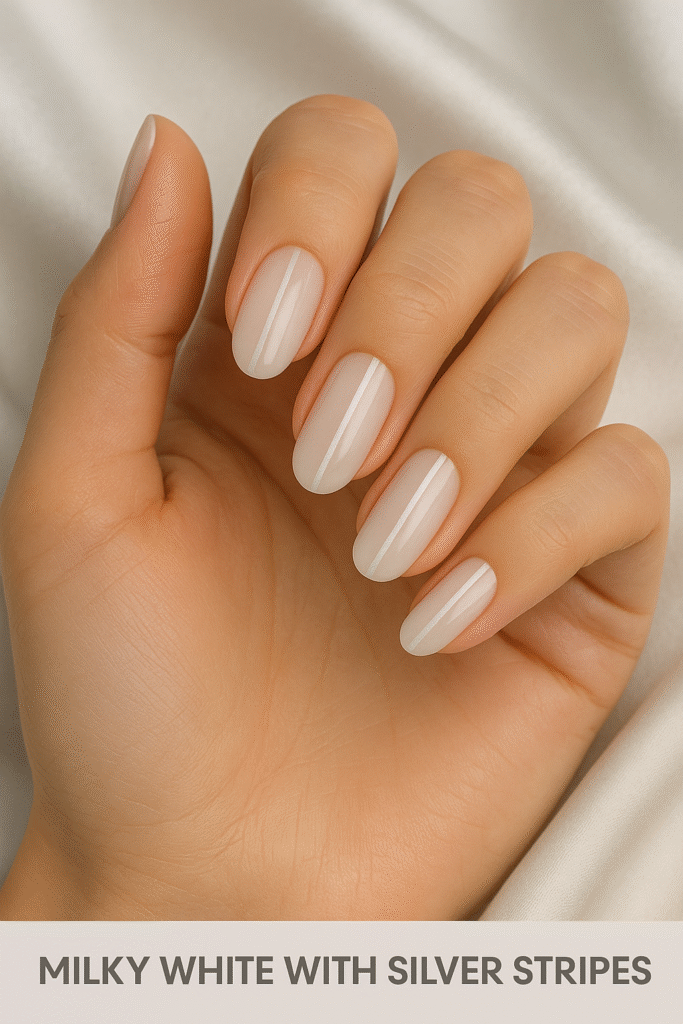
Milky White with Silver Stripes: Translucent milky white base features thin vertical silver stripes.
Difficulty: Intermediate. The semi-sheer base (2-3 coats) creates ethereal effect.
Use silver striping polish or detail brush to paint evenly-spaced vertical lines. The elongating effect of vertical stripes flatters shorter nails.
Drying time: 45 minutes total.
Champagne Ombré with Diamonds: Nude to champagne gradient features tiny diamond-like crystals at the tips.
Difficulty: Intermediate. Create subtle ombré using nude and champagne shades, then place small clear rhinestones clustered at tips.
The gradient provides dimension while crystals add sparkle appropriate for formal celebrations.
This design particularly suits New Year’s Eve weddings and galas.
Icy Blue & Frosty Winter Nails (8 Designs)
Icy blue dominates winter 2025 trend reports, deserving dedicated exploration.
These eight designs showcase the versatility of winter’s signature color family, from pale frost to deep cobalt.
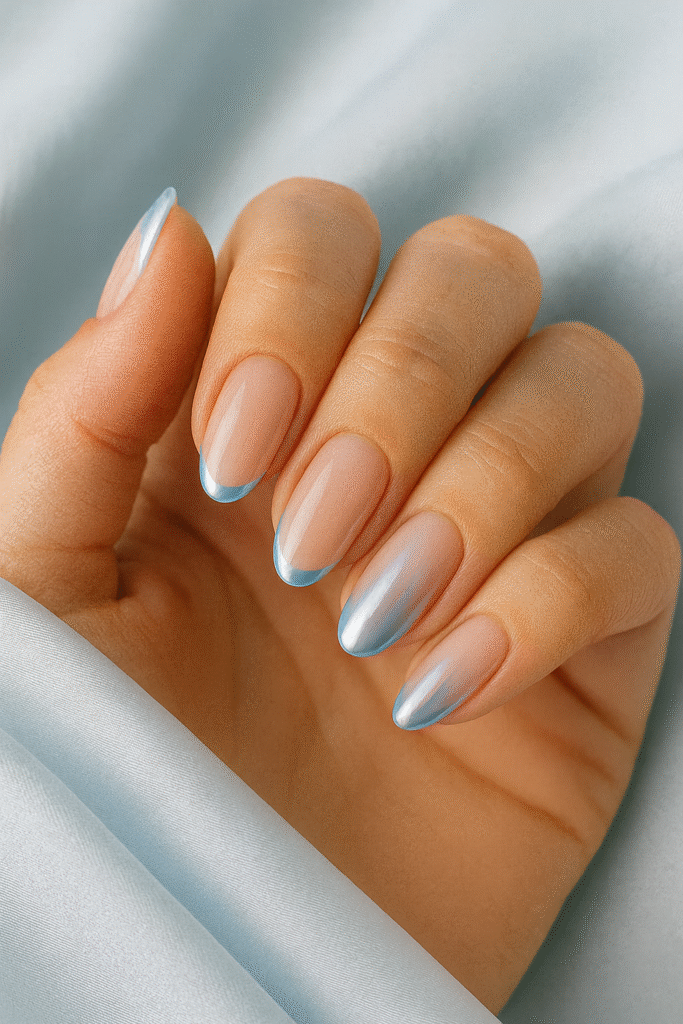
Baby Blue Chrome French: Delicate baby blue chrome tips on nude or clear base create modern French manicure.
Difficulty: Intermediate. The chrome finish makes traditional French feel current.
Apply chrome powder to tips only after creating smile line with light blue gel polish.
The color reads as fresh and winter-appropriate without being costume-like.
Born Pretty chrome powder in “Ice Blue” works perfectly.
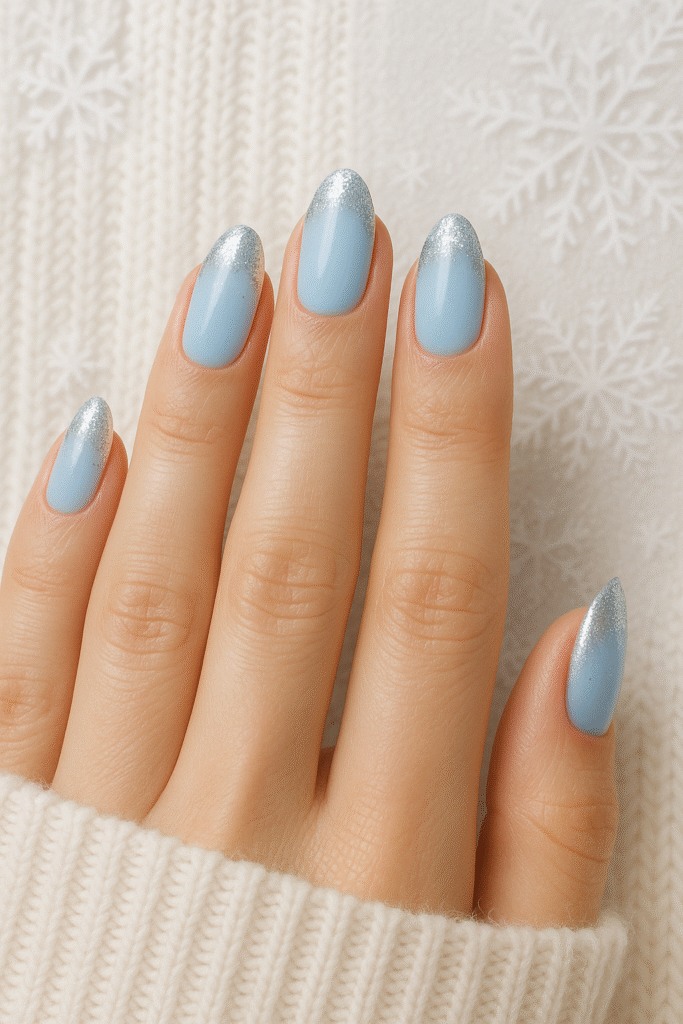
Icy Blue with Silver Glitter Tips: Pale blue base features concentrated silver glitter at the free edge, creating frozen effect.
Difficulty: Beginner. Use Essie’s “Borrowed & Blue” or similar pale blue as base (2 coats).
Apply silver glitter polish to tips using sponge for gradient effect.
This design suits everyday wear and special occasions equally.
The cool tones flatter cool and neutral undertones particularly well.
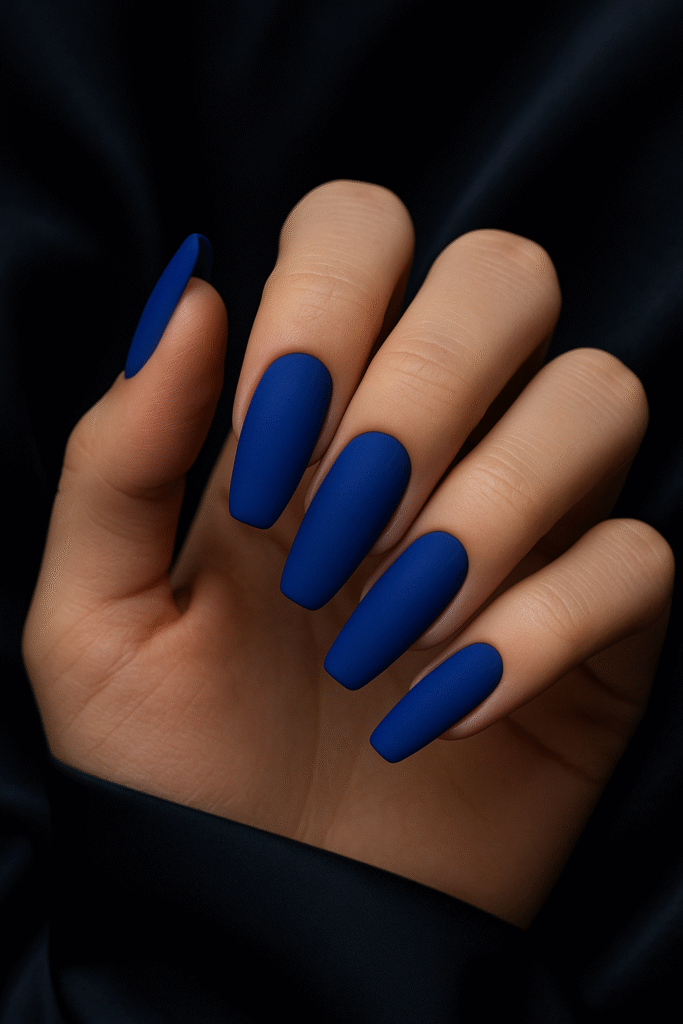
Cobalt Matte Coffin: Vibrant cobalt blue with matte finish on coffin-shaped nails makes bold statement.
Difficulty: Intermediate (application) + Advanced (shape maintenance).
The saturated color (OPI’s “Keeping Suzi at Bay”) requires 2-3 coats for opacity.
Matte top coat transforms it from ordinary to striking.
This design suits confident wearers comfortable with attention-getting nails.
Periwinkle with White Snowflakes: Soft periwinkle blue base features white snowflake patterns—stamped or hand-painted.
Difficulty: Beginner with stamps, Intermediate with painting.
The purple-blue hybrid feels more wearable than pure blue for some skin tones.
Sally Hansen’s “Fairy Teal” (which reads more periwinkle) creates beautiful base.
Add snowflakes to accent nails only for subtlety.
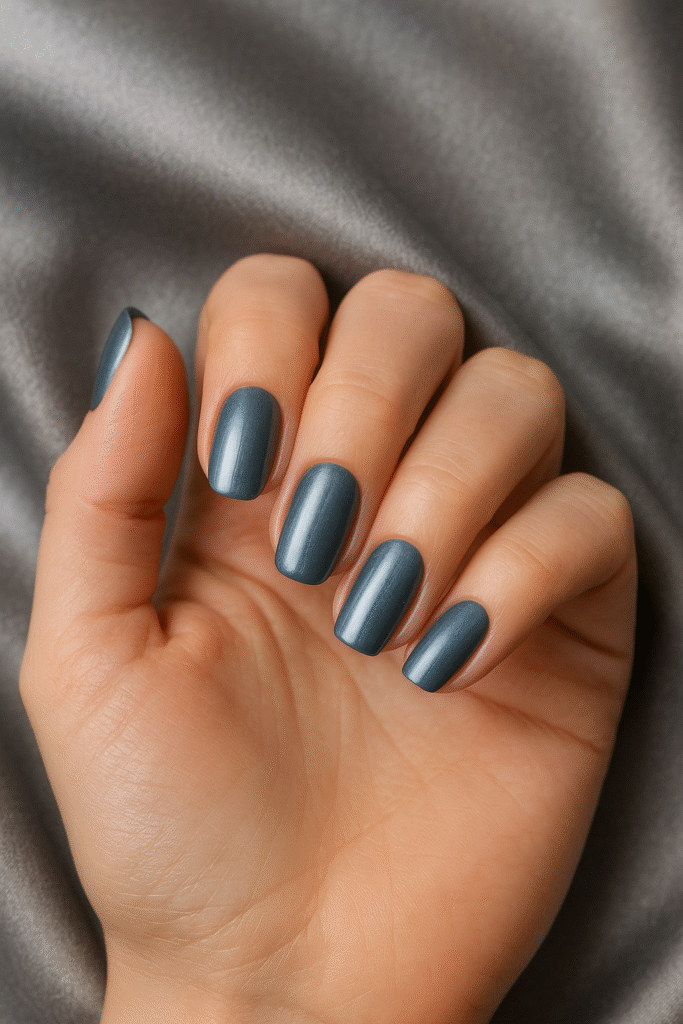
Steel Blue Metallic: Medium steel blue with metallic sheen creates sophisticated neutral-alternative.
Difficulty: Beginner. This shade sits between grey and blue, making it surprisingly versatile for daily wear.
One coat of metallic base, two coats of color (Zoya’s “Tru”), and top coat complete the look in 30 minutes.
The metallic particles eliminate need for additional techniques.
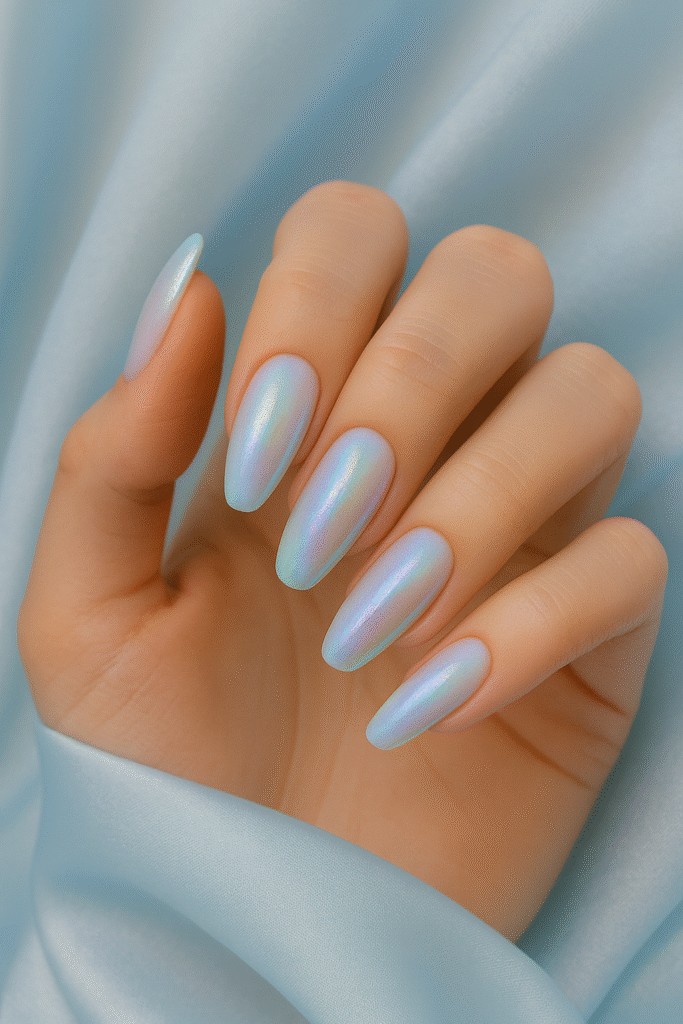
Pale Blue Aurora Effect: Pale blue base features aurora powder or polish creating subtle rainbow shift.
Difficulty: Intermediate. Apply aurora/angel paper powder over no-wipe gel top coat, or use specialized aurora polish like ILNP’s “Poised”.
The effect is more subtle than traditional chrome, creating ethereal winter beauty. This design photographs gorgeously in natural light.
Navy Blue with Ice Blue Ombré: Deep navy at the cuticle fades to pale icy blue at tips, creating depth and dimension.
Difficulty: Intermediate. Use makeup sponge to blend Essie’s “Midnight Cami” (navy) into “Borrowed & Blue” (pale blue).
The gradient technique takes practice for smooth transition but creates striking result. Add silver glitter to tips for additional sparkle if desired.

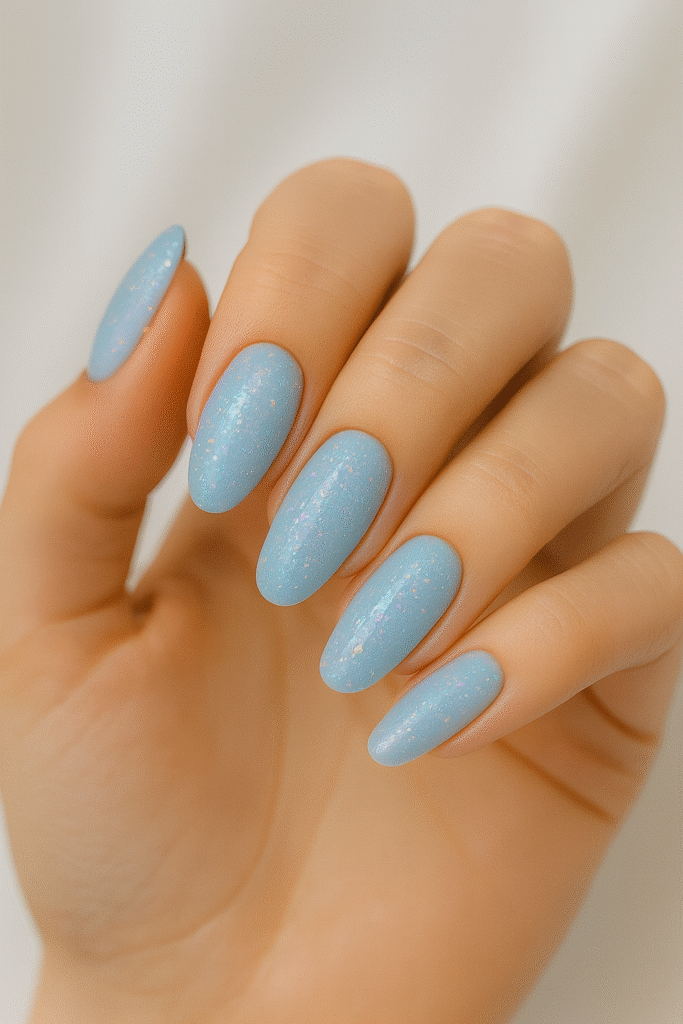
Powder Blue with Holographic Flakes: Soft powder blue base features holographic flake top coat creating subtle sparkle.
Difficulty: Beginner. Apply 2 coats of powder blue (OPI’s “Reach for the Sky”), then apply holographic flake top coat while slightly tacky.
The flakes catch light without overpowering the soft base color.
This design bridges minimalist and glamorous, working in various settings.
Total application time: 35 minutes.
What’s Trending: Winter Nail Designs 2025
Fashion and beauty trends evolve yearly, and winter 2025 brings distinct shifts in nail aesthetics.
Understanding current trends helps you make design choices that feel modern and relevant rather than dated.
The data compiled from Vogue, Who What Wear, Marie Claire, and major nail art influencers reveals clear patterns in color preferences, texture choices, and design approaches dominating this season.

Three major themes define winter 2025 nail trends: the continued dominance of chrome and metallic finishes entering their third consecutive year of popularity, the emergence of velvet matte textures as the season’s most sought-after finish, and the prioritization of wearable nail lengths and shapes reflecting practical lifestyle needs.
These trends intersect with color preferences leaning heavily toward icy blues, deep burgundies, and warm mocha tones—a palette that feels both festive and wearable.
The data shows interesting user behavior shifts. Search volume for “short squoval nails” increased 64% compared to winter 2024, indicating growing preference for practical yet stylish nail lengths.
Meanwhile, “chrome nails” maintains steady high search volume, and “velvet nails” saw 40% increase in searches since October 2025.
These numbers reflect what nail professionals observe in salons and what enthusiasts create at home.
Celebrity manicurists note that clients increasingly request designs combining multiple trends rather than single-focus looks.
For example, icy blue chrome with snowflake accents merges color, finish, and pattern trends into one cohesive design.
This mixing approach allows personalization while staying trend-current, giving you permission to adapt rather than replicate exactly.
Winter 2025 Color Trends
Color psychology and cultural influences shape seasonal palette preferences. Winter 2025’s color story balances cool icy tones with warm comforting hues, creating options for various moods and occasions throughout the season.
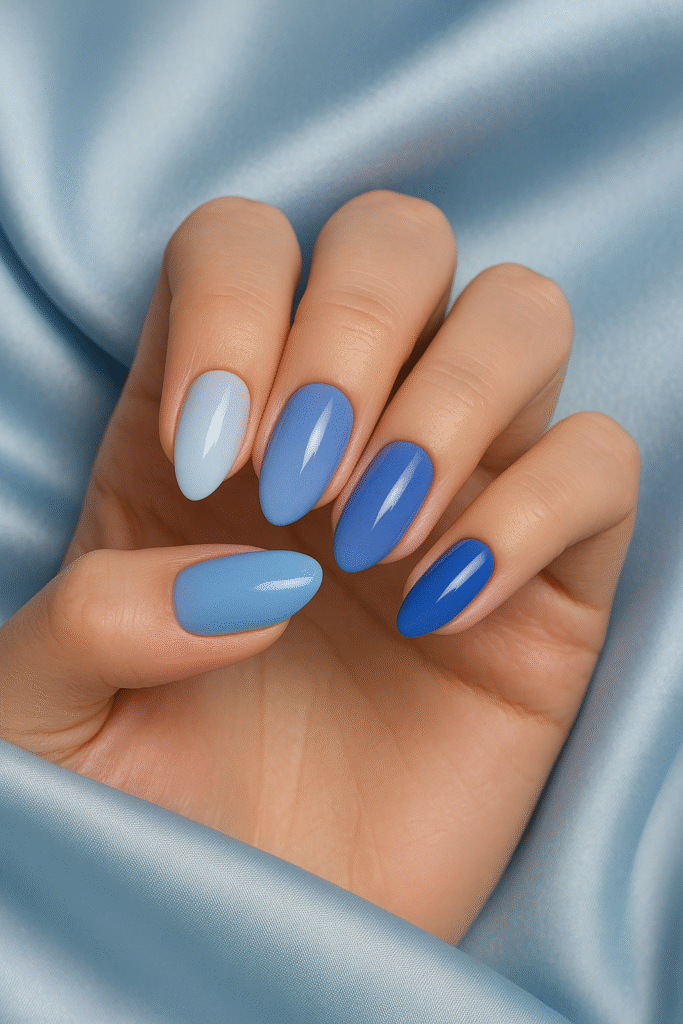
Icy Blues & Periwinkles lead the color conversation this winter.
From palest frost to vibrant cobalt, blue family shades appear in approximately 40% of winter nail trend features according to aggregate data from fashion publications.
The color reads as fresh and modern, moving beyond traditional winter reds.
Light icy blues suit daytime and professional environments, while deeper cobalts work for evening occasions.
The cool tone flatters most skin tones, particularly those with cool or neutral undertones.
Recommended shades: OPI’s “Did You See Those Mussels?”, Essie’s “Borrowed & Blue”, Sally Hansen’s “Fairy Teal”.
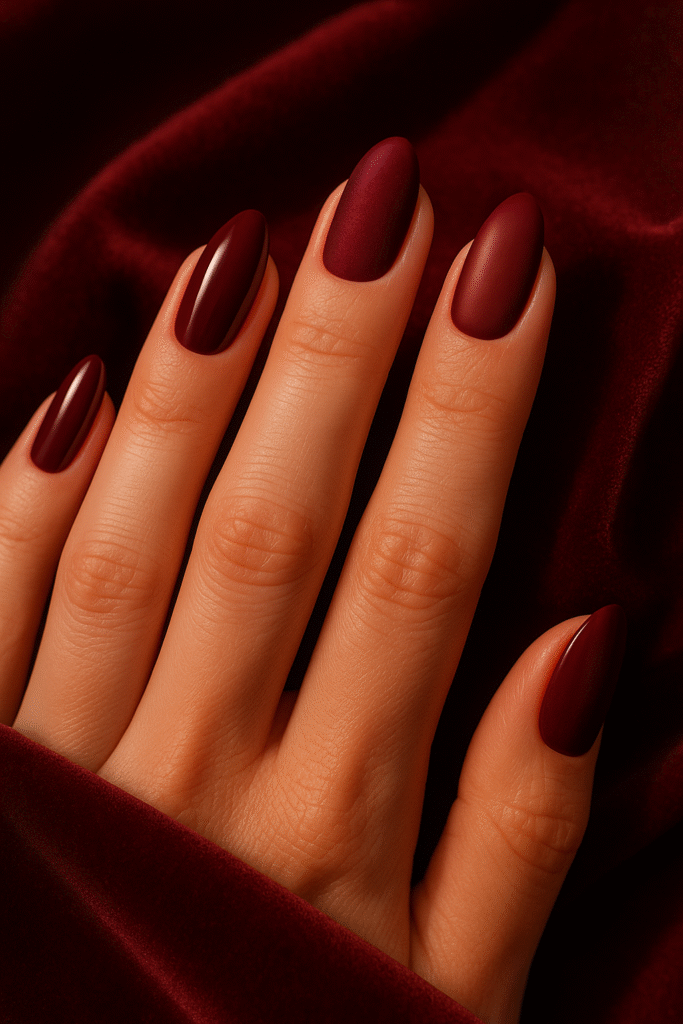
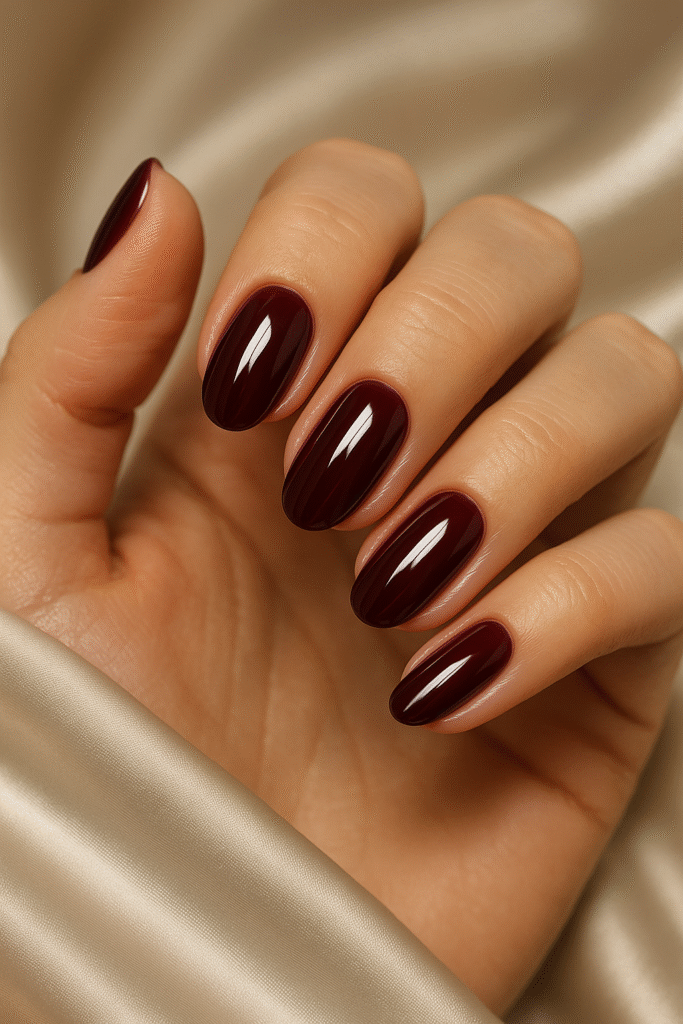
Deep Burgundy & Wine Reds provide rich, luxurious alternative to bright holiday reds.
These jewel-toned shades feel sophisticated and seasonally appropriate without screaming “Christmas.”
According to Who What Wear’s winter 2025 trend report, burgundy and wine shades rank second in popularity after blue family colors.
The deep tones suit all skin depths beautifully, creating particular stunning contrast on deeper skin tones.
Burgundy works in professional settings while feeling special enough for parties.
Recommended shades: Essie’s “Bordeaux”, OPI’s “Malaga Wine”, Zoya’s “Toni”.
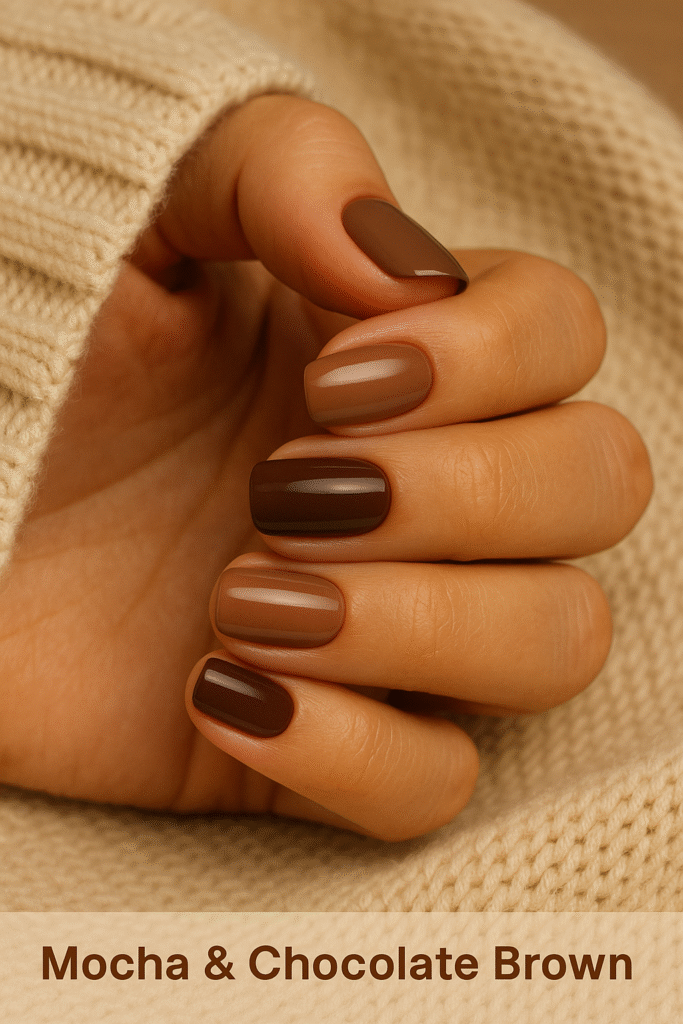
Mocha & Chocolate Browns captured attention this season as warm, wearable neutrals.
The brown family moves beyond traditional nudes, offering depth while maintaining versatility.
These shades complement earth-tone winter wardrobes and suit all skin tones when you choose the right undertone—warmer mochas for warm undertones, greyish taupes for cool undertones.
Brown nails trend particularly strong on Instagram, with #mocha nails reaching 200K+ posts.
Recommended shades: OPI’s “Chocolate Moose”, Essie’s “Sable Collar”, Sally Hansen’s “Mocha Chocolate”.
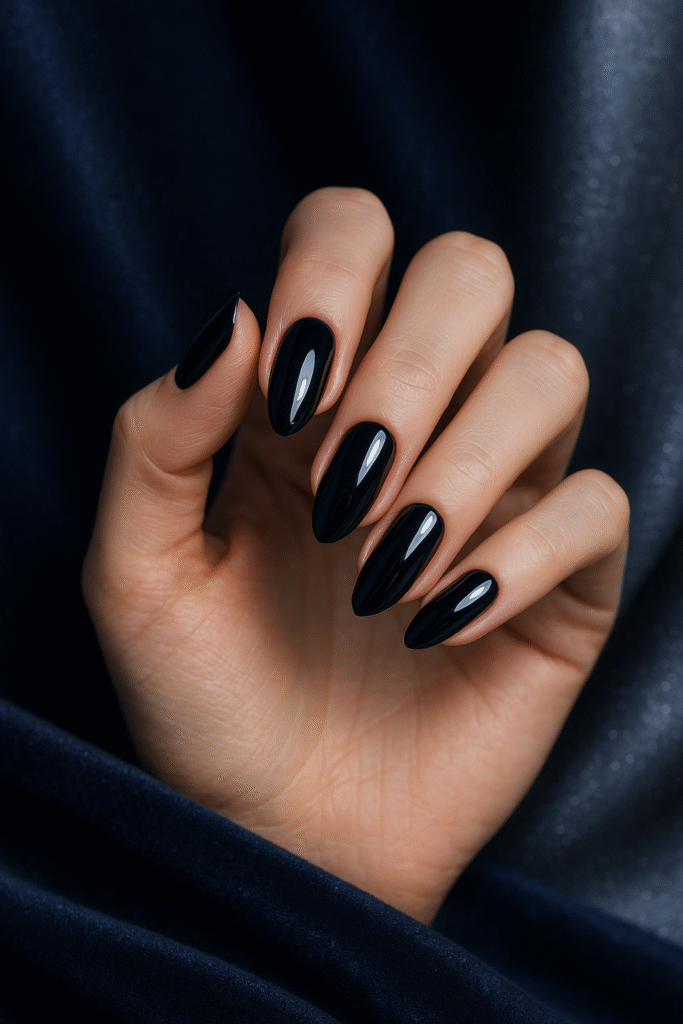
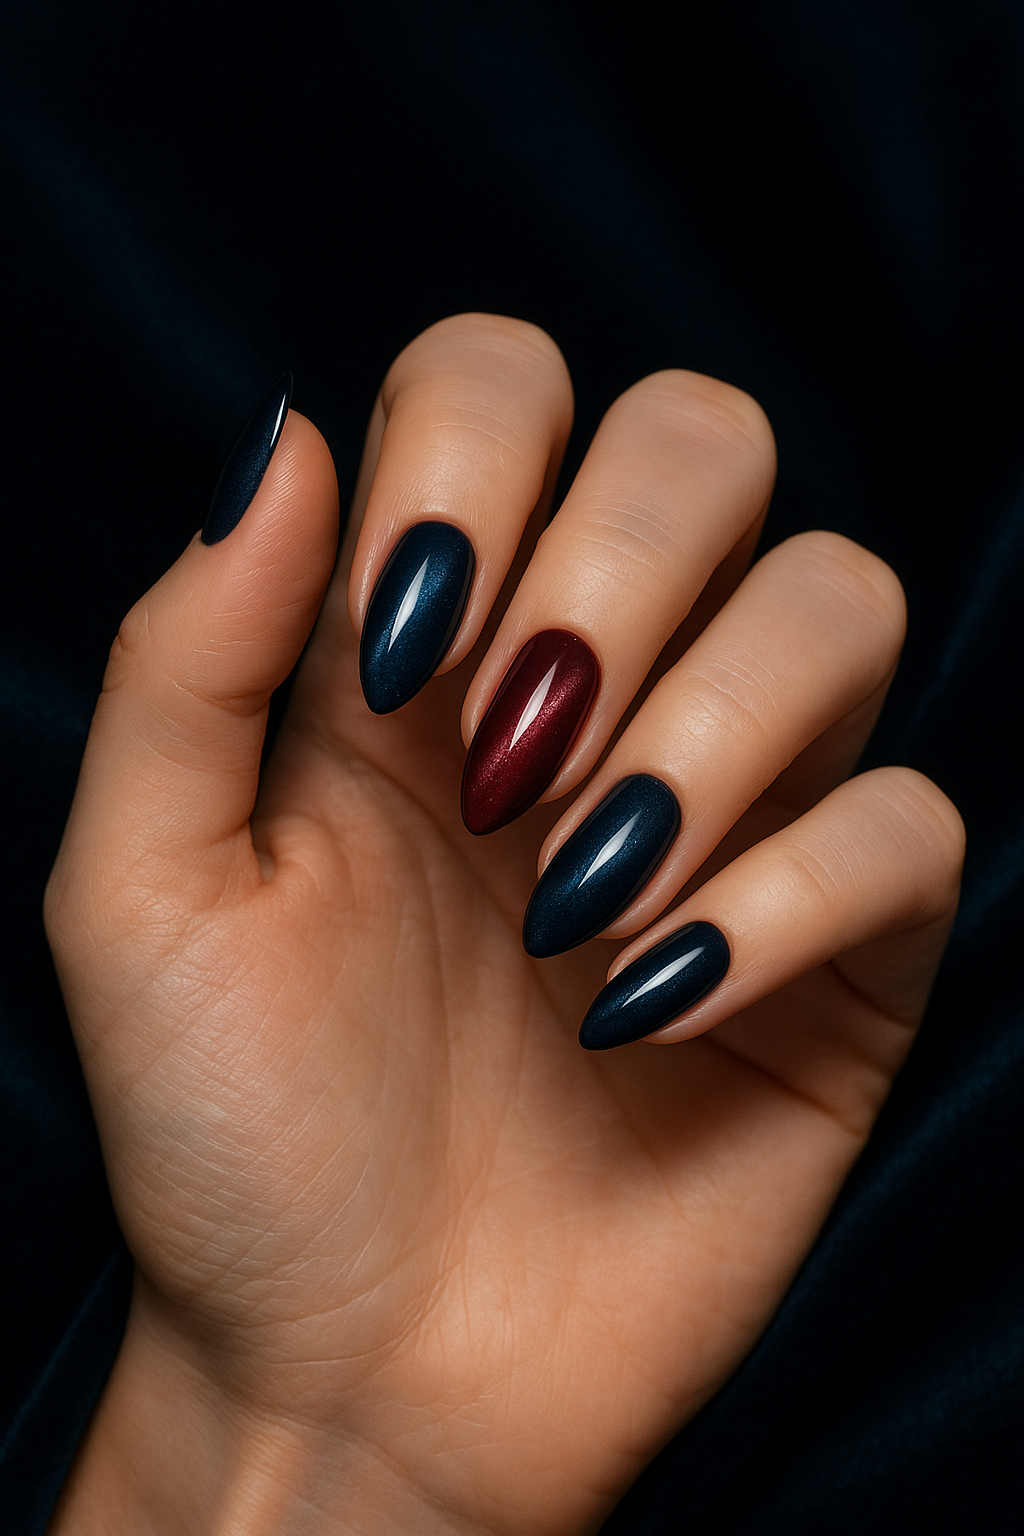
Midnight Navy & Deep Blues serve as sophisticated neutral alternatives.
Darker than traditional navy, these near-black blues provide drama without the starkness of true black.
The color family works year-round but feels particularly appropriate for winter.
Navy serves as base for metallic accents, snowflake patterns, and celestial designs.
The deep tone requires 2-3 coats for opacity but rewards with richness.
Recommended shades: Essie’s “Midnight Cami”, OPI’s “Keeping Suzi at Bay”, China Glaze’s “First Mate”.
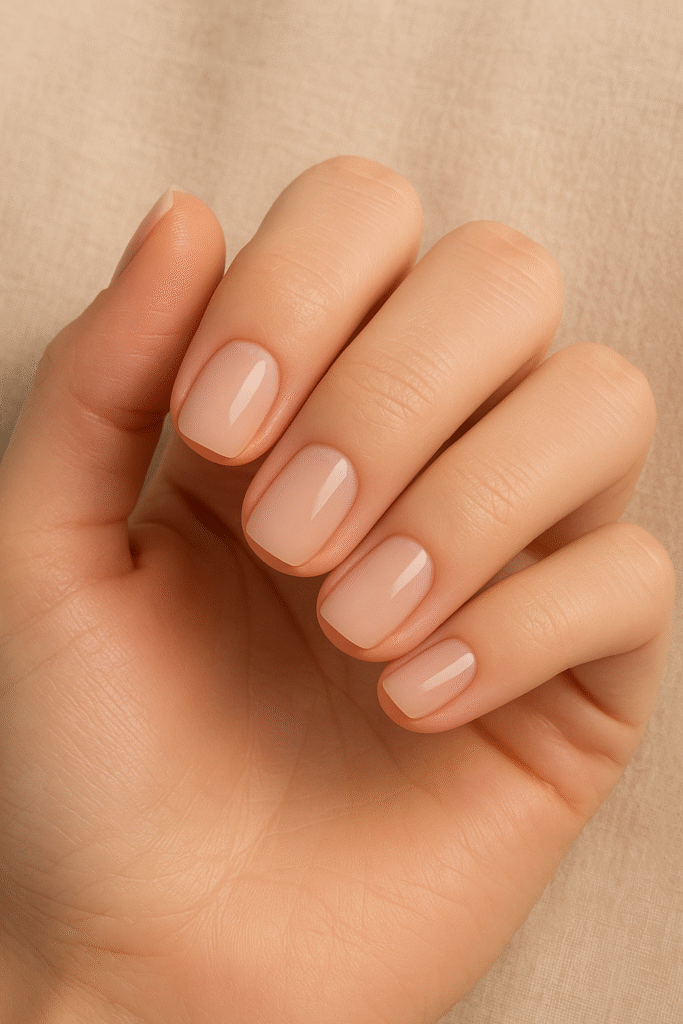
Soft Pinks & Nudes maintain steady popularity as classic, versatile choices.
Winter 2025 sees these shades paired with unexpected finishes (chrome, matte) or minimal winter accents for seasonal relevance.
The nude family now includes warmer peachy tones and cooler pink-based options, acknowledging diverse skin tone needs.
These shades suit professional environments and formal occasions equally well.
Recommended shades: OPI’s “Bubble Bath”, Essie’s “Fiji”, Sally Hansen’s “Natural” collection.
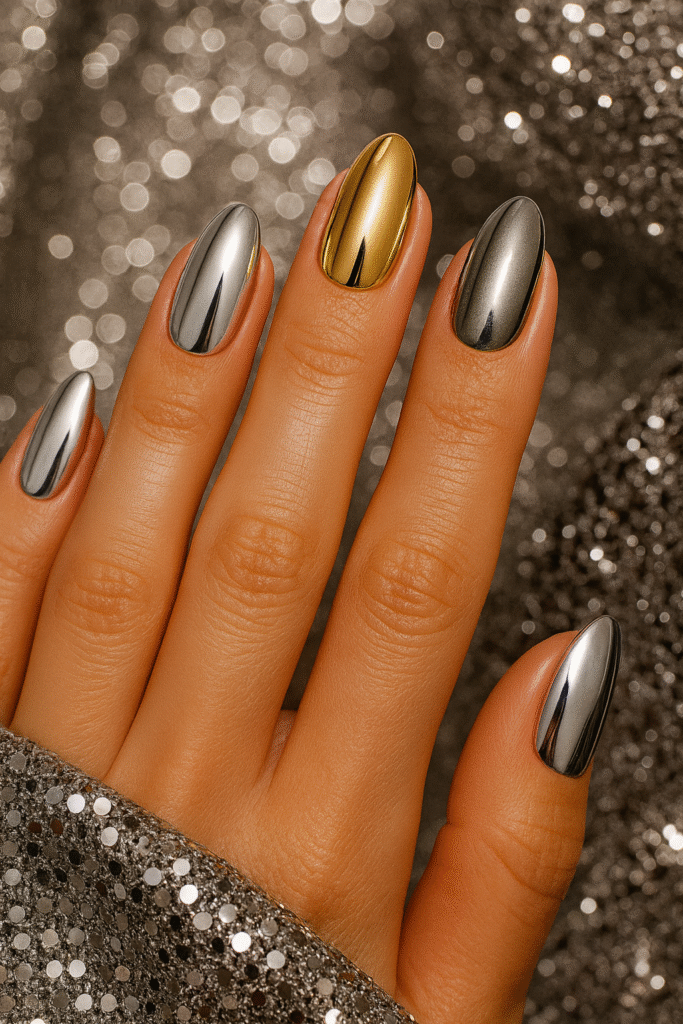
Metallics (Silver, Gold, Pewter) function as both primary colors and accent choices this season.
Full metallic nails make statements for holiday parties, while metallic accent nails add interest to neutral bases.
Silver leans cool and modern, gold reads warm and traditional, and pewter/gunmetal provides edgy sophistication.
The reflective quality makes metallics photograph beautifully.
Recommended shades: China Glaze’s “Golden Enchantment”, Essie’s “No Place Like Chrome”, OPI’s “Lucerne-tainly Look Marvelous”.
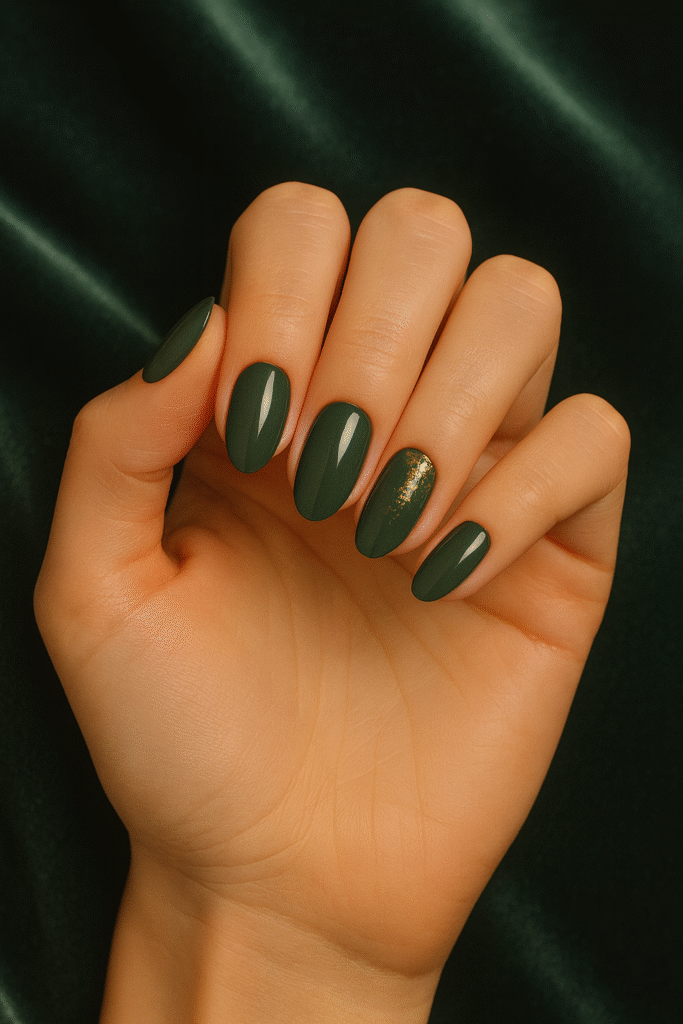
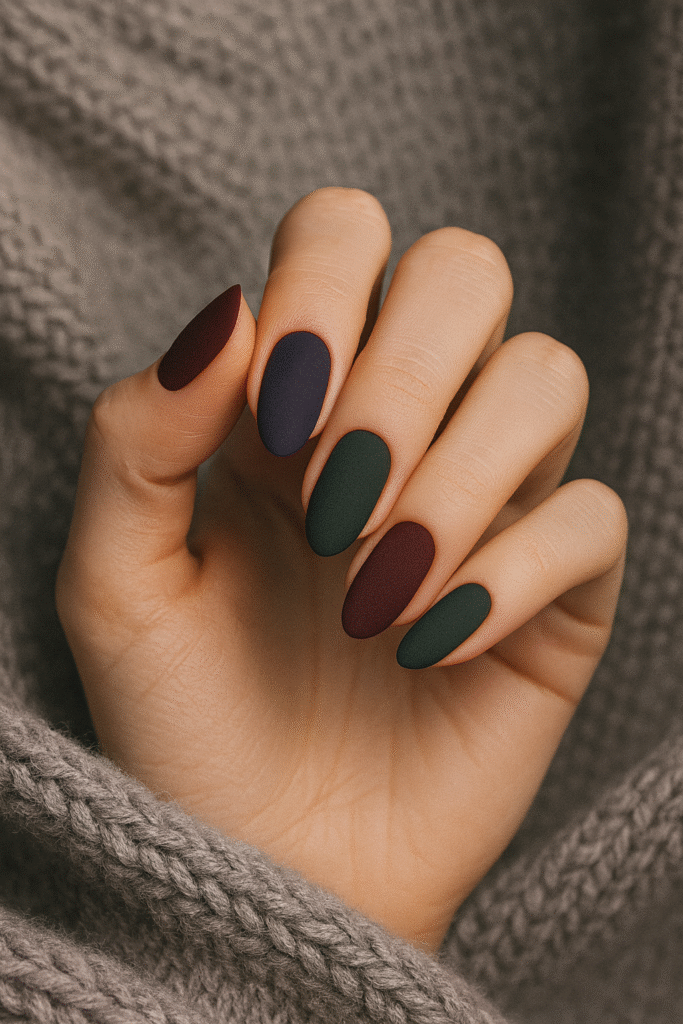
Olive & Forest Greens offer alternative to traditional Christmas green.
These muted, sophisticated greens work throughout winter without feeling holiday-specific.
The shades pair beautifully with gold accents for those wanting festive touches.
Olive green particularly suits olive and medium skin tones.
Recommended shades: Essie’s “Going Incognito”, OPI’s “Stay Off the Lawn”, Zoya’s “Hunter”.
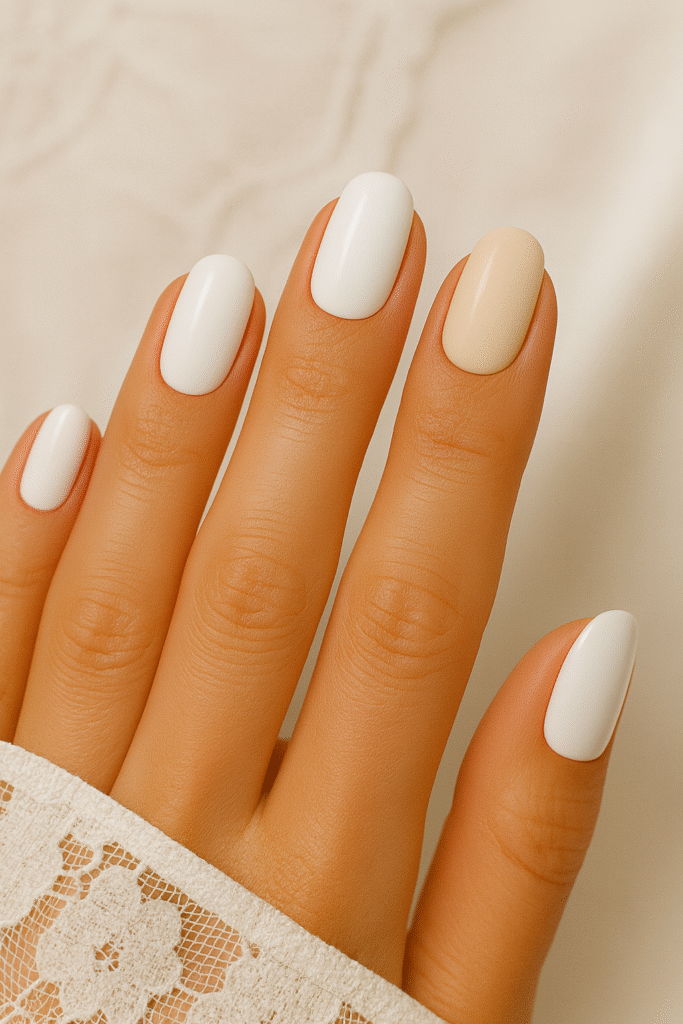
Classic White & Cream provide clean, modern bases for winter nail art.
Pure white creates maximum contrast for colorful accents, while cream shades feel softer and warmer.
White nails trend strongly in minimalist nail art movements, often featuring simple line art or single accent details.
The color requires careful application (3 coats typical) and shows wear quickly but creates striking aesthetic.
Recommended shades: Essie’s “Blanc”, OPI’s “Alpine Snow”, Sally Hansen’s “Créme de la Cream”.
Must-Try Textures & Finishes
Texture and finish transform the same color into different aesthetics.
Winter 2025 prioritizes varied surface treatments, moving beyond standard glossy finishes to create tactile and visual interest.
Chrome continues dominating finish trends, particularly on blues and silvers.
The mirror-like surface creates high impact with relatively simple application.
Chrome powder applied over gel polish base produces the most dramatic effect, though chrome polishes offer easier alternatives.
The finish suits both subtle and bold designs depending on base color choice.
Chrome application takes practice for smooth, even results.
Professional application recommended for first attempts, though home application becomes manageable with practice.
Chrome nails require careful top coat application—too much dulls the effect, too little shortens wear time.
Velvet/Matte emerges as winter 2025’s most desired texture.
The soft, velvety surface feels luxurious and seasonally appropriate.
Matte finishes work particularly beautifully on deep colors—burgundy, navy, forest green—where the texture adds dimension.
Achieving velvet effect happens two ways: matte top coat over regular polish (easier, less durable) or specialized velvet powder (more dramatic, requires gel system).
Matte finishes show fingerprints and oil more readily than glossy, requiring more frequent cleaning.
The texture suits sophisticated aesthetics and photographs gorgeously in natural light.
Seche Vite’s matte top coat provides reliable results at accessible price point ($8).
Shimmer & Glitter maintain popularity through layered, sophisticated applications rather than full-coverage glitter.
Winter 2025 glitter trends favor gradient applications, glitter tips, or subtle shimmer within cream polishes rather than chunky glitter coverage.
Fine shimmer particles create elegance, while larger glitter pieces make statements.
Removal remains the primary challenge with glitter polishes—acetone-soaked cotton wrapped in foil for 10 minutes makes the process manageable.
Peel-off base coats underneath glitter polish simplify removal further.
Glossy High-Shine remains timelessly elegant. Extra-glossy top coats (like Seche Vite Dry Fast) create glass-like surface that enhances any color.
The shine makes colors appear more saturated and nails look healthier.
High-shine finish suits professional environments and formal occasions where subtle elegance matters.
Quick-dry glossy top coats also protect nail art and extend wear time significantly—often adding 3-5 days to manicure life.
Magnetic/Cat-Eye effects use polishes containing metallic particles that align when magnet is held over wet polish.
The resulting stripe or starburst pattern creates dimension and visual interest.
Navy and burgundy magnetic polishes trend particularly strong this winter.
The application takes practice for centered, even effects, but the unique result rewards the effort.
Each nail can have differently positioned stripes for variety.
Holographic & Iridescent finishes create rainbow effects in direct light.
Holo polishes contain microparticles that refract light into spectrum colors, while iridescent finishes produce softer, aurora-like shifts.
These effects work beautifully over winter’s cooler color palette.
The sparkle feels festive without reading as glittery, making it suitable for various occasions. ILNP and Cirque Colors offer extensive holographic collections.
3D Accents (bows, rhinestones, pearls) add physical dimension to nails.
Winter 2025 sees these used sparingly as accent elements rather than full-nail coverage.
Strategic placement—along cuticles, at the base of accent nails, or clustered at tips—creates elegance rather than excess.
Rhinestones bond best with gel top coat, lasting 7-14 days when properly sealed.
Pre-made 3D elements (bows, snowflakes) simplify application for home users.
Textured finishes like sweater knit effects capture cozy winter aesthetics.
These techniques use the same color polish in different applications—base coat smoothed, then detail work left raised—to create visual texture.
The raised elements create subtle 3D effect. Matte top coat over textured designs enhances the fabric-like appearance.
These designs trend strongly on social media but require patience and steady hands for successful execution.
Trending Nail Shapes for Winter 2025
Nail shape affects both aesthetic and practicality. Winter 2025 trends favor shorter, more wearable shapes that suit active lifestyles while maintaining style.
Short Squoval dominates 2025 as the year’s most popular shape according to Vogue Scandinavia’s trend report.
The square-oval hybrid offers practical short length (approximately 0.3-0.6cm or 1/8-1/4 inch beyond fingertip) with slightly rounded corners that prevent snagging.
The shape flatters all finger types and suits every lifestyle from manual labor to desk work.
Squoval provides enough surface area for nail art while keeping length manageable.
This shape works particularly well for those transitioning from very short nails to slightly longer lengths.
Filing technique: square off free edge, then round the corners gently.
Almond maintains popularity as elegant, elongating shape. The tapered sides leading to slightly pointed tip create feminine, sophisticated aesthetic.
Almond shape suits medium to long lengths (0.6-1.3cm or 1/4-1/2 inch beyond fingertip) and works best on wider nail beds that can support the narrowing. The shape makes fingers appear longer and more slender. Almond requires more maintenance than squoval as the sides are more prone to breakage.
Filing technique: create angled sides from widest point of nail converging to centered point at tip.

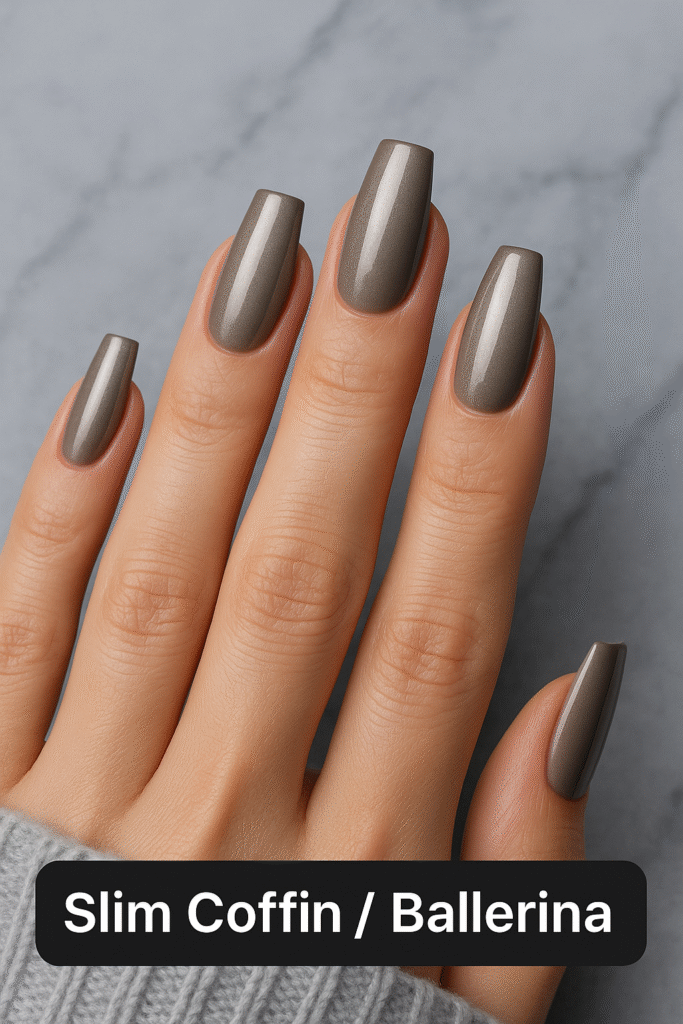
Slim Coffin/Ballerina offers trendy edge with practical length.
Unlike extreme coffin nails requiring considerable length, slim coffin at medium length (0.6-1cm or 1/4-3/8 inch beyond fingertip) balances style and wearability.
The shape features tapered sides like almond but with squared-off tip rather than point.
Coffin shape suits those wanting fashion-forward nails without extremity of stiletto length.
Filing technique: create almond shape first, then square off the tip, creating flat edge.
Minimalist Square provides clean, modern aesthetic. Short square nails with completely straight sides and edge create architectural look.
The shape suits minimalist nail art particularly well, as the geometric form complements simple line art and negative space designs.
Square nails risk corner catching and breaking, so slightly shorter length works best.
Filing technique: file straight across free edge, then file sides perpendicular to create 90-degree corners.
Shape trends clearly move toward practicality without sacrificing style.
The days of extremely long stiletto nails as everyday wear seem to be waning in favor of lengths and shapes that accommodate gloves, typing, and daily activities.
This shift reflects broader trend toward functional beauty that enhances rather than hinders daily life.
Popular Winter Nail Patterns & Motifs for 2025
Winter nail art allows you to express personal style while embracing seasonal themes. From classic motifs to modern abstract designs, here are the top winter nail patterns trending in 2025.
Classic Snowflake Designs
Snowflakes dominate winter nail searches, appearing in 35% of seasonal queries. The key to elegant snowflake nails is placement—use them as accent nails rather than covering every finger for a sophisticated look.
Application methods:
- Hand-painting (advanced skill level)
- Stamping (intermediate)
- Stickers (beginner-friendly)
White snowflakes on colored bases create timeless contrast, while metallic versions on neutral tones feel contemporary. This versatile design works from November through February.
Cozy Sweater Nail Art
Cable knit patterns bring winter texture to your nails. With over 150K Instagram posts under #sweaternails, this trend captures the cozy aesthetic perfectly.
Creating knit texture requires building raised polish lines that mimic fabric patterns. Apply matte top coat to enhance the sweater illusion. Cream, oatmeal, and grey bases work best. Expect 60-75 minutes for a full manicure.
Plaid & Tartan Patterns
Runway-inspired plaid brings sophistication to winter nails. Create intersecting lines in complementary colors using striping brushes or thin tape.
Popular color combinations:
- Red, green, and gold (holiday vibes)
- Burgundy, navy, and white (sophisticated winter)
Apply plaid to accent nails only, pairing with solid colors on remaining fingers for a balanced look.
Festive Bow Designs
Gift-inspired bows add feminine charm throughout winter party season. Small painted bows suit beginners, while 3D sculpted versions require advanced techniques.
Gold or silver bows over deep bases like burgundy, navy, or forest green create elegant looks perfect for formal events.
Aurora & Aura Effects
These ethereal designs mimic northern lights with shifting colors that change in different lighting. Specialized polishes, chrome powders, or aurora papers create unique, one-of-a-kind results. Aurora effects pair beautifully with winter’s blue and purple color families.
Celestial Themes
Stars, moons, and constellations connect to dark winter nights. Metallic stars on navy, black, or deep purple bases provide striking contrast. This versatile motif works for both playful and sophisticated styles depending on execution.
Minimalist Line Art
Simple black, white, or brown lines creating abstract shapes or geometric patterns suit professional environments while maintaining winter relevance. The hand-drawn quality adds charm—perfection isn’t required.
Pair a single line art accent nail with solid neutrals on remaining fingers for a modern, balanced aesthetic.
Marble & Abstract Swirls
Winter marble incorporates white, grey, and metallic veining for sophisticated elegance. Water marbling produces organic, unrepeatable patterns that photograph beautifully.
No artistic skill required—just patience with the process. Perfect for formal winter events and special occasions.
Which winter nail pattern will you try first? Each design offers unique appeal, from cozy sweater textures to elegant marble effects. Start with your skill level and build confidence as you explore these trending winter looks.
Step-by-Step: 7 DIY Winter Nail Tutorials
Creating beautiful winter nails at home saves $40-80 per manicure compared to salon prices.
The tutorials below build from beginner-friendly to intermediate complexity, giving you confidence to try techniques matching your current skill level.
Each tutorial includes complete materials lists, timing estimates, step-by-step instructions, troubleshooting guidance, and professional tips for best results.
Successful DIY nail art depends on proper preparation more than artistic talent. Clean, shaped nails with pushed-back cuticles provide the canvas.
Thin polish coats dry faster and wear longer than thick applications.
Patience between coats prevents smudging and bubbling. These foundational techniques apply across all tutorials below.
If you’re new to nail art, start with Tutorial 1 or 6—both use simple techniques with high success rates.
Tutorial 1: Classic Snowflake Accent Nails (Beginner)
This design creates elegant winter nails using the simplest possible technique—stickers.
The result looks intentional and polished without requiring artistic skills or specialized tools beyond basic manicure supplies.
Difficulty: Beginner
Time Required: 30-40 minutes
Estimated Cost: $15-20 for all supplies
Materials Needed:
– Base coat (any brand)
– Icy blue or soft pink polish (OPI’s “Did You See Those Mussels?” or Essie’s “Fiji”)
– Snowflake nail stickers (Amazon, nail art supply stores)
– Fast-dry top coat (Seche Vite recommended)
– Small brush for cleanup
– Pure acetone
– Cotton pads
Step-by-Step Instructions:
1. Prepare your nails (10 minutes): Push back cuticles gently using cuticle pusher or orange stick after softening with warm water.
File nails to desired shape—short squoval works beautifully for this design. Buff nail surface lightly with fine-grit buffer to smooth ridges.
Wipe nails with acetone to remove oils and ensure good polish adhesion.
2. Apply base coat (2 minutes): Apply thin layer of base coat to all nails. Allow to dry completely—approximately 2 minutes.
Base coat prevents staining and extends polish wear time significantly.
3. First color coat (5 minutes): Apply your chosen color polish in thin, even coat.
Start slightly away from cuticle and draw brush toward yourself, then push brush back toward cuticle in one smooth motion.
This technique prevents flooding cuticles. Apply polish to all ten nails. Allow to dry 3-4 minutes between coats.
4. Second color coat (5 minutes): Apply second thin coat of polish using same technique.
Two thin coats provide better opacity and longer wear than one thick coat.
The color should look completely even and opaque after this coat. Allow to dry completely—5-7 minutes minimum.
5. Select accent nails (1 minutes): Choose which nails receive snowflakes. Traditional placement uses ring fingers and thumbs (4 nails total), though single ring finger accent also works beautifully.
Less is more with nail art—restraint creates elegance.
6. Apply snowflake stickers (5 minutes): Using tweezers or your fingers, peel snowflake sticker from sheet. Position carefully on accent nail—centered placement works well, or slightly off-center for modern look. Press firmly across entire sticker, ensuring all edges adhere. Repeat on remaining accent nails.
7. Seal with top coat (5 minutes): Apply generous layer of top coat over all nails, including stickers. Press down gently over stickers while applying top coat to ensure edges seal completely. The top coat should cover entire nail surface and wrap around free edge (cap the edge) to prevent chipping.
8. Clean up edges (3 minutes): Dip small cleanup brush in acetone and carefully clean polish from skin around nails. Work slowly to avoid disturbing wet top coat. Clean, crisp edges make the manicure look professional.
9. Final dry time (10 minutes): Allow nails to dry completely before touching anything. Quick-dry top coats set in approximately 10 minutes, though full hardness takes 30 minutes. Avoid hot water and heavy hand use for first 2 hours.
Troubleshooting Common Issues:
– Stickers lifting at edges: Apply more top coat, focusing on sealing sticker edges. You can apply second top coat layer after first dries if lifting persists.
– Polish smudging when applying stickers: Ensure polish dries completely (7+ minutes) before applying stickers. Touch test nail lightly—if it feels tacky, wait longer.
– Bubbles in polish: Polish too thick or shaking bottle creates bubbles. Roll bottle between palms instead of shaking. Apply thinner coats.
Pro Tips:
– Snowflake stickers come in various sizes. Mix sizes on different accent nails for visual interest.
– Silver or gold snowflake stickers on dark bases create maximum contrast and drama.
– This technique works with any seasonal stickers—holly leaves, gift bows, winter florals.
– Press stickers onto sticky side of tape first, then transfer to nail for easier positioning control.
Tutorial 2: Icy Blue Chrome French Tips (Beginner-Intermediate)
Chrome finish creates stunning modern take on classic French manicure. This tutorial produces trendy results while introducing chrome powder technique—a valuable skill for multiple nail art styles.
Difficulty: Beginner-Intermediate
Time Required: 45-60 minutes
Estimated Cost: $20-30 for all supplies
Materials Needed:
– Base coat
– Nude or soft pink base polish (OPI’s “Bubble Bath” or similar)
– White gel polish OR regular white polish for tips
– Blue chrome powder (Born Pretty “Ice Blue”)
– No-wipe gel top coat (if using gel method)
– Regular fast-dry top coat
– Eyeshadow applicator or silicone tool
– French tip guides or striping tape (optional)
– Small cleanup brush
– Acetone
Step-by-Step Instructions:
1. Prepare nails (10 minutes): Complete standard prep—push cuticles, file to shape, buff surface, cleanse with acetone.
French manicures show imperfections clearly, so proper prep matters significantly.
2. Apply base coat (2 minutes): Thin base coat layer on all nails. Allow 2 minutes drying time.
3. Apply base color (10 minutes): Apply two thin coats of nude or soft pink polish, allowing 3-4 minutes drying between coats.
This creates neutral base that makes chrome tips stand out. The base should look completely even and opaque.
4. Create French tip smile line (5 minutes): You have three options based on skill level.
Option A (easiest): Apply French tip guide stickers, positioning curved edge where you want the smile line.
Option B (intermediate): Use striping tape to create straight diagonal line if you prefer modern, angled French instead of curved.
Option C (advanced): Freehand paint smile line without guides. Most people find guides helpful for even, symmetrical results.
5. Apply white to tips (7 minutes): Paint white polish carefully on tip area beyond smile line. If using guides, paint over the guides. Apply two thin coats, allowing drying between.
If using gel white polish, cure each coat under LED lamp according to polish instructions (typically 60 seconds).
6. Remove guides (2 minutes): Carefully peel away French tip guides or tape while polish is still slightly tacky for cleanest line.
If using guides, remove them at an angle rather than straight up to prevent disturbing polish.
7. Ensure tips are completely dry (5-10 minutes): This step is critical for chrome application. Touch test tips gently—they should feel completely hard.
If using gel polish, apply no-wipe gel top coat to tips only and cure under lamp.
8. Apply chrome powder (8 minutes): Take small amount of chrome powder on eyeshadow applicator or silicone tool.
Gently rub powder onto white tips in small circular motions. The powder adheres to tacky gel top coat or, if using regular polish, to slightly textured surface. Continue rubbing until tips achieve mirror-like finish. The transformation happens quickly—within 30-60 seconds per nail.
9. Dust off excess powder (2 minutes): Use soft, dry brush or cotton pad to remove excess chrome powder from nails and surrounding skin.
Be thorough but gentle.
10. Seal entire nail (5 minutes): Apply regular top coat carefully over entire nail, including chrome tips.
Apply thin coat to avoid disturbing chrome. Wrap top coat around free edge. The top coat seals chrome and creates cohesive finish across whole nail.
11. Clean up (3 minutes): Use cleanup brush dipped in acetone to remove polish from skin. Clean edges create polished appearance.
12. Final drying (10 minutes): Allow complete drying before activities. Chrome manicures are delicate for first few hours as top coat hardens.
Troubleshooting Common Issues:
– Chrome not adhering: Ensure surface is tacky (if using gel) or slightly textured (if using regular polish). If using regular polish method, buff white tips very lightly before chrome application.
– Uneven chrome coverage: Apply more powder and rub longer. Chrome builds up gradually—patience produces better results than rushing.
– Patchy chrome effect: The white base may not be fully opaque, showing through chrome. Apply additional white coat before chrome step.
– Chrome dulling after top coat: Use very thin top coat layer and avoid overworking the brush on chrome surface.
Pro Tips:
– Chrome powder comes in various colors—silver, gold, rose gold, color-shifting. Experiment with different shades.
– Practice on single accent nail before doing full French manicure to build confidence.
– Chrome shows imperfections in base polish, so ensure white tips are smooth and even.
– This design trending on Pinterest with 2M+ saves demonstrates its popularity and visual appeal.
– Regular polish method is more forgiving for beginners than gel method.
Tutorial 3: Cozy Sweater Knit Nails (Intermediate)
This textured nail art creates 3D cable-knit appearance, perfect for winter’s cozy aesthetic. The technique requires patience and steady hand but produces impressive results that trend strongly on Instagram.
Difficulty: Intermediate
Time Required: 60-75 minutes
Estimated Cost: $15-20 for supplies
Materials Needed:
– Base coat
– Cream, beige, or mocha polish (Essie’s “Sable Collar” or Sally Hansen’s “Mocha Chocolate”)
– Same polish in small bottle or decanted for texture work
– Thin nail art brush (striping brush ideal)
– Dotting tool or toothpick
– Matte top coat
– Regular top coat (optional)
– Paper for pattern practice
Step-by-Step Instructions:
1. Practice pattern on paper (10 minutes): Before working on nails, draw cable knit pattern on paper.
The pattern consists of vertical lines with small horizontal connections and dots, creating woven appearance.
Practicing on paper builds muscle memory and confidence.
2. Prepare nails (8 minutes): Standard prep routine—cuticles, shaping, buffing, acetone cleanse.
3. Apply base coat (2 minutes): Thin base coat on all nails, 2 minutes drying.
4. Apply base color (12 minutes): Apply 2-3 thin coats of your chosen cream/mocha shade until completely opaque. This design requires solid color base with no streaking. Allow 4-5 minutes drying between coats.
5. Ensure complete drying (15 minutes): This design builds texture on top of base color. The base absolutely must be completely dry—hard to the touch—before adding texture lines. Wait minimum 15 minutes. Use hair dryer on cool setting to speed drying if needed.
6. Create cable pattern—vertical lines (8 minutes): Load thin nail art brush with polish (same color as base).
The polish should be slightly thicker consistency than for regular application—if too thin, it won’t create raised lines.
Draw two vertical lines down each nail, positioned about one-third from each side. These form the “cables.” The lines should be slightly raised from base coat.
7. Add horizontal connections (8 minutes): Draw small horizontal lines connecting the vertical cables at regular intervals, creating linked effect.
Space them approximately 2-3mm (1/8 inch) apart. These represent the knit texture’s crossings.
8. Create knit texture details (10 minutes): Using dotting tool or toothpick, add small dots or tiny bumps between the cable lines and along edges.
These details enhance the knitted texture illusion. Don’t overthink placement—irregular organic patterns look more like real fabric than precise geometry.
9. Allow texture to dry completely (15 minutes): The raised texture needs substantial drying time before top coat application.
Wait minimum 15 minutes, testing carefully to ensure texture feels hard and doesn’t deform when touched lightly.
10. Apply matte top coat (5 minutes): This step transforms the design. Matte finish creates fabric-like appearance that makes the sweater illusion work.
Apply thin, even coat of matte top coat over entire nail. Avoid overworking or going back over areas, as this can disturb texture.
11. Optional variation (2 minutes): For different look, apply glossy top coat to one or two accent nails while using matte on others.
The contrast highlights the texture differently.
Troubleshooting Common Issues:
– Pattern smudging: Base coat wasn’t completely dry. The texture polish needs hard surface to grip. Wait longer or use quick-dry base color.
– Lines too thin or not raised: Polish for texture work should be slightly thick. If your polish is thin, leave cap off for 15 minutes to thicken slightly, or use polish that’s slightly older and naturally thickened.
– Pattern not visible: The texture relies on light playing across raised lines. Ensure lighting shows the dimension, and make lines slightly thicker if needed.
– Lost texture after matte coat: Matte coat was applied too heavily. Use very thin layer, or apply second matte coat after first dries to build effect gradually.
Pro Tips:
– Cream and oatmeal shades create most authentic sweater appearance.
– This design works best on short to medium nail lengths where pattern has proper scale.
– Create different cable patterns on each hand for variety—some nails with two cables, some with three.
– The sweater nail trend (#sweaternails on Instagram: 150K+ posts) demonstrates strong community interest.
– If you find hand-painting too challenging, stamping plates with cable knit patterns exist as alternatives.
Tutorial 4: Burgundy Velvet Ombré (Intermediate)
This luxurious gradient combines two major trends—ombré technique and velvet finish—creating depth and sophistication perfect for winter elegance.
Difficulty: Intermediate
Time Required: 50-60 minutes
Estimated Cost: $20-25 for supplies
Materials Needed:
– Base coat
– Lighter burgundy polish (Essie’s “Bahama Mama”)
– Darker burgundy polish (OPI’s “Malaga Wine”)
– Makeup sponge (high-density, fine-texture)
– Velvet powder OR matte top coat
– Regular top coat (optional)
– Striping tape or liquid peel-off tape for skin protection
– Cleanup brush
– Acetone
– Paper plate or palette
Step-by-Step Instructions:
1. Protect surrounding skin (5 minutes): Apply liquid peel-off tape or regular striping tape around nail edges.
Ombré technique gets messy—this protection saves cleanup time. If you don’t have liquid tape, petroleum jelly around cuticles works alternatively.
2. Prepare nails (8 minutes): Complete standard prep routine.
3. Apply base coat (2 minutes): Thin base coat, allow 2 minutes drying.
4. Apply lighter burgundy base (10 minutes): Apply two coats of lighter burgundy shade, allowing 3-4 minutes between coats.
This creates base that helps ombré colors show better. Ensure complete opacity.
5. Let base dry completely (8 minutes): Ombré technique involves dabbing, which can disturb undried polish. Wait until base feels completely dry to touch.
6. Prepare sponge (2 minutes): Cut makeup sponge into small rectangular pieces (approximately 2.5cm x 1.25cm or 1 inch x 1/2 inch). Each piece does several nails before needing replacement.
7. Create gradient on sponge (3 minutes): On paper plate or palette, paint horizontal stripe of lighter burgundy, then immediately paint darker burgundy stripe next to it with slight overlap. The two colors should touch and blend slightly where they meet.
8. Dab ombré onto nail (12 minutes): Press sponge onto nail with light bouncing motion, starting from cuticle area.
Position the gradient so lighter shade appears near cuticle and darker shade at tip. Bounce the sponge rather than dragging to avoid streaking.
Lift sponge and press again 2-3 times on same nail, refreshing sponge colors as needed. The gradient builds up through multiple applications.
9. Build intensity (8 minutes): Apply the sponging process 2-3 times per nail for opacity and smooth gradient transition.
Allow 2 minutes drying between applications. The gradient should transition smoothly from lighter at base to darker at tips.
10. Remove skin protection (2 minutes): Peel away liquid tape or striping tape carefully. Clean any remaining polish on skin with acetone and cleanup brush.
11. Apply velvet finish (5 minutes): Two options exist.
Option A (more dramatic): While nails are still slightly tacky, gently pat velvet powder over nails using eyeshadow applicator. Dust off excess after 2 minutes. Option B (easier): Allow nails to dry completely, then apply matte top coat. Both create velvet effect, with powder providing more intense texture.
12. Optional sealing (3 minutes): For longer wear, apply very thin layer of regular top coat over velvet finish.
This reduces the matte effect slightly but increases durability from 5-7 days to 10-12 days.
Troubleshooting Common Issues:
– Harsh color transition: Blend more at the boundary between colors. Dab sponge more times with lighter pressure. Use higher-density sponge for smoother gradients.
– Sponge texture visible: The sponge texture showing through means either polish was too dry before dabbing or sponge is too coarse.
Use finer-textured sponge (beauty sponges work better than craft sponges). Refresh polish on sponge more frequently.
– Velvet powder not adhering: Apply while polish is slightly tacky but not wet. If powder still doesn’t stick, use gel top coat which remains tacky until sealed.
– Uneven color intensity: Some nails received more layers than others. Consistency matters—give each nail same number of sponge applications.
Pro Tips:
– Wet makeup sponge slightly and squeeze dry before use—this prevents sponge from absorbing too much polish.
– Create custom gradient with any two colors. Try navy to light blue, brown to cream, or pink to burgundy.
– Vertical gradient (side to side) creates different effect than traditional base-to-tip gradient.
– “Velvet nails up 40% in searches for winter 2025” according to trend data, making this technique very current.
– This design photographs beautifully in natural lighting where velvet texture shows most clearly.
Tutorial 5: Minimalist Winter Line Art (Beginner-Intermediate)
Simple line art creates sophisticated winter nails perfect for professional environments. This design builds artistic confidence while producing wearable results.
Difficulty: Beginner-Intermediate
Time Required: 35-45 minutes
Estimated Cost: $15 for supplies
Materials Needed:
– Base coat
– Nude, cream, or white base polish (OPI’s “Bubble Bath” or Essie’s “Blanc”)
– Fine nail art brush (size 0 or 00) OR striping brush
– Black, dark grey, or brown polish/liner for art
– White polish for snow details (optional)
– Top coat
– Paper for practice
– Toothpick for corrections
Step-by-Step Instructions:
1. Practice designs on paper (10 minutes): Sketch simple winter motifs on paper: single branch with small twigs, geometric triangle mountains, abstract snowflake outlines, simple trees. These simple forms suit minimalist aesthetic. Practice until your hand feels steady and movements feel natural.
2. Prepare nails (8 minutes): Standard prep routine.
3. Apply base coat (2 minutes): Thin base coat, 2 minutes drying.
4. Apply base color (10 minutes): Two coats of neutral base color, 3-4 minutes drying between coats. Light bases show dark line art clearly. Ensure complete opacity and smooth surface.
5. Plan design placement (2 minutes): Decide which nails receive art. Minimalist aesthetic typically uses 1-3 accent nails with art, leaving others bare. Ring finger and middle finger are popular choices.
Different designs on each art nail creates variety while maintaining cohesion.
6. Create first line art element (4 minutes): Rest your painting hand against solid surface, anchoring your pinky finger for steadiness.
Load fine brush with minimal polish—too much creates blobs. Draw first element slowly and deliberately.
For branches: draw single slightly curved line, then add 2-3 small twigs branching off.
For geometric mountains: draw 2-3 triangles overlapping. For snowflakes: draw six lines radiating from center point, then add tiny perpendicular lines to each ray.
7. Add additional elements (5 minutes): Build your design slowly. Add one element, assess whether nail needs more or feels complete.
Minimalist design embraces empty space—resist filling entire nail. One or two simple elements per nail creates sophistication.
8. Optional snow dots (2 minutes): Using white polish on dotting tool or toothpick tip, add few tiny white dots representing snow around art.
Keep these minimal—3-5 dots maximum per nail.
9. Correct mistakes immediately (2 minutes): If a line goes wrong, dip toothpick in acetone and carefully remove the mistake while polish is wet.
Wait for area to dry, then attempt again. Imperfect lines often add to organic, hand-drawn charm of minimalist art.
10. Allow art to dry completely (10 minutes): Line art is thin and dries relatively quickly, but wait full 10 minutes to ensure no smudging when applying top coat.
11. Apply top coat carefully (4 minutes): Apply thin top coat over entire nail, being careful not to drag brush across line art which could blur it. Allow brush to glide gently. Wrap free edge with top coat.
12. Final drying (10 minutes): Allow complete drying before activities.
Troubleshooting Common Issues:
– Shaky lines: Rest hand on stable surface. Anchor painting hand’s pinky on table or other hand. Work slowly—speed causes wobbling. Practice on paper more to build confidence.
– Design too busy: Minimalism requires restraint. If design looks crowded, you’ve added too many elements. Start over or simplify by removing elements with acetone before they dry.
– Lines too thick: Too much polish on brush. Wipe brush against bottle neck to remove excess. Thin lines create delicacy that defines minimalist aesthetic.
– Art smudging during top coat: Art wasn’t completely dry. Wait longer between art and top coat steps. Apply top coat with lighter touch.
Pro Tips:
– Black line art on white base creates maximum contrast for striking minimalist aesthetic.
– Brown line art on nude base feels softer and more wearable for conservative environments.
– Embrace imperfection—perfect machine-like lines look less appealing than slightly organic hand-drawn lines.
– Single accent nail with art plus nine solid neutral nails creates extremely sophisticated, modern look.
– This design suits short nails particularly well since detail doesn’t need much space.
– Take inspiration from Scandinavian minimalist design aesthetics for line art ideas.
Tutorial 6: Festive Red Glitter Gradient (Beginner)
Classic holiday glitter gets sophisticated through gradient application. This technique creates party-ready nails with straightforward beginner-friendly process.
Difficulty: Beginner
Time Required: 40-50 minutes
Estimated Cost: $15-20 for supplies
Materials Needed:
– Base coat (consider peel-off base coat under glitter for easier removal)
– Red créme polish (China Glaze’s “Ruby Pumps” or Essie’s “Really Red”)
– Red or gold glitter polish (OPI’s “Gold Key to the Kingdom”)
– Makeup sponge (optional for smoother gradient)
– Top coat (need extra due to glitter texture)
– Cleanup brush
– Acetone
– Cotton pads
Step-by-Step Instructions:
1. Consider removal (2 minutes): Glitter polish notoriously difficult to remove. Apply peel-off base coat under regular base coat if you have it. This allows peeling off entire manicure when you’re ready for removal, skipping acetone soaking process.
2. Prepare nails (8 minutes): Standard prep routine.
3. Apply base coat (2 minutes): Regular base coat (or peel-off base coat followed by regular base coat), 2 minutes drying.
4. Apply red créme base (10 minutes): Two coats of red créme polish, 3-4 minutes between coats. Solid opaque base allows glitter to show properly. Red requires 2-3 coats typically for opacity.
5. Let base dry completely (10 minutes): Glitter application disturbs wet polish easily. Wait until base feels hard and completely dry.
6. Apply glitter gradient—Method 1 (Direct brush) (8 minutes): Load glitter polish brush with good amount of glitter.
Place brush at tip of nail and dab/stipple rather than stroke. Work brush backward toward middle of nail in dabbing motion, creating concentration of glitter at tips that fades as you move toward cuticle.
The glitter naturally disperses as you work backward. Apply 2-3 layers, building intensity.
7. Apply glitter gradient—Method 2 (Sponge) (10 minutes): Paint glitter polish on paper plate or palette in small rectangular shape.
Press makeup sponge into glitter, then bounce sponge onto nail tips, working backward toward cuticle.
This method creates smoother gradient than direct brush application. Refresh glitter on sponge for each nail.
8. Build glitter layers (8 minutes): Apply 2-3 layers of glitter to build intensity and smooth coverage. Allow 2 minutes between layers for drying.
The gradient should show heavy glitter at tips fading to light glitter sparkle at cuticle area.
9. Clean up surrounding skin (3 minutes): Glitter gets everywhere. Use cleanup brush dipped in acetone to remove glitter from skin.
Cotton pad wrapped around finger dipped in acetone works for larger areas.
10. First top coat application (3 minutes): Apply generous layer of top coat over all nails. Glitter creates textured, rough surface.
The first top coat layer fills valleys between glitter pieces, beginning the smoothing process. Allow to dry 5 minutes.
11. Second top coat application (3 minutes): Apply second generous top coat layer. This creates smooth, glossy surface over glitter texture.
The second coat makes crucial difference in professional appearance and wear time.
12. Final drying (10 minutes): Allow complete drying. Glitter manicures need extra drying time due to texture and multiple top coat layers.
Troubleshooting Common Issues:
– Glitter clumpy or stringy: Glitter polish too thick. Add 2-3 drops of clear polish or polish thinner to glitter bottle to thin consistency. Shake well before use.
– Uneven glitter distribution: Build glitter gradually through multiple thin layers rather than one heavy layer. Focus concentration at tips, letting it thin naturally toward cuticles.
– Rough texture even after top coat: Glitter needs more top coat layers. Apply third generous top coat layer.
Glitter manicures always feel slightly less smooth than regular polish but shouldn’t feel rough or catch on things.
– Bald spots in glitter: Glitter pieces didn’t adhere or moved when applying top coat.
While first top coat layer is still slightly wet, use toothpick to push glitter pieces back into position to fill gaps.
Pro Tips:
– Extra thick, quick-dry top coats (like Seche Vite) work particularly well over glitter.
– For easier removal without peel-off base coat: soak cotton pads in acetone, place on nails, wrap each fingertip in small piece of aluminum foil. Wait 10 minutes, then slide cotton pad and foil off nail. Glitter should come off with it.
– Gold glitter on red base creates classic holiday look. Silver or holographic glitter on red feels more modern.
– This design perfect for Christmas through New Year’s—covers entire holiday party season.
– Apply glitter to just tips (first 1/3 of nail) for more subtle effect suitable for work environments.
Tutorial 7: Navy Blue with Silver Star Accents (Intermediate)
Celestial nail art combines multiple 2025 trends—navy color, metallic accents, and celestial motifs—into one cohesive design mixing hand-painting and embellishments.
Difficulty: Intermediate
Time Required: 60-75 minutes
Estimated Cost: $20-25 for supplies
Materials Needed:
– Base coat
– Midnight navy polish (Essie’s “Midnight Cami” or OPI’s “Keeping Suzi at Bay”)
– Silver metallic polish or liner
– Fine nail art brush (size 0) or dotting tools
– Tiny star stickers or star-shaped rhinestones (optional)
– Top coat
– Tweezers (if using rhinestones)
– White polish (optional for layering under silver)
– Reference images of constellations (optional)
Step-by-Step Instructions:
1. Research constellation patterns (5 minutes): Look up simple constellation patterns like Big Dipper, Orion’s Belt, or Cassiopeia if you want authentic star placement.
Alternatively, plan random star scattering for abstract celestial look. Sketch placement plan on paper.
2. Prepare nails (8 minutes): Standard prep routine.
3. Apply base coat (2 minutes): Thin base coat, 2 minutes drying.
4. Apply navy base (15 minutes): Navy and other dark colors require 2-3 coats for complete opacity without streaking.
Apply thin coats, allowing 4-5 minutes between layers. The base should look like deep night sky—rich, dark, completely opaque.
Rushed application of dark polishes shows streaking, so patience pays off here.
5. Let base dry completely (10 minutes): Star details require completely dry base to prevent smudging navy.
Wait full 10 minutes minimum. Touch test carefully—should feel hard and non-tacky.
6. Create stars—Hand-painted method (15 minutes): Load fine brush with minimal silver polish.
For five-pointed stars: make small “X” shape, then add vertical line through center, creating five-point star shape.
Vary star sizes for visual interest—some stars larger and prominent, others tiny dots. Create constellation patterns or random placement.
Pro tip: Paint tiny white dots first, then add silver on top for brightest stars that show better on dark base.
7. Create stars—Dotting tool method (12 minutes): Using dotting tools in various sizes, create dots of silver polish representing stars.
Use largest dotting tool for prominent stars, medium for regular stars, smallest (or toothpick) for distant stars.
This method is easier than painted stars and creates charming organic look. Add 8-12 stars per nail in varying sizes, clustered more densely on accent nails.
8. Add connecting constellation lines (5 minutes, optional): Using finest brush and silver polish, draw thin lines connecting some stars to create constellation patterns. Keep these minimal and delicate—one or two constellation patterns across all nails is plenty.
9. Alternative: Apply star stickers or rhinestones (10 minutes): Using tweezers, place tiny star stickers or rhinestones in planned pattern.
For rhinestones, apply small dot of top coat where rhinestone will go, immediately place rhinestone with tweezers, press gently.
This method requires less artistic skill while creating similar effect.
10. Allow star details to dry (10 minutes): Hand-painted or dotted stars need drying time before top coat. Rhinestones need setting time to bond properly.
11. Apply top coat carefully (5 minutes): Apply thin, careful top coat over entire nail. If you used rhinestones, apply first thin coat, allow to dry, then apply second coat to fully seal rhinestones.
The top coat should cover entire surface without disturbing silver stars.
12. Final drying and inspection (10 minutes): Allow complete drying. Inspect stars to ensure all are sealed properly under top coat.
Troubleshooting Common Issues:
– Silver not visible on navy: Silver metallic polish sometimes appears dull on very dark bases. Paint tiny white dot first, then immediately paint silver over it while white is wet. The white underlayer makes silver pop dramatically.
– Stars looking messy or blobby: Too much polish on brush. Use minimal polish for small details. If star goes wrong, remove immediately with acetone on toothpick while wet, wait for area to dry, try again.
– Design too busy: Created too many stars. Celestial design benefits from restraint—negative space (dark sky) is as important as stars. 8-15 stars per nail is plenty. Remember, less is more.
– Rhinestones falling off: Rhinestones weren’t sealed properly. Ensure each rhinestone gets covered by top coat. Apply second top coat layer if any feel loose.
Pro Tips:
– Reference real constellation patterns for authentic look that astronomy enthusiasts will appreciate.
– Matte navy with glossy silver stars creates beautiful contrast—apply matte top coat to base nails before adding stars, then add stars without top coat for natural shine difference.
– This design works beautifully on both short and long nails.
– Create Milky Way effect by densely clustering tiny silver dots across 1-2 nails while keeping others sparse.
– This design combines multiple 2025 trends (navy, celestial, metallics), making it very current and photograph-worthy.
– The dark base makes this design particularly suitable for evening events and holiday parties.
Best Winter Nail Polish Colors
Icy Blues
- OPI “Did You See Those Mussels?” – Baby blue shimmer, $11.50
- Essie “Borrowed & Blue” – Milky pale blue, $9
- Sally Hansen “Pacific Blue” – Bold cobalt, $5
Burgundy & Wine
- Essie “Bordeaux” – Classic burgundy, $9
- OPI “Malaga Wine” – Deep wine with purple tones, $11.50
- Zoya “Toni” – 10-free formula, $10
- Sinful Colors “Merlot” – Budget option, $2.50
Mocha & Browns
- Sally Hansen “Mocha Chocolate” – Milk chocolate brown, $5
- Essie “Sable Collar” – Greyed taupe, $9
- OPI “Chocolate Moose” – Rich dark chocolate, $11.50
Navy & Deep Blues
- Essie “Midnight Cami” – True midnight navy, $9
- OPI “Keeping Suzi at Bay” – Deep blue-grey, $11.50
Neutrals & Nudes
- OPI “Bubble Bath” – Cult-favorite sheer pink, $11.50
- Essie “Fiji” – Soft pale pink, $9
- Sally Hansen Natural Collection – Multiple skin tone shades, $5
Metallics & Classics
- Essie “No Place Like Chrome” – Silver metallic, $9
- China Glaze “Golden Enchantment” – Rich gold, $7.50
- OPI “Alpine Snow” – Pure white, $11.50
- Essie “Really Red” – Classic blue-toned red, $9
Specialty Finishes & Effects
Chrome Powders
- Born Pretty Chrome Powder – Multiple colors, $4.99 (50+ uses)
- Makartt Set – 6 colors with applicators, $15
Matte/Velvet
- Seche Vite Matte Top Coat – Professional favorite, $10
- Essie “Matte About You” – Reliable alternative, $9
- Born Pretty Velvet Powder – True fabric texture, $5
Glitter
- OPI “Gold Key to the Kingdom” – Dimensional gold, $11.50
- China Glaze “Champagne Kisses” – Sophisticated sparkle, $7.50
Magnetic/Holographic
- Madam Glam Magnetic Collection – Cat-eye effect, $15
- ILNP “Birefringence” – Ultra-holographic, $10-12
- Cirque Colors Holo Collection – Strong effects, $13
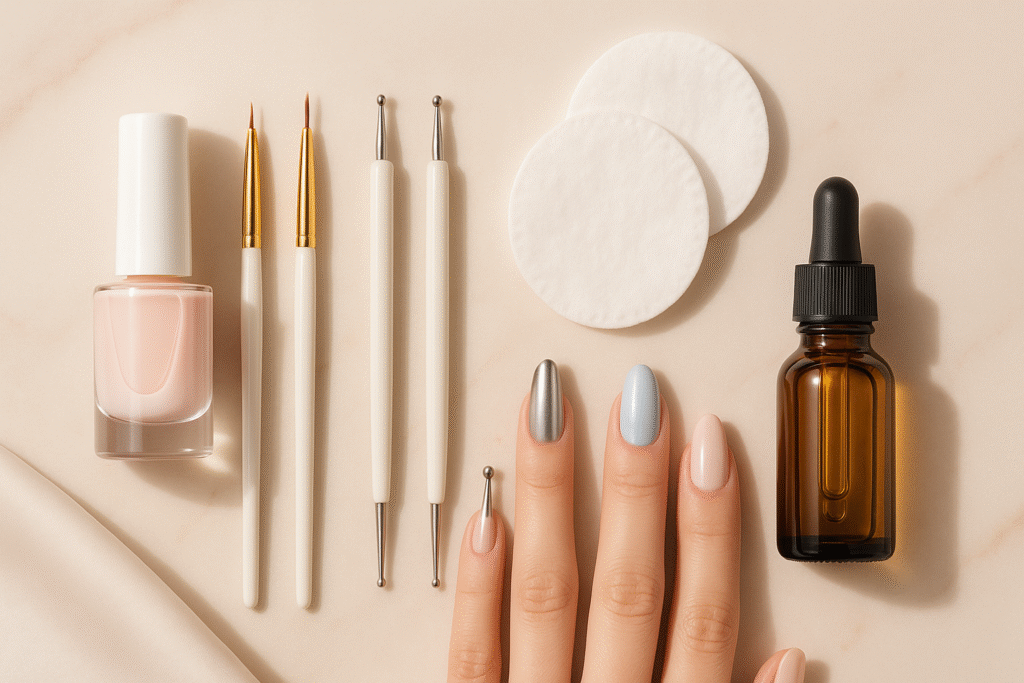
Essential Tools
Basic Kit ($25):
- Detail brushes (size 0-000), $12.99 set
- Dotting tools, $6
- Cleanup brush, $3-6
- Nail buffer, $2-5
- Base coat + top coat, $20-25
Nice to Have:
- Stamping kit, $15-25
- Chrome applicator, $2-5
- Striping brush, $5
- Rhinestones set, $10
- French tip guides, $3-6
Best Base & Top Coats
Base Coats
- OPI Natural Nail Base – Strengthening formula, $11.50
- Essie First Base – Budget-friendly, $9
- Orly Anchor Base – Prevents chipping, $10
Top Coats
- Seche Vite Dry Fast – Gold standard, dries in 2 minutes, $9-10
- Essie Good to Go – Fast-dry alternative, $9
- INM Out the Door – Budget option, $7.50
Winter Nail Care Essentials
Cuticle Oils
- CND SolarOil – Industry standard, $9
- OPI ProSpa Oil – Luxury option, $19
- Revlon Pen – Portable budget option, $5
Hand Creams
- Neutrogena Norwegian Formula – Intense moisture, $7
- Burt’s Bees Shea Butter – Natural formula, $10
Nail Strengtheners
- OPI Nail Envy – Most recommended, $15
- Sally Hansen Hard as Nails – Budget choice, $5
Winter Care Routine
Daily (2 minutes)
- Morning: Apply cuticle oil after washing, follow with hand cream
- Throughout day: Hand cream after each wash
- Evening: Generous oil + rich cream before bed
Weekly (20 minutes)
- File nails in one direction
- Push back cuticles (never cut)
- Apply strengthening treatment if needed
- Refresh top coat every 2-3 days
Application Tips for Longevity
- Perfect prep – Push cuticles, buff, dehydrate with alcohol
- Quality base coat – Creates smooth surface, prevents staining
- Thin coats – Two thin beats one thick
- Cap free edges – Sweep across tips with every layer
- Wait between coats – 3-4 minutes minimum
- Generous top coat – Apply slightly thicker, cap edges again
- Refresh regularly – New top coat every 2-3 days adds 3-4 days wear
- Wear gloves – For water, chores, cold weather
- Avoid water exposure – Minimize soaking time
- Don’t use nails as tools – Use proper implements
Winter Weather Effects
Cold air reduces humidity to 10-20%, causing:
- Nails lose moisture, becoming brittle
- 15-20% slower growth
- Temperature fluctuations crack polish
- Cuticles dry and crack
- Glove friction wears tips faster
Solutions: Double moisturizing frequency, wear protective gloves, refresh top coat often, choose darker colors that hide chips.
Color Guide by Skin Tone
Fair/Light Skin
Cool undertones: Icy blues, soft pinks, deep burgundy, silver metallics, blue-based reds
Warm undertones: Mocha browns, warm nudes, coral reds, champagne/rose gold, cream whites
Avoid: Very orange tones (cool), pure stark white
Medium/Olive Skin
Warm undertones: Deep burgundy, chocolate browns, terracotta, gold metallics, olive/forest greens
Cool undertones: Deep navy, plum, cool burgundy, rose gold Best: Jewel tones (emerald, sapphire, ruby, amethyst)
Deep/Dark Skin
All shades work, especially:
- Chrome finishes (stunning contrast)
- Deep burgundy/wine
- Rich chocolate brown
- Vibrant cobalt/navy
- White (beautiful contrast)
- Neon brights
- Holographic/iridescent
- Pure black with glitter
Tip: Deep skin carries bold colors and high contrast beautifully. Embrace chrome, bright colors, dramatic designs.
Design Ideas by Occasion
Holiday Parties
- Formal: Red velvet + gold foil, ruby burgundy + rhinestones
- Casual: Classic red + white snowflakes, green plaid accents
- Office: Burgundy velvet, navy + subtle silver stars
New Year’s Eve
- Silver chrome on stiletto/almond
- Holographic nails
- Gold + black geometric
- Champagne glitter gradient
Work-Appropriate
- Conservative: Mocha ombré, nude shimmer, taupe + rose gold
- Business casual: Soft pink + snowflake, minimal line art
- Creative: Bold icy chrome, burgundy velvet, cobalt matte
Winter Weddings
- Brides: Classic French + silver glitter, nude + pearls
- Bridesmaids: Champagne chrome, blush pink + snowflake
- Guests: Burgundy velvet, navy + pearls, soft pink + rhinestones
Top 2025 Trends
- Icy blue chrome – Leading in 40% of trend reports
- Velvet/matte burgundy – Searches up 40% since October
- Snowflake accents – Classic, 35% of winter searches
- Minimalist line art – Instagram/Pinterest favorite
- Aurora/aura effects – New trend gaining momentum
- Short squoval shape – Most popular length (1/8-1/4 inch beyond fingertip)
Quick FAQs
How long do winter designs last?
Regular polish: 7-14 days with proper care Gel polish: 2-4 weeks
Can I do designs on short nails?
Yes! Short nails are trending for 2025. Best designs: minimalist line art, single snowflakes, chrome French, glitter gradients, solid matte colors.
Best removal for glitter/gel?
Glitter: Soak cotton in acetone, wrap in foil 10 minutes, gently scrape
Gel: File top coat, soak in acetone 15 minutes, push off gently with orange stick. Never peel!
How to last through holidays?
- Apply Dec 22-23 for Christmas through New Year’s
- Choose durable designs (glitter gradients, chrome, darker colors)
- Refresh top coat every 2 days
- Apply cuticle oil 2-3x daily
- Wear gloves for chores
Are stickers/press-ons reliable?
Stickers: 5-10 days if sealed properly with top coat
Press-ons: 3-7 days (adhesive tabs), 10-14 days (glue) Both are beginner-friendly and affordable ($2.50-15)
DIY vs Salon costs?
DIY: $30-60 initial investment, $5-15 per manicure after
Salon: $35-50 basic, $50-80 gel + art, $80-120 complex
Break-even: After 2-3 DIY manicures
Annual savings: $400-800 with DIY
When to start winter designs? Late November through early March Peak season: December-January Apply holiday designs Dec 22-23 for maximum coverage
Can I mix trends?
Yes! Popular combos:
- Icy blue + chrome + snowflakes
- Burgundy + velvet + gold accents
- Minimalist line art + chrome tips
- Navy + silver stars + matte finish
Rule of 3: Max three trend elements together
Do I need special tools?
Basic designs: Just polish, base/top coat Intermediate: Add detail brush ($13), dotting tools ($6), sponge ($2.50) Advanced: Chrome powder ($5), stamping kit ($15-25), gel system ($20-60+)
Starter kit under $25: Base coat, top coat, 2-3 colors, cleanup brush, buffer, dotting tool OR detail brush
Common Mistakes to Avoid
Prep: Skipping base coat, not pushing cuticles, not dehydrating nails
Application: Thick coats, not capping edges, rushing between coats
Design: Overcrowding elements, stickers too close to cuticles
Care: Skipping top coat, not refreshing, neglecting cuticle oil, using nails as tools
Removal: Peeling polish/gel (damages nails!), not moisturizing after
Winter 2025 offers incredible nail art opportunities. Start with one tutorial that matches your skill level, establish a moisturizing routine, and experiment with colors that flatter your skin tone. Your perfect winter nails await!
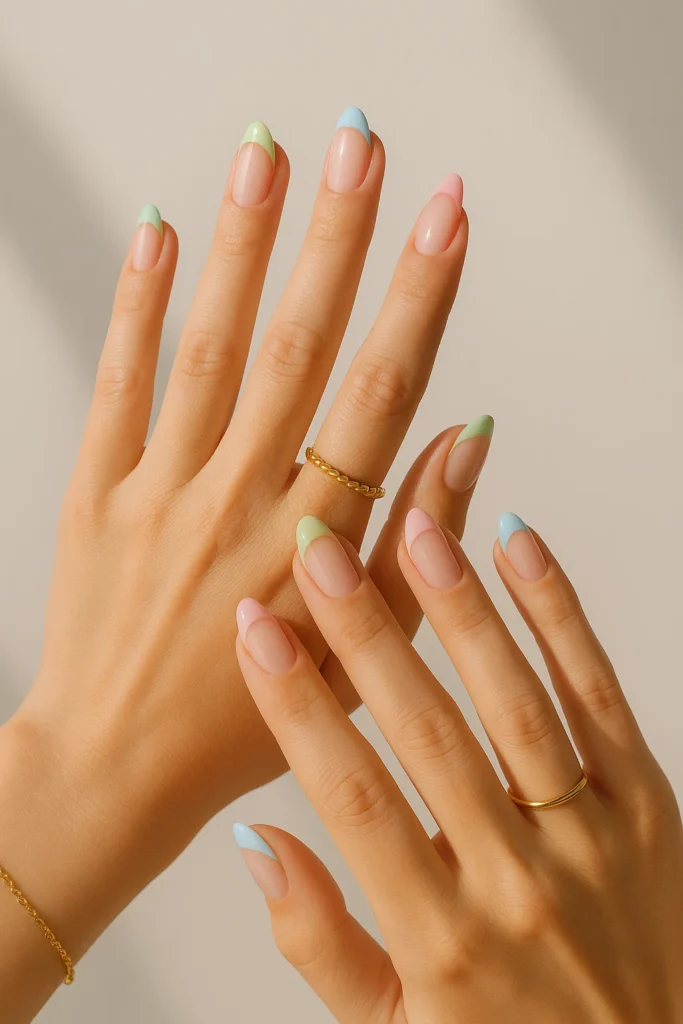
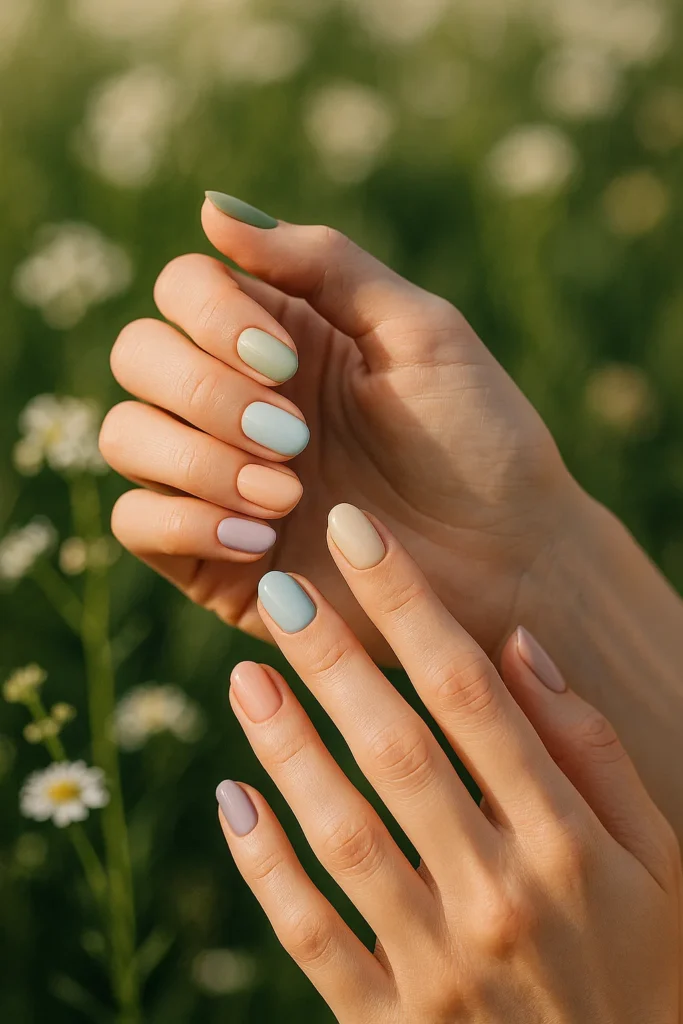
Pingback: Holiday Nail Art: 20+ Festive Designs for Every Celebration (2025 Guide)
Pingback: Cozy Winter Nails: 35+ Inspiring Designs, Trends & DIY Guide for 2025