Summer 2025 is here, and beach nail designs are absolutely taking over Instagram, Pinterest, and TikTok! There’s something magical about ocean-inspired nail art that captures those carefree coastal vibes—whether you’re actually heading to the beach or just dreaming about it from your desk.
Beach nail designs are more than just pretty polish. They’re about bringing that seaside energy to your fingertips with gorgeous ocean blues, playful palm trees, shimmering mermaid scales, and delicate seashell accents.
These looks range from subtle wave French tips to elaborate 3D coral reef masterpieces.
The best part? You don’t need a plane ticket or a salon appointment to rock these looks.
In this comprehensive guide, I’m sharing 30+ stunning beach nail designs organized by theme, the hottest 2025 trends you need to know, step-by-step DIY tutorials for beginners, and expert product recommendations.
Plus, I’ll show you how to make your beach manicure last through actual beach activities—because what’s the point of gorgeous nails if they chip after one swim?
I’m Ann from Nail Blog 2025, and I’ve been testing and perfecting these beach nail designs all spring.
Whether you’re a total beginner or an experienced nail art enthusiast, this guide will help you create salon-quality beach nails right at home. Let’s dive in!
What Are Beach Nail Designs?
Beach nail designs are nail art styles inspired by coastal and ocean themes, featuring motifs, colors, and textures that evoke the seaside aesthetic. Think of them as wearable vacation vibes that capture everything you love about the beach—from crashing waves to tropical sunsets.
The magic of beach nails comes from their signature elements. You’ll see ocean-inspired color palettes like turquoise blues, coral pinks, sandy beiges, and sea glass greens. The designs incorporate coastal motifs that instantly transport you to the shore, and they often feature special finishes like shimmer, chrome, or glossy wet look effects that mimic water.
Key design elements that define beach nail art:
- Ocean waves and water effects (gradients, ripples, foam)
- Seashells, starfish, and sand dollars
- Palm trees and tropical foliage
- Mermaid scales and iridescent finishes
- Nautical elements like anchors, stripes, and sailor motifs
- Beach landscapes featuring sunsets, horizons, and sandy shores
- Marine life including sea turtles, fish, and jellyfish
- Tropical fruits and florals (pineapples, hibiscus, citrus)
What makes beach nail designs so popular is their incredible versatility. They’re perfect for summer vacations, beach weddings, pool parties, and festivals—but they also work as everyday wear when you want to channel those sunny, positive vibes. According to Pinterest trend data, searches for “beach nails” spike 340% from May through August, making them one of summer’s most sought-after nail art styles.
Beach nail art has evolved significantly over the years. What started as simple blue polish has transformed into intricate 3D art, chrome effects, and detailed hand-painted scenes. In 2025, we’re seeing techniques that were once salon-exclusive becoming totally achievable at home with the right tools and guidance. Read more about winter nail designs.
The beauty of this trend is that it works for everyone—all ages, all skill levels, and all occasions. You can go as subtle or as bold as you want, from a single tiny shell on your ring finger to full-coverage mermaid scales on every nail.
2025 Beach Nail Design Trends: What’s Hot This Summer
This summer is all about bold color choices, textured finishes, and creative techniques that make your beach nails stand out.
After tracking nail artists and beauty influencers for months, I’ve noticed some clear winners emerging as the must-try trends for 2025. Check the latest nail trends 2025.
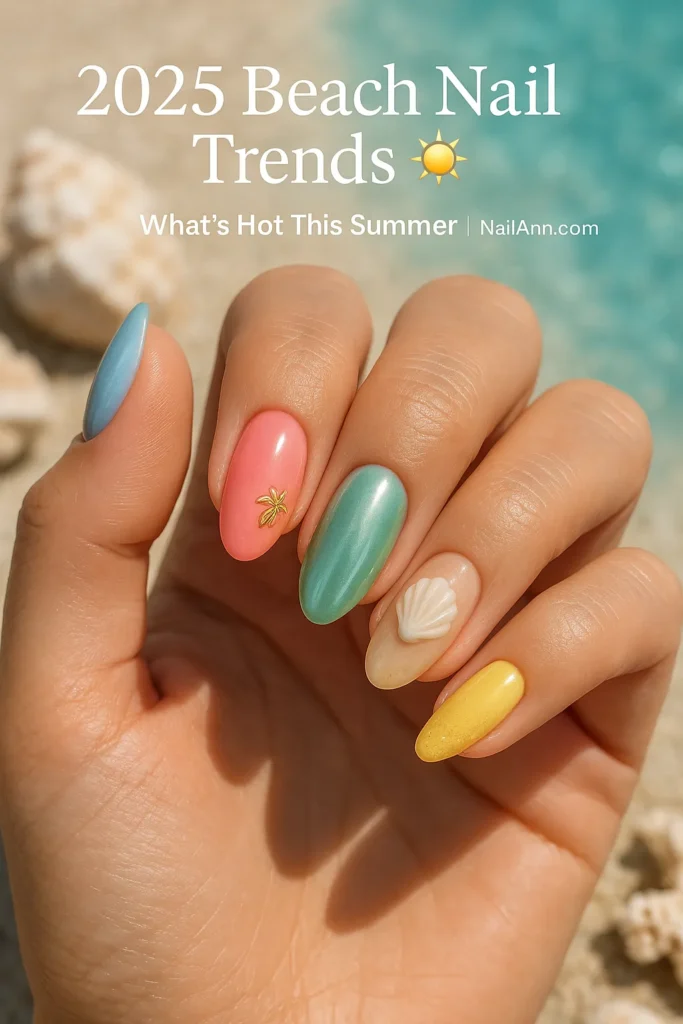
Trending Color Palettes for 2025:
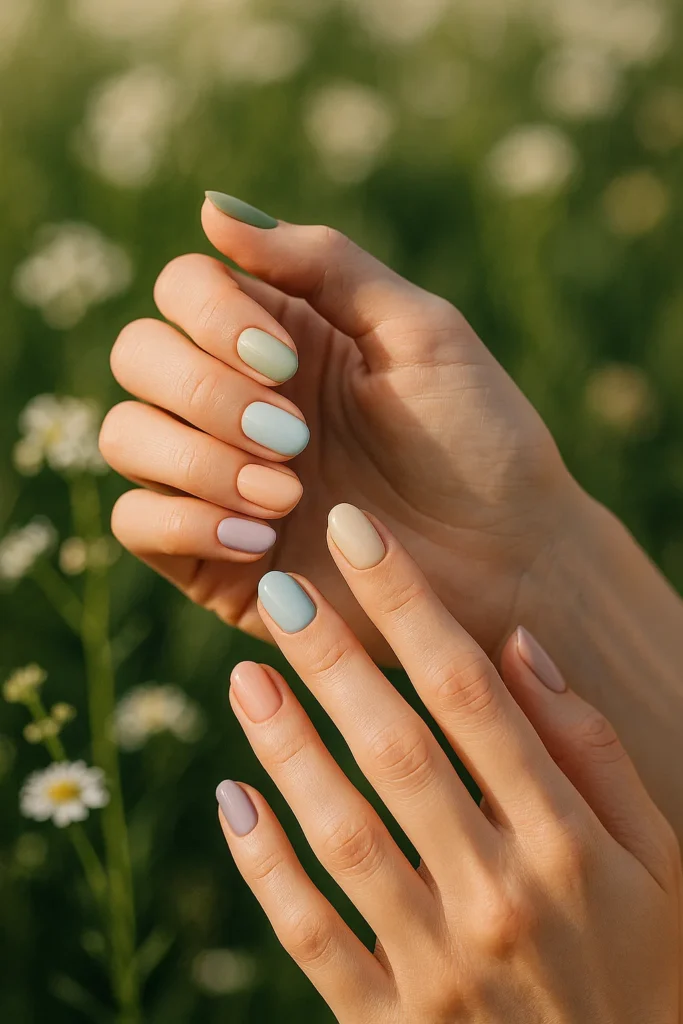
- Pastel blues and seafoam greens – tranquil tones like sea glass
- Coral pinks and tropical oranges – vibrant, sun-kissed shades
- Sandy beiges and neutral nudes – subtle, elegant bases
- Citrus brights – lemon yellow, lime green, tangerine
- Marine greens and deep teals – rich, jewel-toned ocean colors
Popular Techniques & Finishes Taking Over 2025:
- Chrome overlays – metallic seafoam, holographic silver, iridescent pearl
- Glazed and aura nails – that viral finish translates perfectly to beach themes; learn about glazed/aura variations
- Gradient and ombré – sharper transitions and unexpected combos
- Glass and jelly nails – translucent, glossy sea glass effects
- 3D embellishments – shells, textured waves, caviar beads
- Minimalist sparkle – subtle glitter and negative space
Must-Have Motifs You’ll See Everywhere:
- Ocean waves with 3D foam effects
- Pearl-effect shells and starfish with iridescent shimmer
- Tropical fruits like pineapples and watermelon
- Delicate palm tree accents
- Mermaid scales with duochrome shimmer
Top nail artists on Instagram are showing these designs racking up millions of impressions. The almond and oval nail shapes are most popular for beach designs in 2025 because they provide the perfect canvas for detailed art while still being practical for beach activities.
What I love about this year’s trends is the mix of bold and subtle. You can go full maximalist with chrome mermaid scales and 3D shells, or keep it quietly chic with a sandy nude base and one tiny starfish accent. Both are equally on-trend!
30+ Stunning Beach Nail Design Ideas for 2025
Okay, here’s where the fun really begins! I’ve curated over 30 beach nail designs organized by theme so you can easily find your perfect match. Each design includes a description, suggested color palette, and difficulty level to help you choose what works for your skills and style.
Save your favorites, screenshot for your next salon visit, or use these as inspiration to create your own custom beach nail masterpiece. Let’s explore!
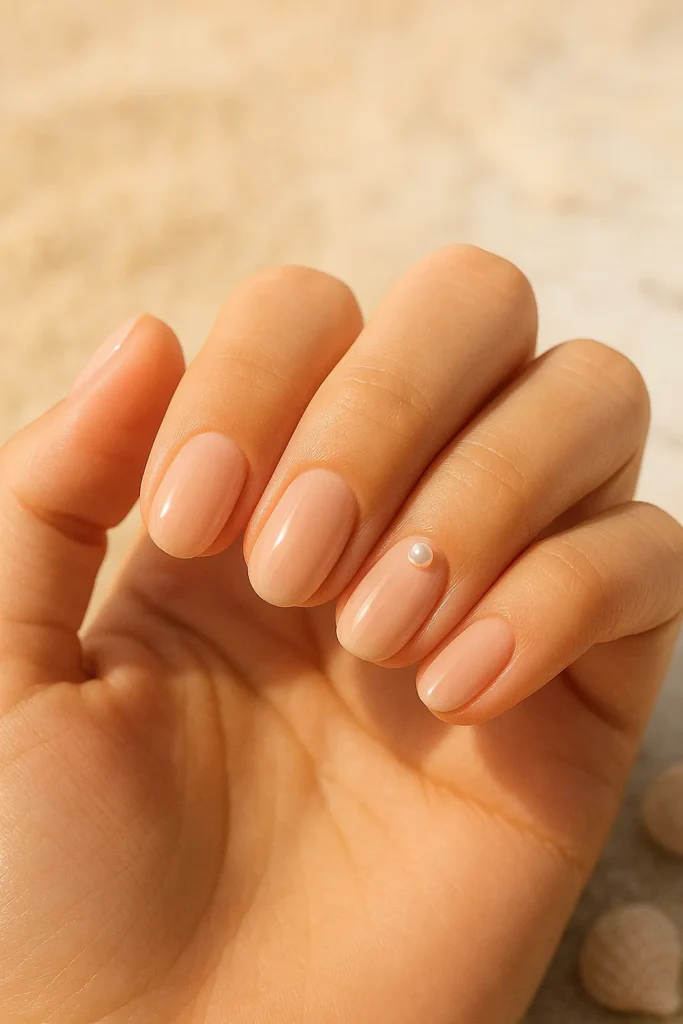
Minimalist Beach Nails: Subtle Coastal Elegance
If you love the beach aesthetic but prefer understated elegance, these minimalist designs are perfect. They’re professional enough for the office, easy enough for beginners, and sophisticated enough for any occasion. Learn more about simple nail designs.
1. Subtle Wave French Tips
Colors: White, baby blue, nude base / Difficulty: Beginner
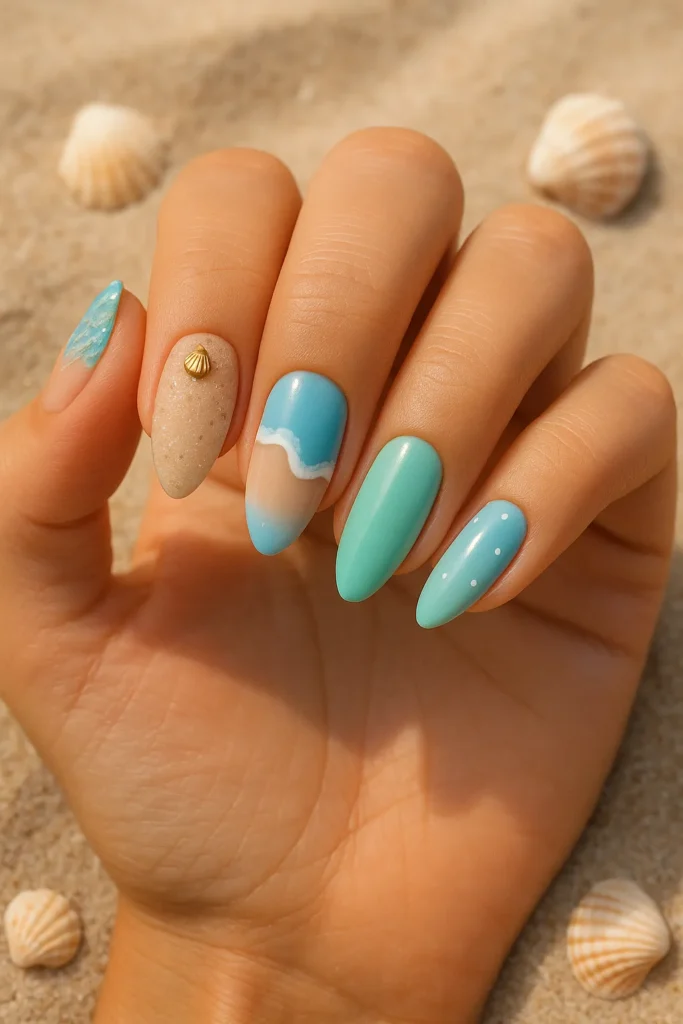
2. Tiny Seashell Accent Nails
Colors: Nude, pearl white, soft pink / Difficulty: Beginner
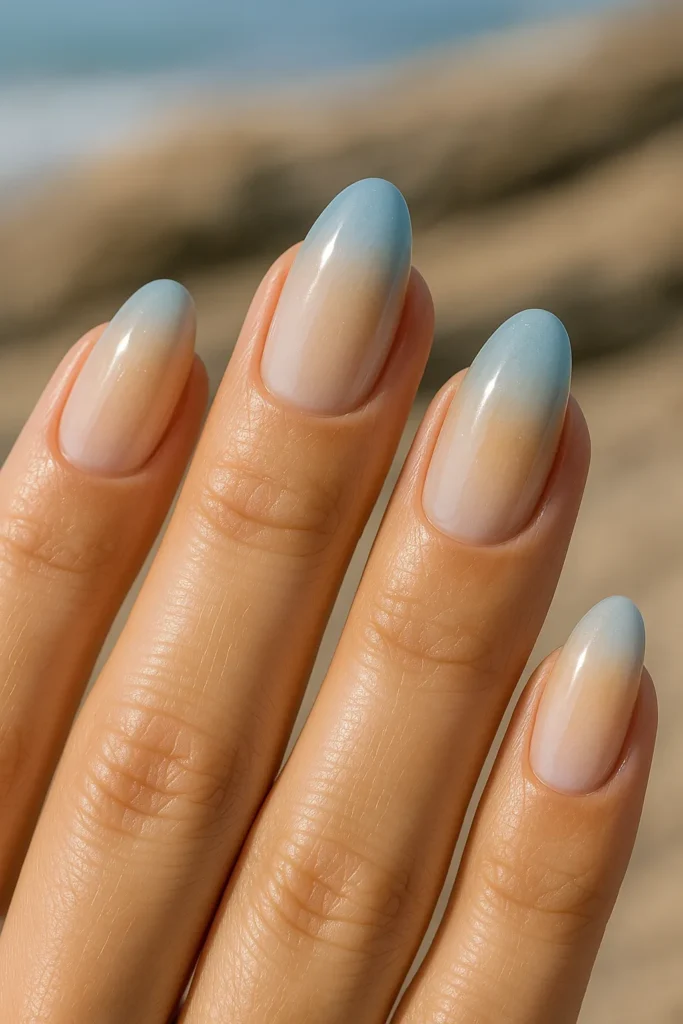
3. Sand & Sea Gradient
Colors: Beige, pale blue, cream / Difficulty: Intermediate
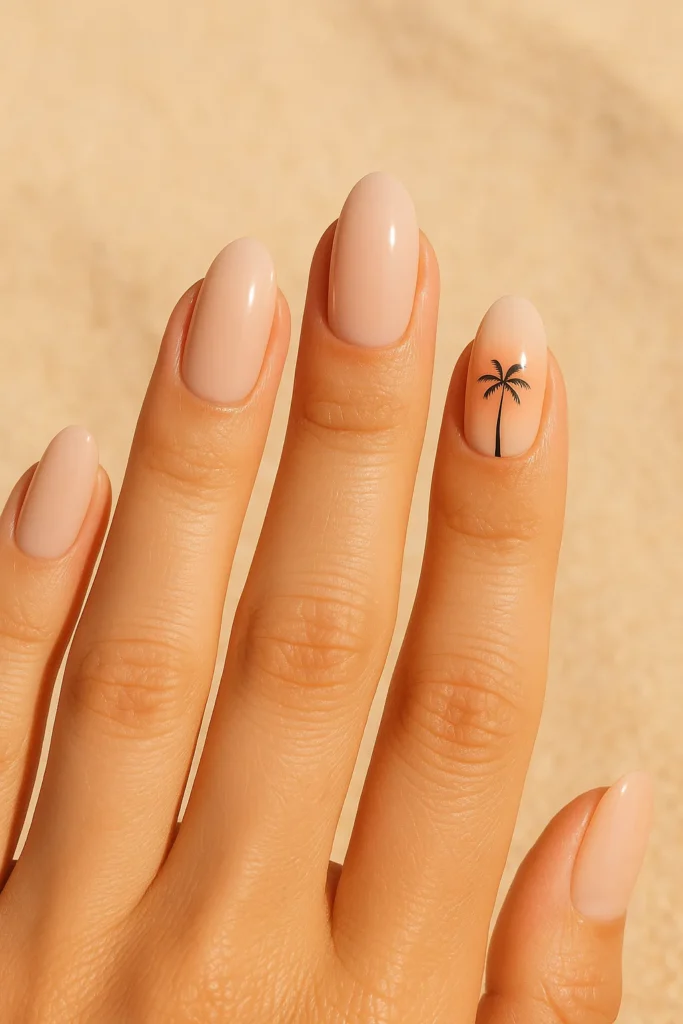
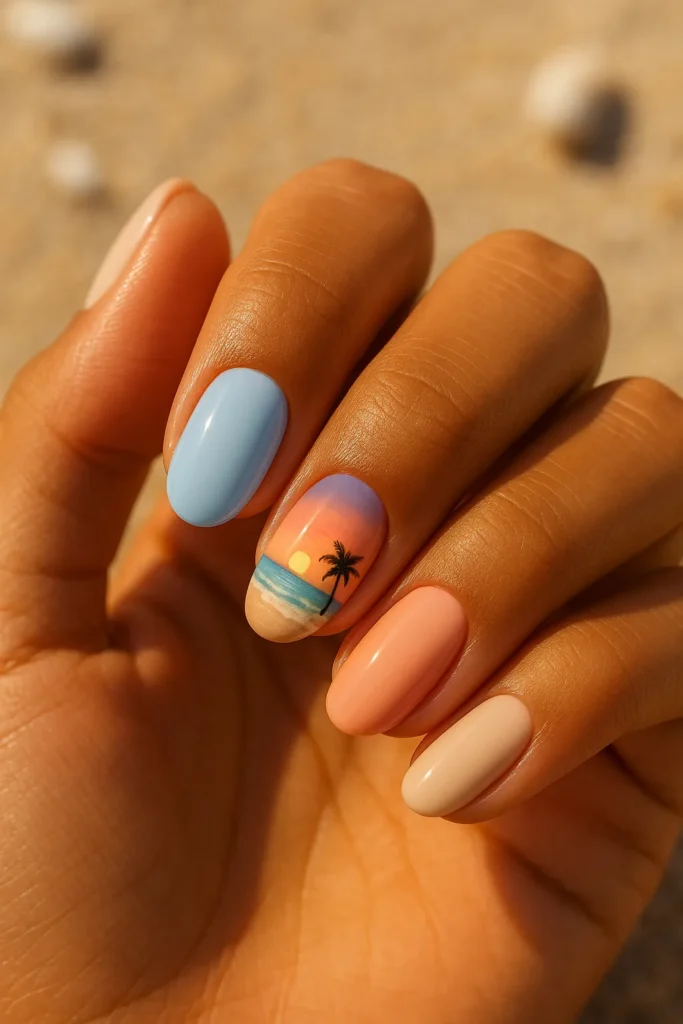
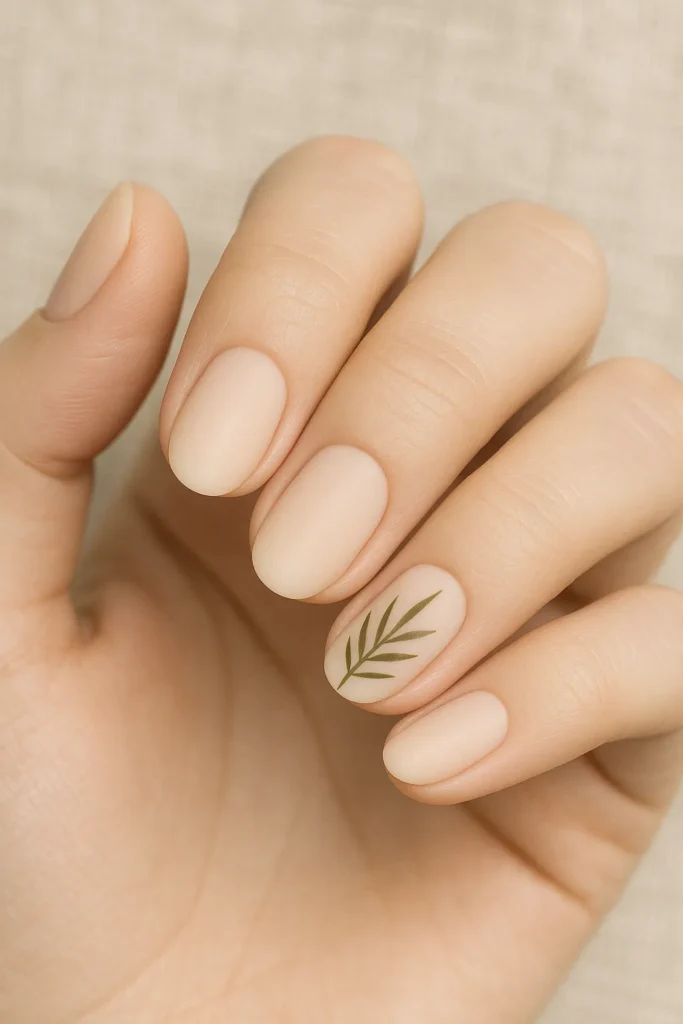
4. Single Palm Tree Minimalist
Colors: Nude, dark green or black, optional sunset peach / Difficulty: Intermediate
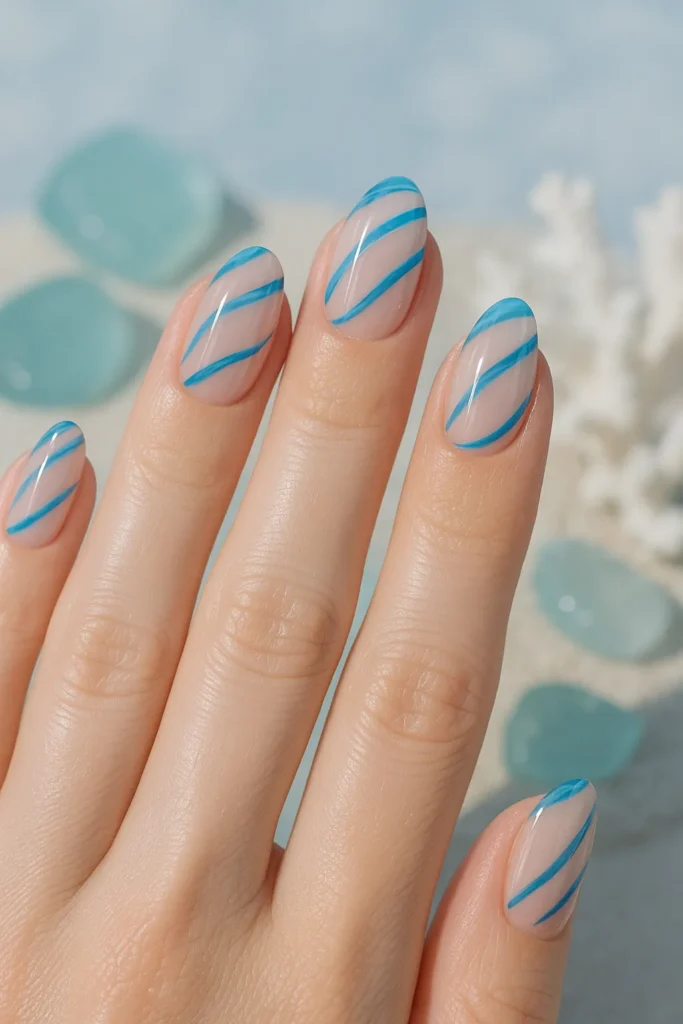
5. Negative Space Waves
Colors: Clear base, ocean blue / Difficulty: Intermediate
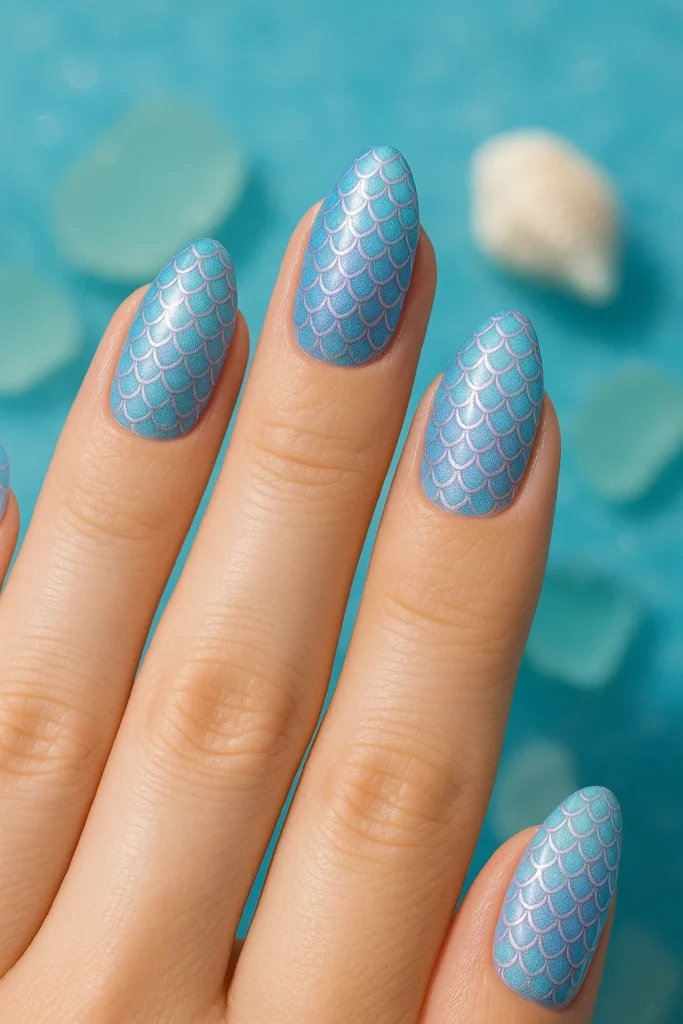
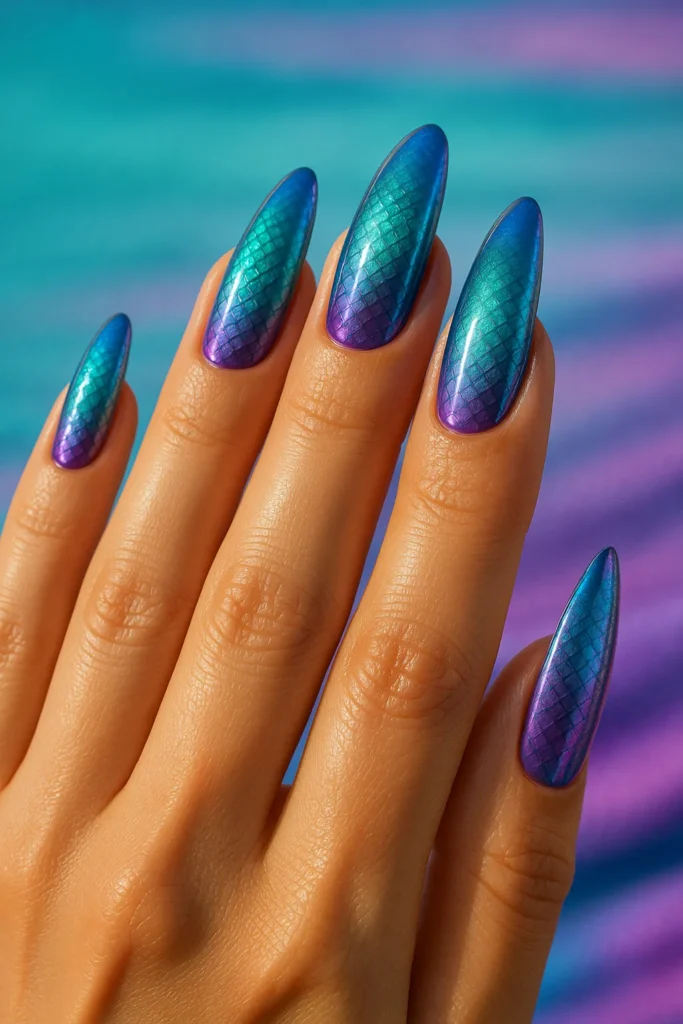
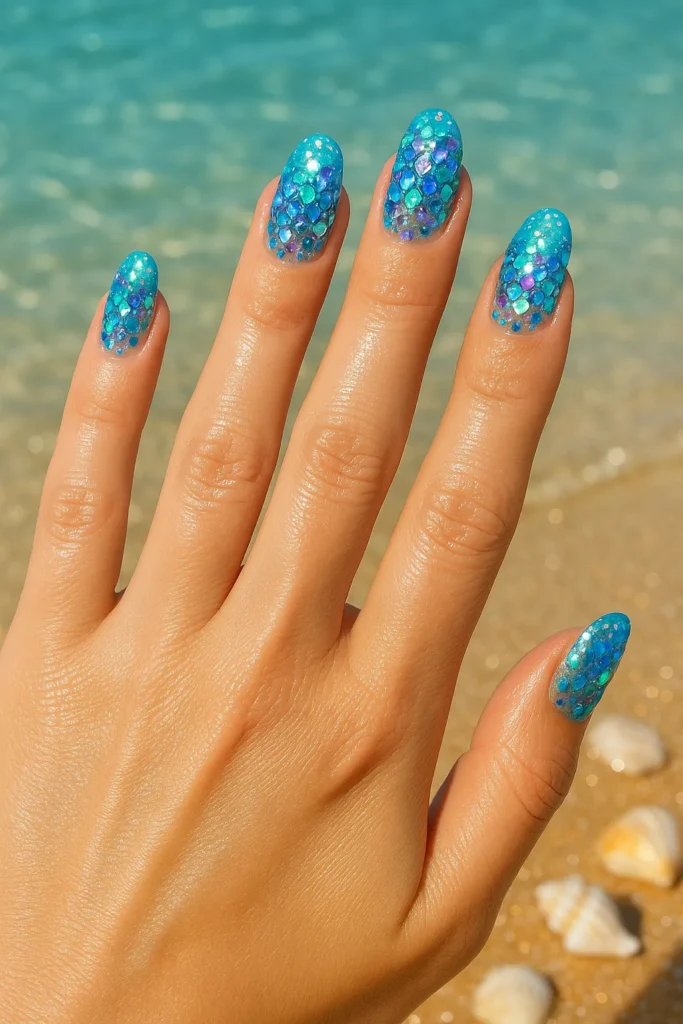
Mermaid-Inspired Beach Nails: Mystical Ocean Magic
Channel your inner mermaid with iridescent, shimmery designs that feature scale patterns and underwater fantasy elements. Mermaid nails are perfect for making a statement at festivals, beach parties, or whenever you want to feel magical.
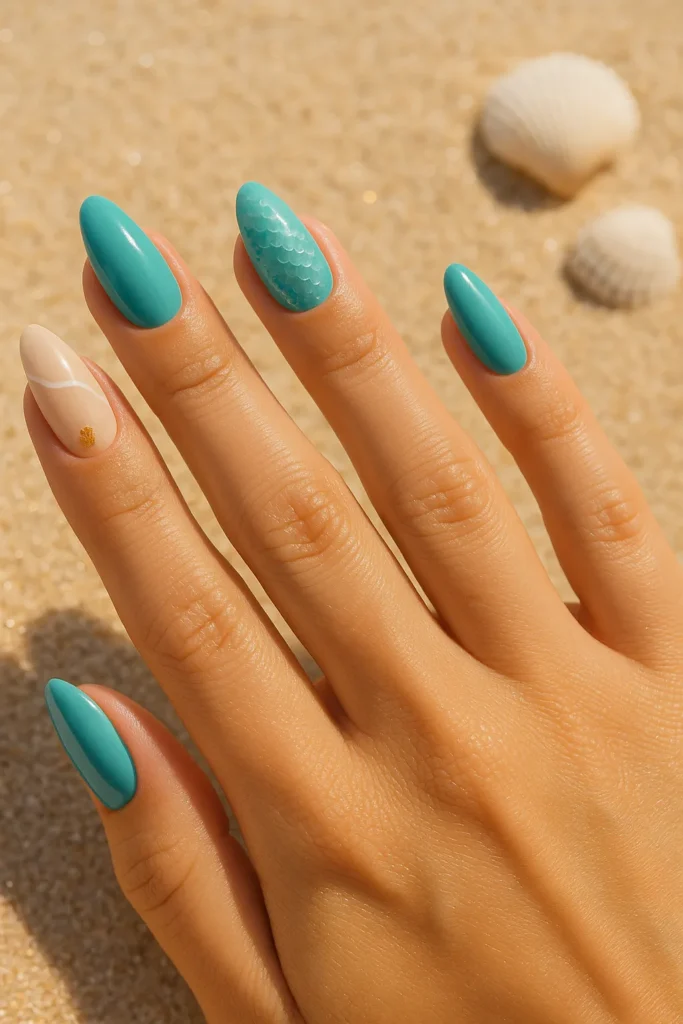
6. Classic Mermaid Scales — Teal, purple, iridescent toppers / Difficulty: Intermediate
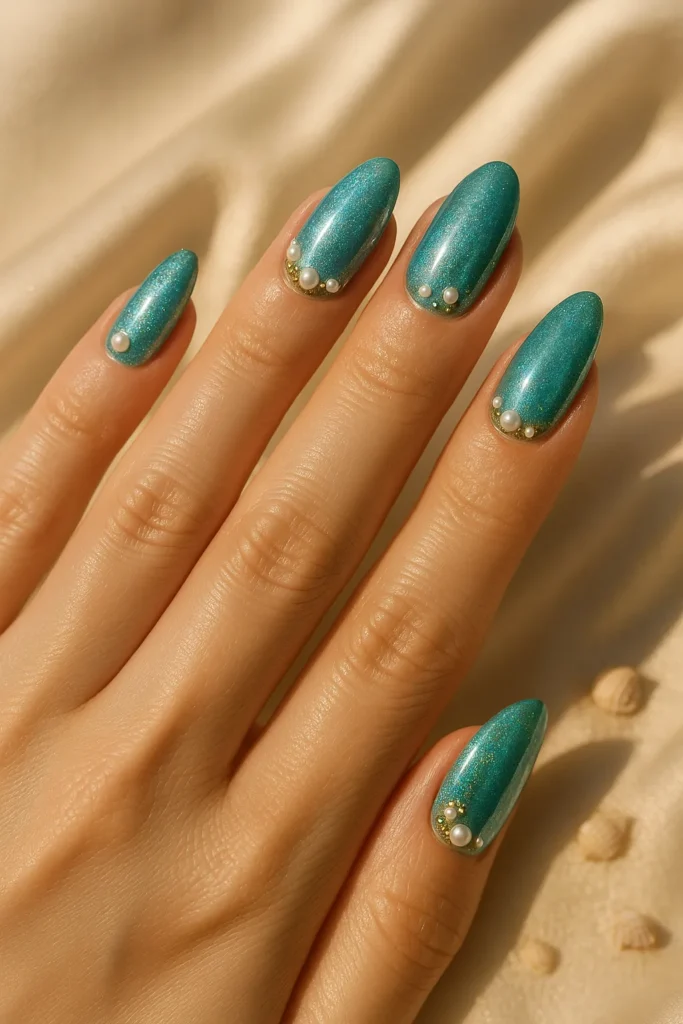
7. Pearl-Embellished Mermaid — Teal, white pearls, optional gold accents / Difficulty: Expert
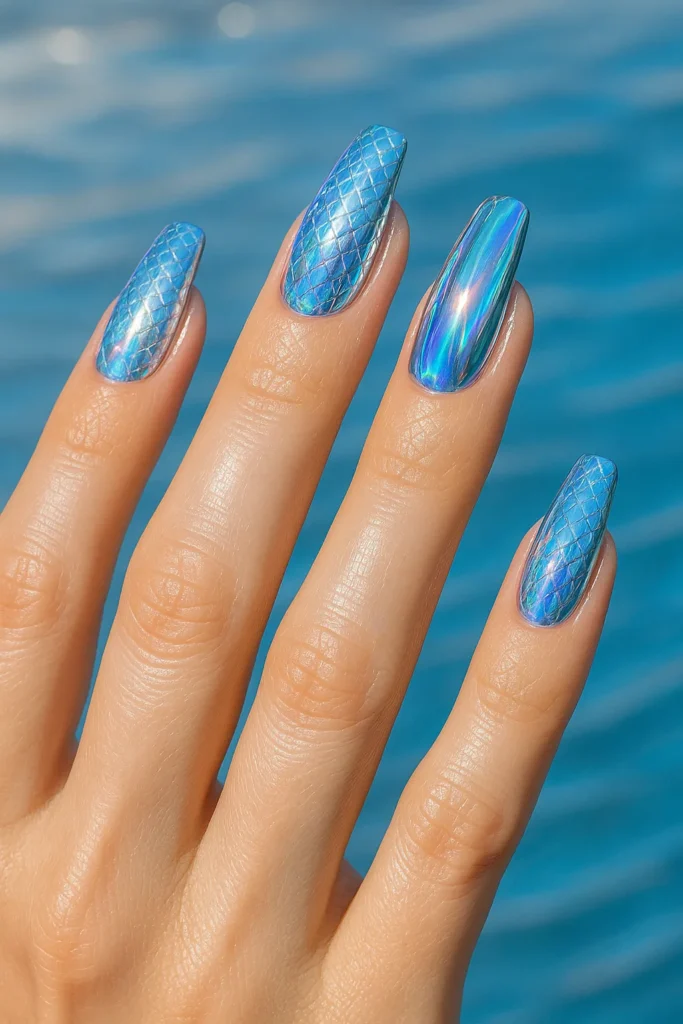
8. Holographic Ocean Scales — Holographic blue, silver / Difficulty: Intermediate
9. Ombré Mermaid Gradient — Teal to purple gradient with scale details / Difficulty: Intermediate
10. Glitter Mermaid Tail — Turquoise, chunky aqua/purple glitter / Difficulty: Beginner
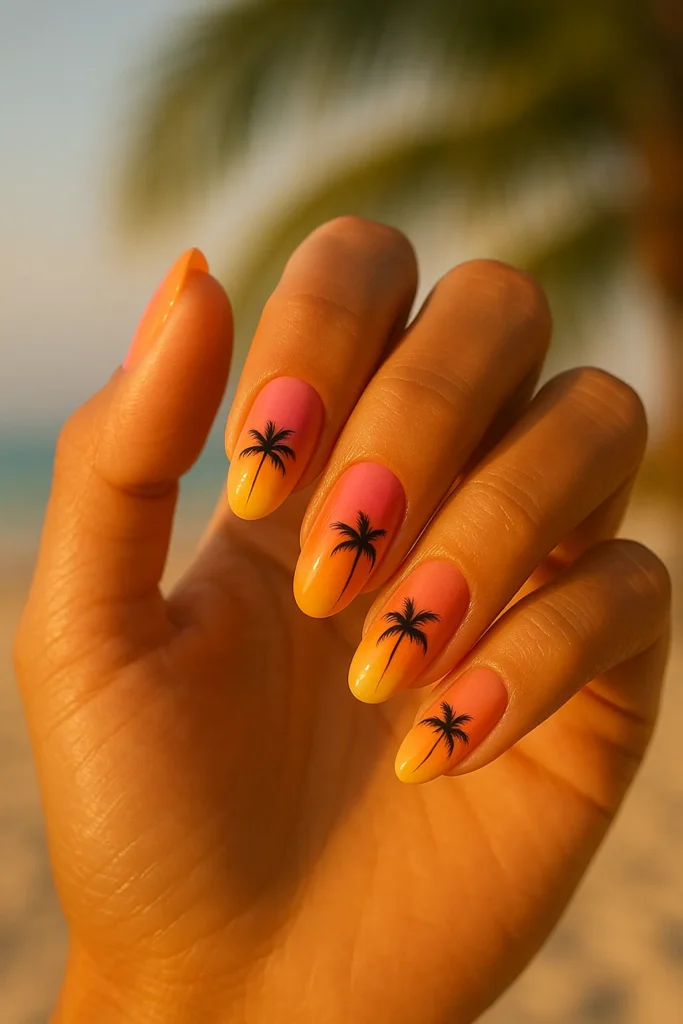
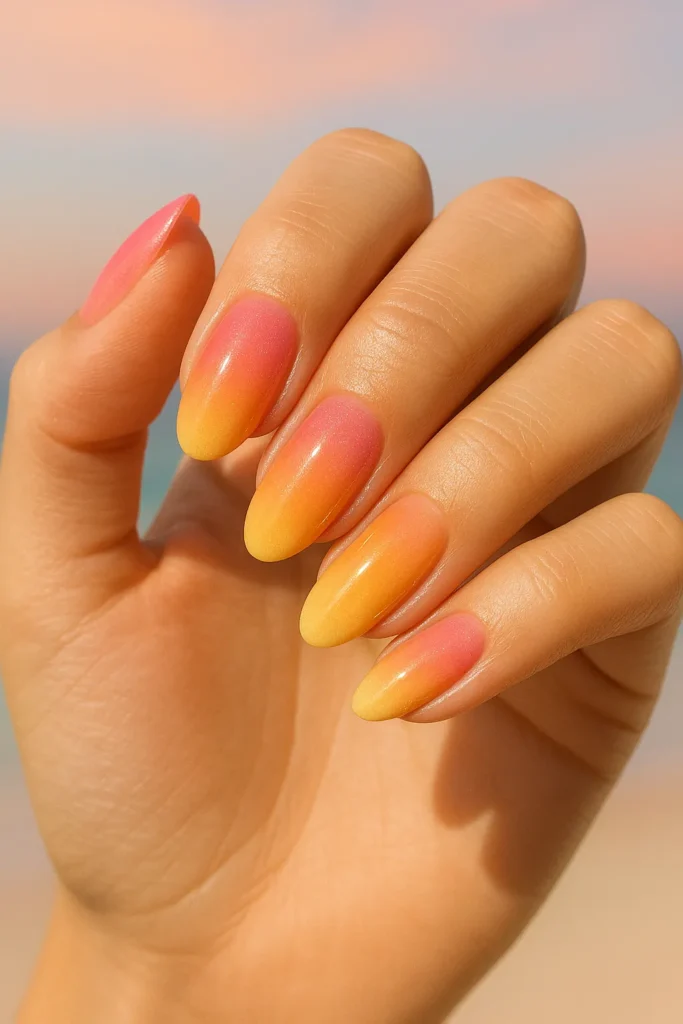
Palm Trees, Sunsets & Beach Landscapes
These designs capture entire beach scenes on your nails. From classic palm tree silhouettes against sunset gradients to detailed landscape art, these are the designs that truly transport you to paradise.
11. Classic Palm Tree Silhouette — Orange, pink, yellow gradient + black / Difficulty: Intermediate
12. Sunset Ombré — Pink, orange, yellow / Difficulty: Beginner
13. Beach Scene Accent Nail — Multiple colors / Difficulty: Expert
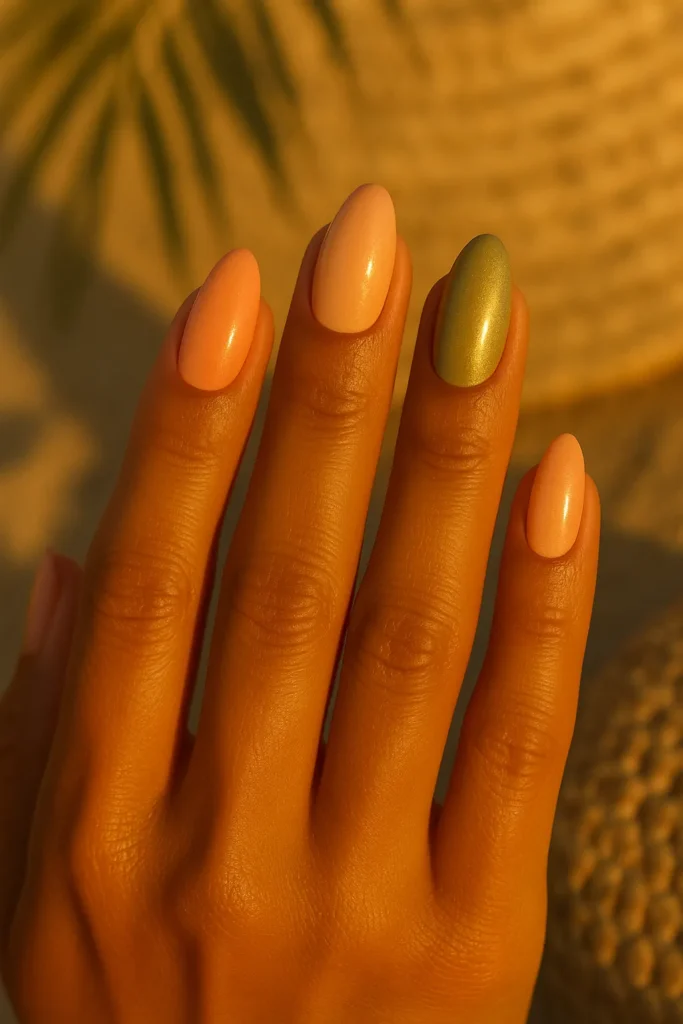
14. Golden Hour Glow — Peach, gold, olive green / Difficulty: Intermediate
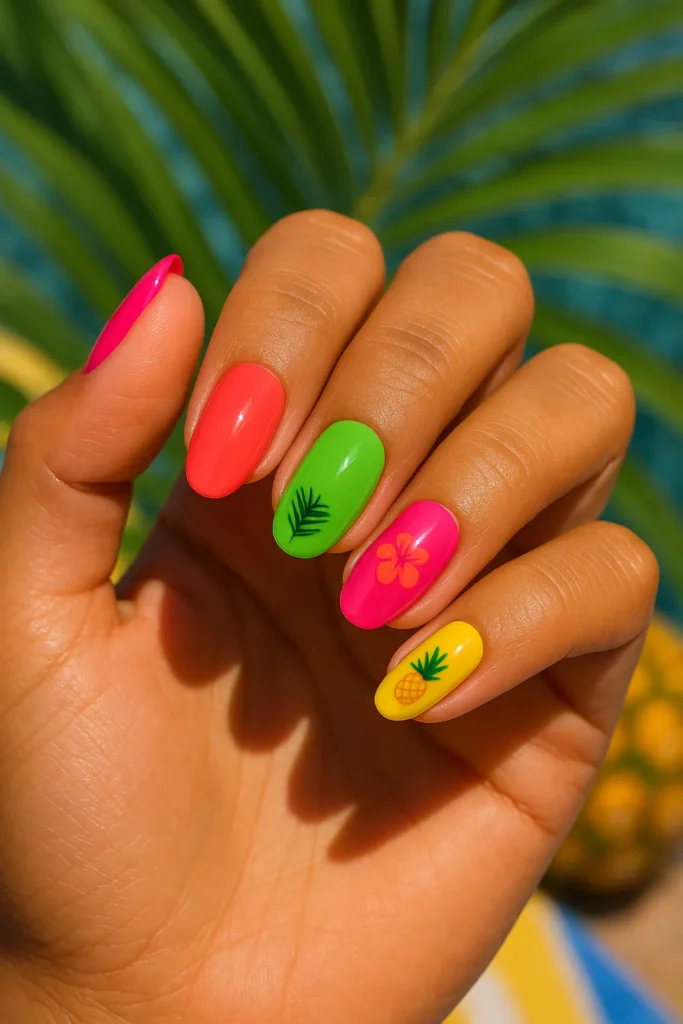
15. Tropical Paradise — Hot pink, coral, bright green, yellow / Difficulty: Intermediate
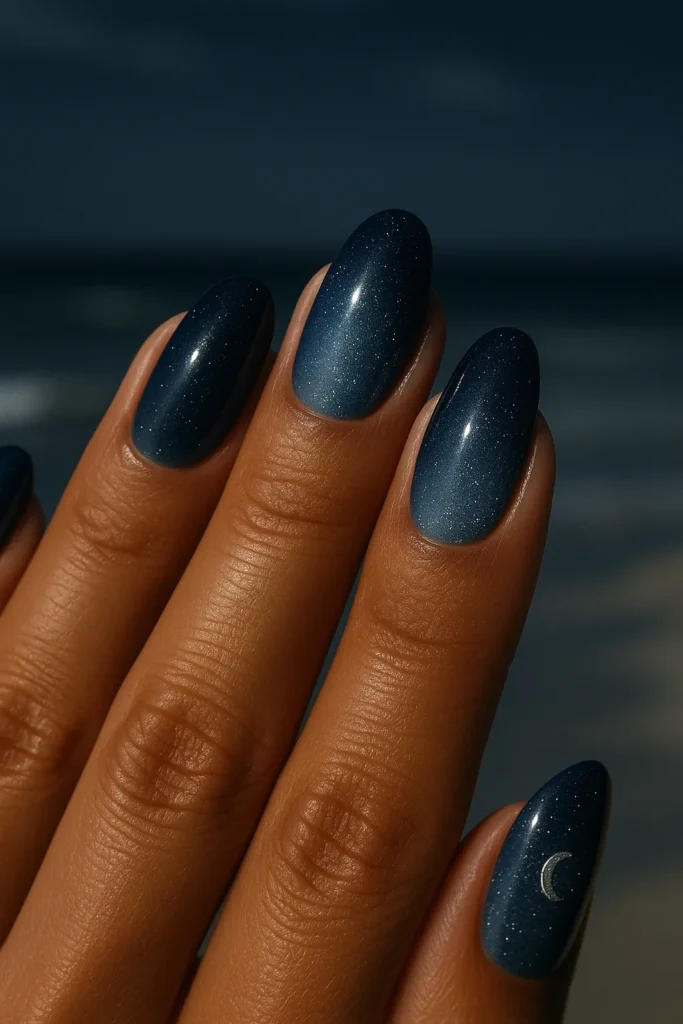
16. Moonlit Beach — Navy, midnight blue, silver, black / Difficulty: Intermediate
17. Minimalist Palm Leaves — White or nude, olive green / Difficulty: Beginner
Starfish, Sea Creatures & Coral Reef Accents
Bring the underwater world to life with playful, detailed designs featuring sea creatures and coral reef elements. These are perfect for ocean lovers who want something a bit more unique than standard beach motifs.
18. 3D Starfish Embellishment — Ocean blue, gold/orange starfish / Difficulty: Intermediate
19. Coral Reef Cluster — White base, coral pink, orange, purple / Difficulty: Expert
20. Sea Turtle Accent — Teal, green, brown, cream / Difficulty: Expert
21. Jellyfish Elegance — Purple, pink gradient / Difficulty: Expert
22. Seahorse Charm — Nude, gold / Difficulty: Beginner
23. Tropical Fish Pop — Multiple bright colors / Difficulty: Intermediate
Nautical Stripes, Anchors & Sailor-Inspired
Classic, timeless, and endlessly versatile—nautical designs bring that preppy, sailor-chic energy to your beach nails. These work year-round and transition beautifully from beach to boat to brunch.
24. Classic Navy Stripes — White, navy blue / Difficulty: Beginner
25. Anchor Accent Nail — Red, white, gold / Difficulty: Intermediate
26. Sailor French Tips — Navy, nude, white / Difficulty: Intermediate
27. Red, White & Blue Nautical — Patriotic mixed patterns / Difficulty: Intermediate
28. Minimalist Anchor — Nude, navy / Difficulty: Beginner
Tropical Fruits & Floral Beach Vibes
Add a pop of fun with tropical fruit and floral designs that capture summer’s playful energy. These designs are perfect for pool parties, casual beach days, and when you want your nails to make people smile.
29. Watermelon Slices — Pink, green, black, white / Difficulty: Beginner
30. Pineapple Paradise — Yellow, green, brown / Difficulty: Intermediate
31. Citrus Burst — White, yellow, orange / Difficulty: Intermediate
32. Hibiscus Flower — Coral, pink, yellow, green / Difficulty: Intermediate
33. Coconut Chic — White, brown, optional green / Difficulty: Intermediate
34. Mixed Tropical — Multiple bright colors / Difficulty: Intermediate
French Tips with Coastal Twist
French manicures are timeless, but beach-inspired colors and details make them perfect for summer. These elevated classics work for both casual and formal beach occasions.
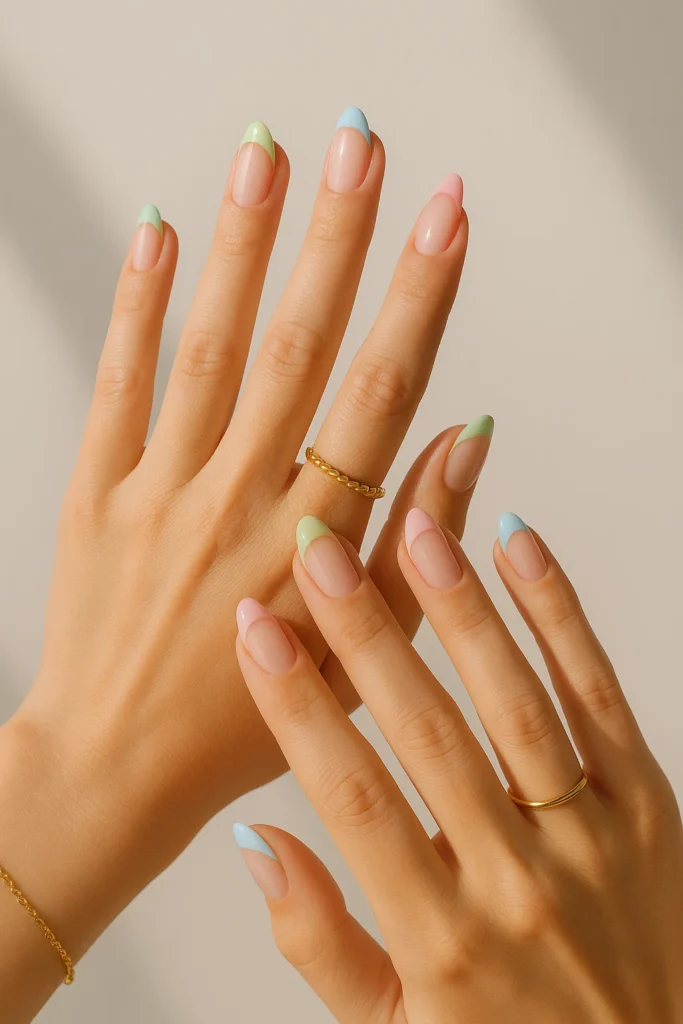
35. Sea Glass French — Nude, sea glass blue-green / Difficulty: Beginner
36. Sandy Ombré Tips — Nude, beige, tan / Difficulty: Intermediate
37. Ocean Wave French — Nude, ocean blue, white / Difficulty: Intermediate
38. Glazed Coconut French — Clear, sheer white / Difficulty: Beginner
39. Reverse Beach French — Turquoise or coral base, nude tips / Difficulty: Beginner
Step-by-Step DIY Beach Nail Tutorials for Beginners
Ready to create your own beach nail masterpiece? I’ve put together three detailed tutorials for popular designs that work beautifully for beginners.
Each tutorial includes everything you need—materials, step-by-step instructions, and my best tips for success. If you want more at-home tutorials and seasonal DIY ideas, check out this additional guide: DIY fall nails.
Start with the simplest design and work your way up as you build confidence. Remember, nail art is totally a learnable skill, and even imperfect attempts often look charming and handmade in the best way!
Tutorial 1: Ocean Gradient Ombré Nails
This is hands-down the most versatile beach nail technique you’ll learn.
Once you master the sponge gradient method, you can create endless color combinations from subtle neutrals to bold tropical vibes.
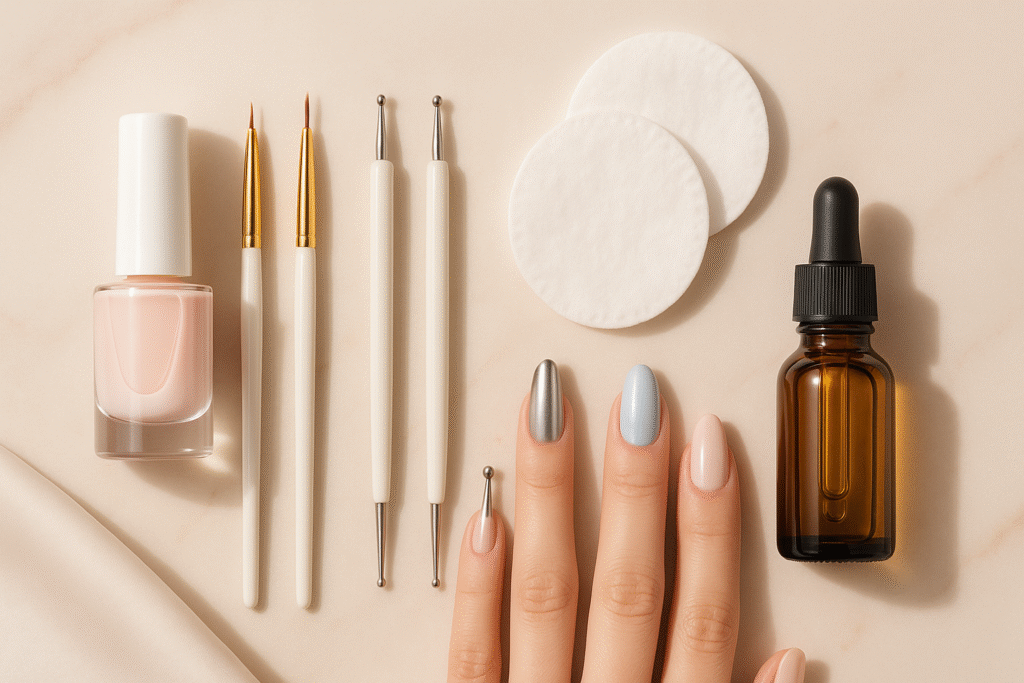
Materials Needed:
- Base coat
- White or nude base polish
- 2-3 blue polishes in different shades (light sky blue, medium turquoise, deep ocean blue)
- Makeup sponge (wedge-shaped)
- Glossy top coat
- Small cleanup brush
- Acetone or polish remover
- (Optional) Liquid latex or tape for protecting your fingers
Step-by-Step Instructions:
- Prep your nails properly: file, push back cuticles, wipe with rubbing alcohol, and apply a thin base coat.
- Apply your white or nude base using two thin coats and let dry.
- Set up your gradient palette on foil or plastic with your three blue polishes in stripes.
- Dampen your sponge slightly, then press into the polish stripes to pick up the gradient.
- Apply to your nail with a light bouncing motion; repeat 2-3 times per nail for coverage.
- Repeat for all nails, reloading the sponge as needed for consistent color.
- Clean up edges with a brush dipped in acetone and carefully remove excess polish from skin.
- Seal with a generous glossy top coat to smooth texture and add shine.
- Optional: add a tiny wave detail or shell decal on your ring finger once dry.
Troubleshooting Common Mistakes:
- “My gradient looks streaky.” Use more polish on the sponge and apply with lighter pressure.
- “The colors are too blended together.” Use less polish and create more defined sections on your sponge.
- “My polish is bubbling or looks thick.” You might be over-pressing or working too quickly—let layers dry slightly between steps.
- Base coat
- Base color polish (nude, white, or gradient from Tutorial 1)
- Dark green or black polish
- Thin nail art brush or toothpick
- Top coat
- (Optional) Dotting tool for coconuts
- (Optional) Brown polish for trunk detail
- Prepare Your Base: Complete your base color on all nails. This can be a solid nude, white, or the ocean gradient from Tutorial 1. Let dry completely for 5 minutes.
- Choose Your Accent Nail: Select which nail will feature your palm tree—typically the ring finger. This creates a focal point without overwhelming your manicure.
- Paint the Palm Trunk: Using a thin brush, paint a vertical line starting from the bottom third of your nail.
Make it slightly curved (like a “C” shape) for natural appearance.
The trunk should be thin—about 1-2mm wide. If using a toothpick, apply gentle pressure and drag upward slowly. - Create the Palm Fronds: From the top of your trunk, paint 5-7 curved strokes radiating outward.
Start each stroke at the trunk center and sweep outward in a gentle arc.
Visualize the fronds as a fan shape—2-3 fronds sweeping left, 2-3 sweeping right, and 1-2 pointing upward. - Add Detail Lines: On each frond, add small diagonal lines extending from the main stroke.
These represent the individual palm leaves. Use quick, light strokes—3-4 tiny lines per frond.
This detail transforms a simple line into a recognizable palm tree. - Optional: Add Coconuts: Using your dotting tool or toothpick tip, add 2-3 small brown dots at the base of the fronds where they meet the trunk.
This adds realism and dimension. - Let Dry Completely: Wait 2-3 minutes for the polish to set. Don’t rush this step—smudging ruins your artwork.
- Seal With Top Coat: Apply top coat to all nails, including your palm tree design. This protects your artwork and adds glossy finish.
- Practice First: Draw palm trees on paper before attempting on nails. This builds muscle memory.
- Thin Consistency: Add a drop of polish thinner if your green/black polish is thick. Thin polish flows better for detail work.
- Less Is More: Don’t overwork the design. Simple palm trees look more elegant than overdone ones.
- Steady Your Hand: Rest your painting hand on a stable surface. Brace your pinky finger against the table for control.
- Mistake Recovery: If you mess up, let it dry completely (5 minutes), then gently scrape off with an orange stick dipped in acetone. Redo on clean surface.
- Minimalist Option: For ultra-simple look, paint just 3 fronds—one left, one right, one center. This creates stylized, modern palm tree.
- Color Variations: Black creates dramatic contrast on light backgrounds. Dark green appears softer and more natural.
- Sunset Background: Apply an orange-to-pink gradient base, then add black palm tree silhouette for stunning sunset scene.
- Multiple Palm Trees: Paint 2-3 palm trees of different heights on your accent nail for beach landscape effect.
- Beach Elements: Add small details like a yellow sun dot, wavy blue water line at nail base, or tiny bird silhouettes.
- Double Accent: Create palm trees on both ring fingers for symmetrical tropical look.
- Base color: 5 minutes
- Palm tree painting: 8-12 minutes (2-3 minutes per accent nail)
- Drying: 5 minutes
- Top coat: 3-5 minutes
- Base coat
- Base color polish (ocean blue, turquoise, nude, or sand beige)
- 3D seashell charms or decals (available at beauty supply stores, Amazon, or Etsy)
- Nail glue OR thick top coat/gel top coat
- Precision tweezers (pointed tip)
- Regular top coat
- (Optional) Small pearls, rhinestones, or starfish charms
- (Optional) Small dotting tool for glue application
- Create Your Base: Apply base coat followed by your chosen base color. Use two thin coats for opacity. Let dry completely—at least 10 minutes. 3D embellishments need fully cured base to adhere properly.
- Plan Your Placement: Before applying glue, decide which nails will feature embellishments. Recommendation: 1-2 shells per hand maximum.
Common placements include ring finger only, thumbs and ring fingers, or just one thumb for subtle accent. Hold charms against nails to visualize before committing. - Prepare Your Adhesive: For strongest hold, use nail glue designed for embellishments. For gentler removal, use thick top coat or gel top coat.
Place a small drop of adhesive on aluminum foil or plastic palette—not directly on nail yet. - Apply Adhesive to Nail: Using a dotting tool or toothpick, transfer a small dot of adhesive to your nail where the shell will sit.
Less is more—excess glue will squeeze out and look messy. The adhesive dot should be slightly smaller than your charm. - Place the Embellishment: Using tweezers, pick up your seashell charm. Hold it at the base, not the delicate edges.
Carefully position it onto the glue dot. Press down gently but firmly. - Hold in Position: Maintain gentle pressure for 10-15 seconds. This allows the glue to begin bonding.
You should feel the charm “grab” onto the nail surface. If using regular top coat as adhesive, hold for 20-30 seconds. - Add Complementary Elements: While your main shell is setting, add small pearls, tiny rhinestones, or miniature starfish around it.
Apply these the same way—small adhesive dot, careful placement with tweezers. Create a small cluster rather than scattering randomly. - Allow Complete Drying: Let glue dry completely before touching—5-10 minutes minimum.
If you applied multiple embellishments, don’t proceed until all feel secure when gently tapped. - Apply Protective Top Coat: Here’s the key: apply top coat carefully AROUND 3D elements, not over them. Brush top coat up to the base of each charm, sealing the edges. This prevents catching and extends wear. For flat decals, you can coat over them. For dimensional charms, coating over them looks cloudy.
- Optional Second Layer: After 15 minutes, apply a second thin layer of top coat around embellishments for extra security and shine on surrounding nails.
- Gentle Treatment: 3D nails are more delicate than regular polish. Avoid tapping nails on hard surfaces or using nails to open things.
- Water Caution: Keep embellishments dry for the first 24 hours. This allows adhesive to cure completely.
After that, normal hand washing is fine, but avoid prolonged soaking. - Wear Gloves: Always wear gloves when washing dishes, cleaning, or doing any wet work. Water weakens adhesive over time.
- Sleep Carefully: Be mindful the first night—avoid face-down sleeping positions that press on your nails.
- Repair Strategy: If an element falls off, clean both the nail surface and the charm back with alcohol. Let dry, then reapply with fresh glue. Most charms can be reused 2-3 times.
- Expected Longevity: 3D designs typically last 5-7 days—shorter than regular polish due to their dimensional nature.
Plan application timing around events or vacations. - Removal: When ready to remove, soak nails in acetone for 5 minutes. The 3D elements will release easily. Gently pop them off—don’t pull or pry.
- Base color application: 10 minutes
- Embellishment planning: 3-5 minutes
- Application: 8-12 minutes (2-3 minutes per embellished nail)
- Drying time: 5-10 minutes
- Top coat: 3-5 minutes
- Amazon: Search “3D nail seashells” for variety packs ($5-12)
- Etsy: Handmade ceramic or resin shells ($8-15)
- Born Pretty: Asian nail art supplier with huge selection ($3-10)
- Sally Beauty Supply: Pre-packaged nail charm sets
- Beauty supply stores in your area
- Craft stores (Michaels, Hobby Lobby): General embellishments that work for nails
- Look for lightweight materials (heavy charms fall off easily)
- Flat backs adhere better than rounded backs
- Sets with multiple sizes offer more design flexibility
- Read reviews mentioning “nail art” specifically
- Positioned off-center for artistic look
- 1-2mm from cuticle (prevents catching)
- Balanced with complementary small elements
- Proportional to nail size (small shells on small nails)
- Every nail covered in embellishments
- Charms too close to nail edges
- Multiple large elements on one nail
- Mixing too many different charm types
- One statement nail (large shell + 2-3 small pearls)
- Remaining nails in coordinating solid color or gradient
- Maximum 2 embellished nails per hand
- Negative space balances dimensional elements
- “Charm falls off within 24 hours.” Cause: Insufficient adhesive or wet nail surface. Solution: Ensure nail is completely dry before application. Use nail glue instead of top coat for stronger hold.
- “Glue shows white around charm.” Cause: Too much glue applied. Solution: Use tiny dot of glue—less than you think you need. Clean excess immediately with toothpick.
- “Charm sits crooked.” Cause: Pressed too hard while adjusting. Solution: Remove immediately while glue is wet. Clean nail, let dry 2 minutes, reapply with fresh glue dot.
- “Top coat makes charms look cloudy.” Cause: Top coat applied over dimensional elements. Solution: Apply top coat AROUND charms only, not over them. Coat the base of charms to seal edges.
- Classic Beach: Single large shell on ring finger with ocean gradient base
- Tropical Cluster: Small shell + starfish + 2-3 pearls on thumb over turquoise base
- Elegant Minimal: One tiny shell centered on nude base, remaining nails solid
- Mermaid Vibes: Multiple small shells scattered across 2 nails with iridescent base
- Sunset Beach: Coral-to-purple gradient with white shell and gold pearl accents
Frequently Asked Questions
Q: How long do beach nail designs typically last?
A: With proper prep, a quality gel or long-wear polish, and a solid top coat, beach nail designs can last 10–14 days.
Avoid using nails as tools and reapply top coat every few days for extra protection.
Q: Can beginners create mermaid scales at home?
A: Yes—use scale stencils or stamping plates to simplify the process. Start with chunky glitter or duochrome toppers if individual scales feel intimidating.
Q: Are 3D embellishments beach-friendly?
A: They look stunning but can snag on towels or beachwear. For active beach days, opt for flat decals or embossed gel textures that are more durable.
Q: What products should I pack for a beach-friendly manicure?
A: Bring a travel-size top coat, nail glue for quick repairs, a small file, and a backup polish in a similar shade. These little tools save the day when you’re away from home.
Conclusion
Beach nails in 2025 are all about creativity, texture, and a playful mix of bold and subtle details. From minimalist waves to full-on mermaid scales and 3D seashells, there’s a beach design for every mood and skill level.
Try starting with a simple gradient or a single accent nail, build your toolkit, and practice the techniques described here. With patience and the right tools, you can create salon-worthy beach nails at home.
Want more tutorials, seasonal looks, and product recommendations? Explore additional guides on the blog and keep experimenting—your next favorite beach manicure is only a few coats away.