Welcome — this guide is your complete roadmap to spooky, sophisticated, and social-ready Halloween nails for 2025.
Read on for inspiration, tutorials, and pro tips organized by style and skill level.
Halloween is no longer a single-night affair. In 2025, nail art has transformed into a celebrated form of personal storytelling — gothic glamour, playful whimsy, and high-fashion edge all coexisting on fingertips.
Searches for Halloween nail designs have surged as people seek standout looks that photograph beautifully for social media and hold up through parties, costumes, and daily activities.
On platforms like TikTok and Instagram, the chatter around “gothic lace” textures, 3D accents, and glow-in-the-dark finishes has grown dramatically, signaling a broader embrace of elaborate, multi-dimensional art that still remains wearable beyond October.
See related winter nail designs.
This guide blends tradition with innovation. You’ll see classic motifs elevated with modern textures, plus new themes that reflect 2025 aesthetics — from minimalist negative space designs to baroque-inspired luxury looks.
Whether you’re a complete beginner or a seasoned nail artist, you’ll find designs that speak to your skill level and personal style.
I’ve spent over a decade perfecting seasonal nail art, and I’m thrilled to share these techniques with you.
In this comprehensive guide, you’ll discover 50+ nail design ideas across all skill levels, visual inspiration galleries, step-by-step tutorials, expert tips from professional nail technicians, current 2025 trending themes and styles, product recommendations for polishes and tools, and both DIY home solutions and salon-ready ideas.
Let’s dive into this warm, encouraging journey that makes nail art accessible for all. Read more on nail trends 2025.
Quick Inspiration Gallery: 50+ Top Halloween Nail Looks for 2025
Welcome to your visual candy store! I’ve organized these design ideas by style category for easy browsing, so you can jump straight to what speaks to your vibe.
Each design includes a complexity indicator (easy/medium/hard), estimated time, and key features.
Think of this as your personalized Halloween nail menu — mix and match styles, or stick with one theme throughout the season.
Quick-links to related tutorials and product lists appear beneath each category.
Ready to explore what’s trending in 2025? Let’s go!
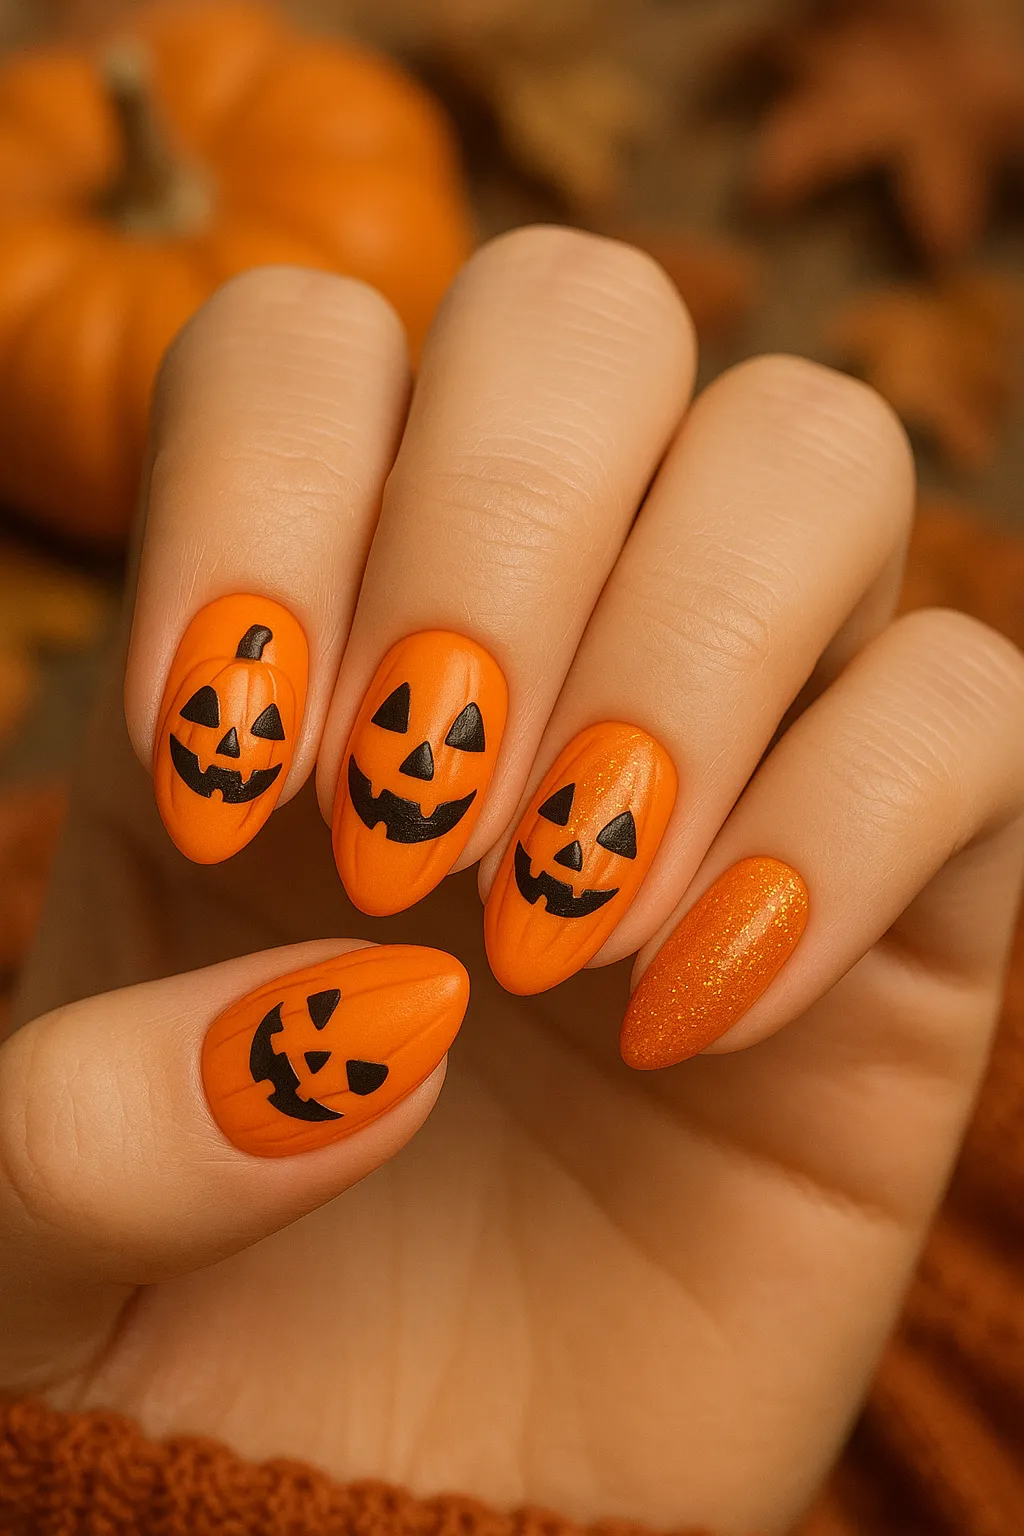
Classic Spooky (15+ Timeless Looks)
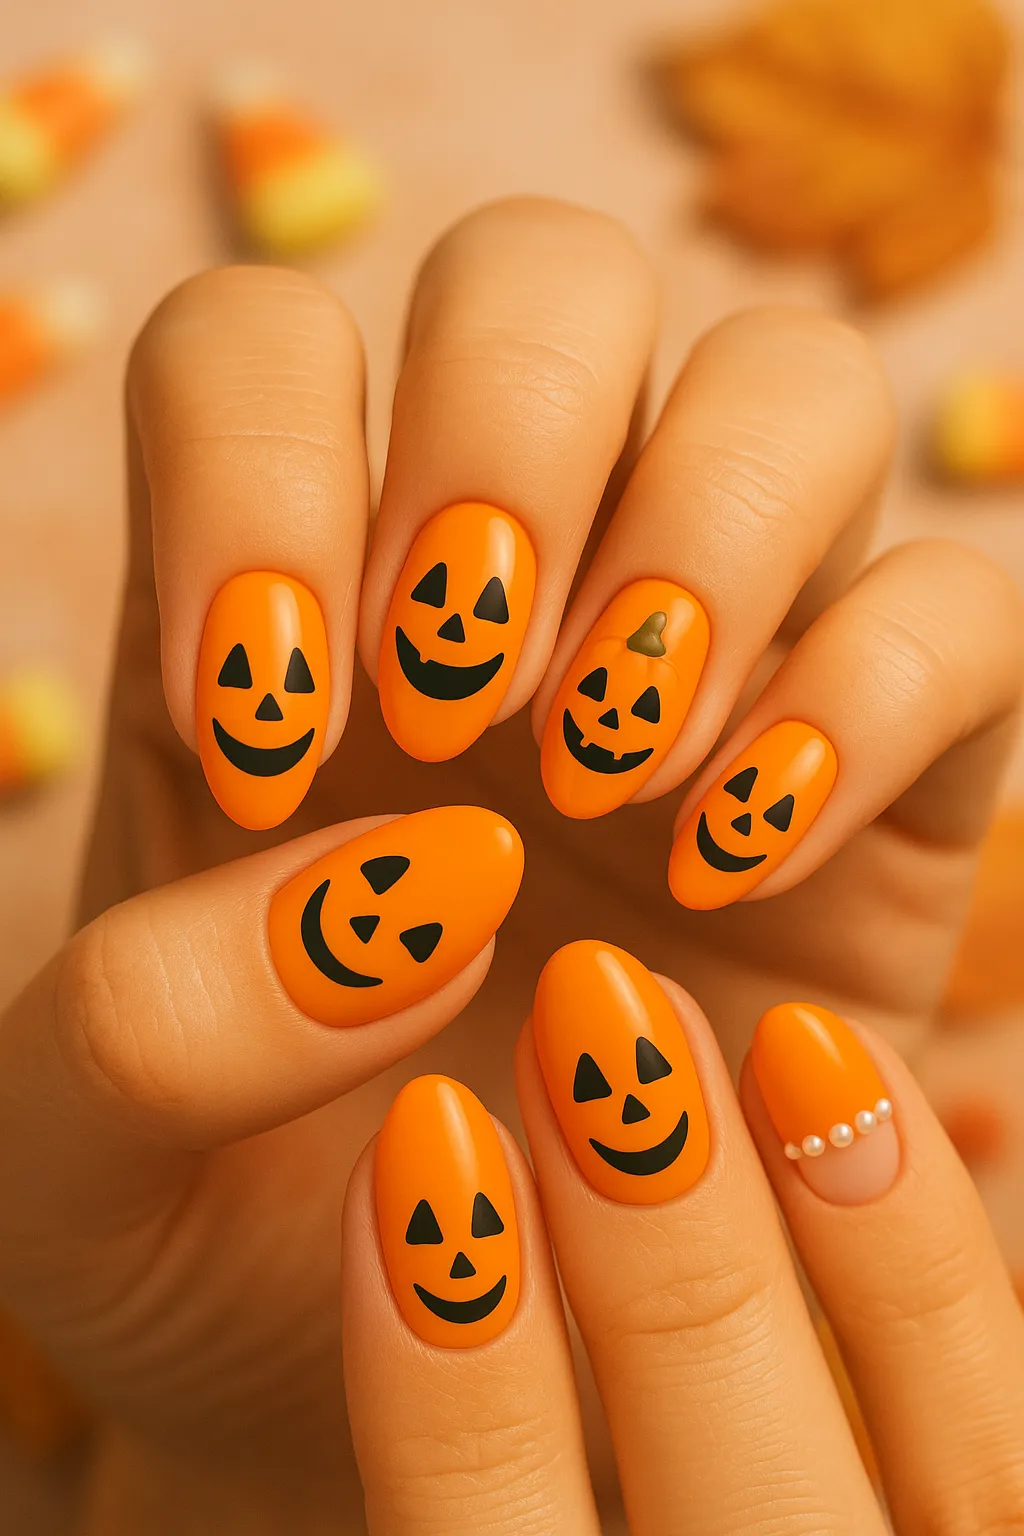
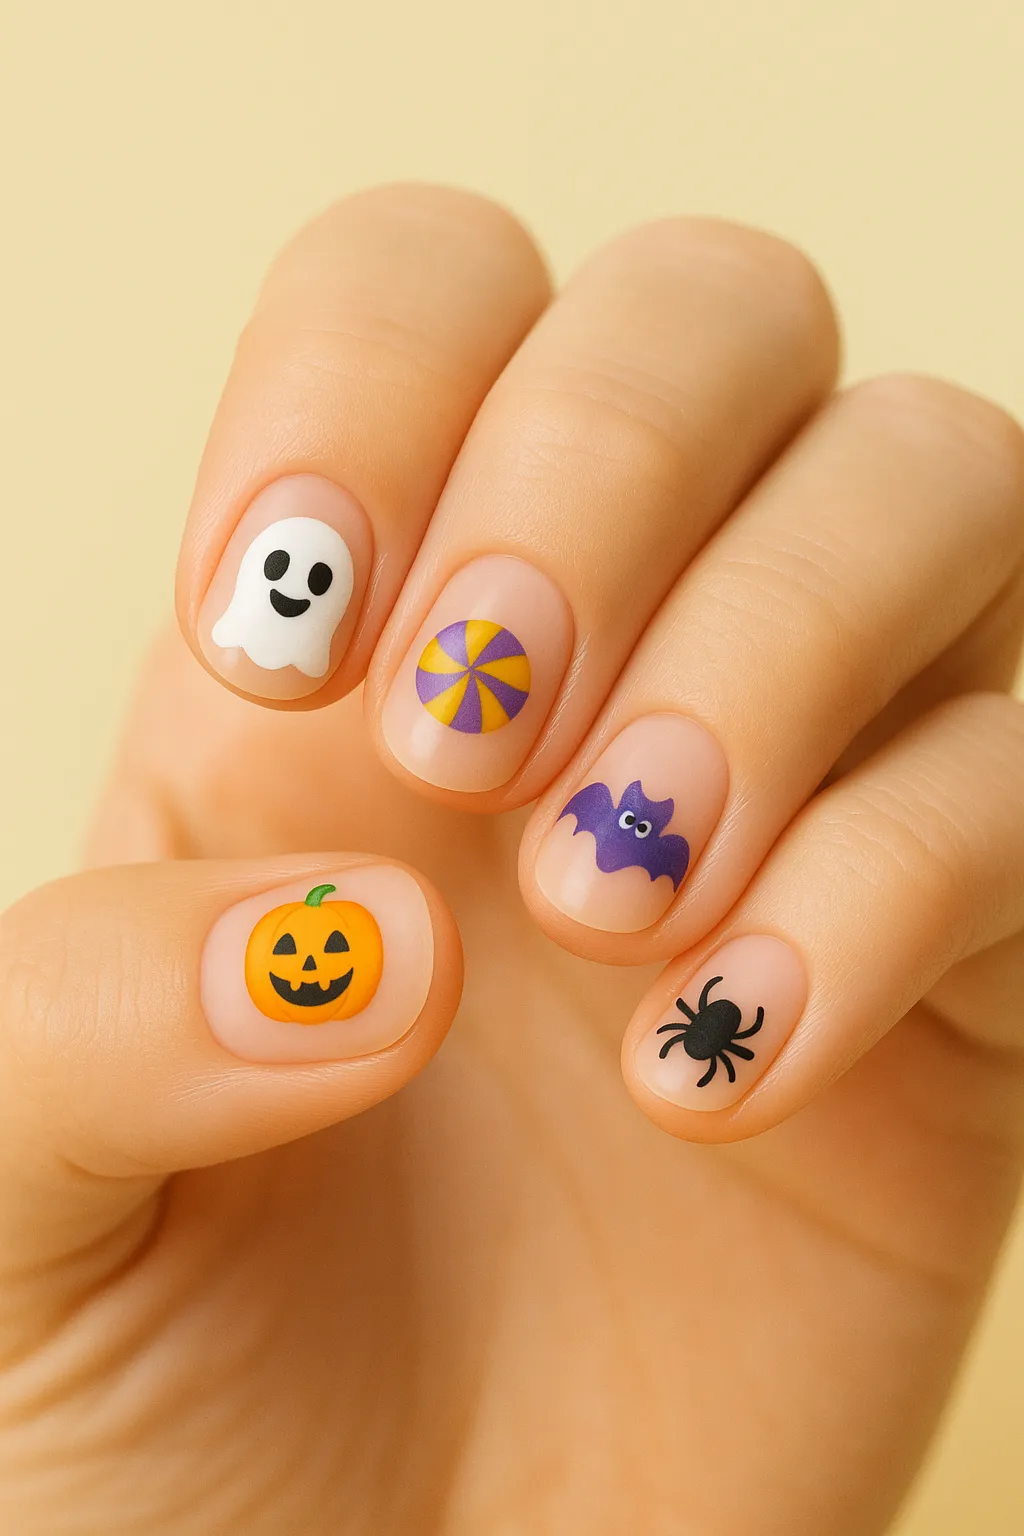
- Pumpkin Patch Nails: Orange base with hand-painted jack-o’-lantern faces, featuring 3D pumpkins or glitter accents that catch the light. Complexity: Easy–Medium. Time: 25–40 minutes. Related: DIY fall nails.

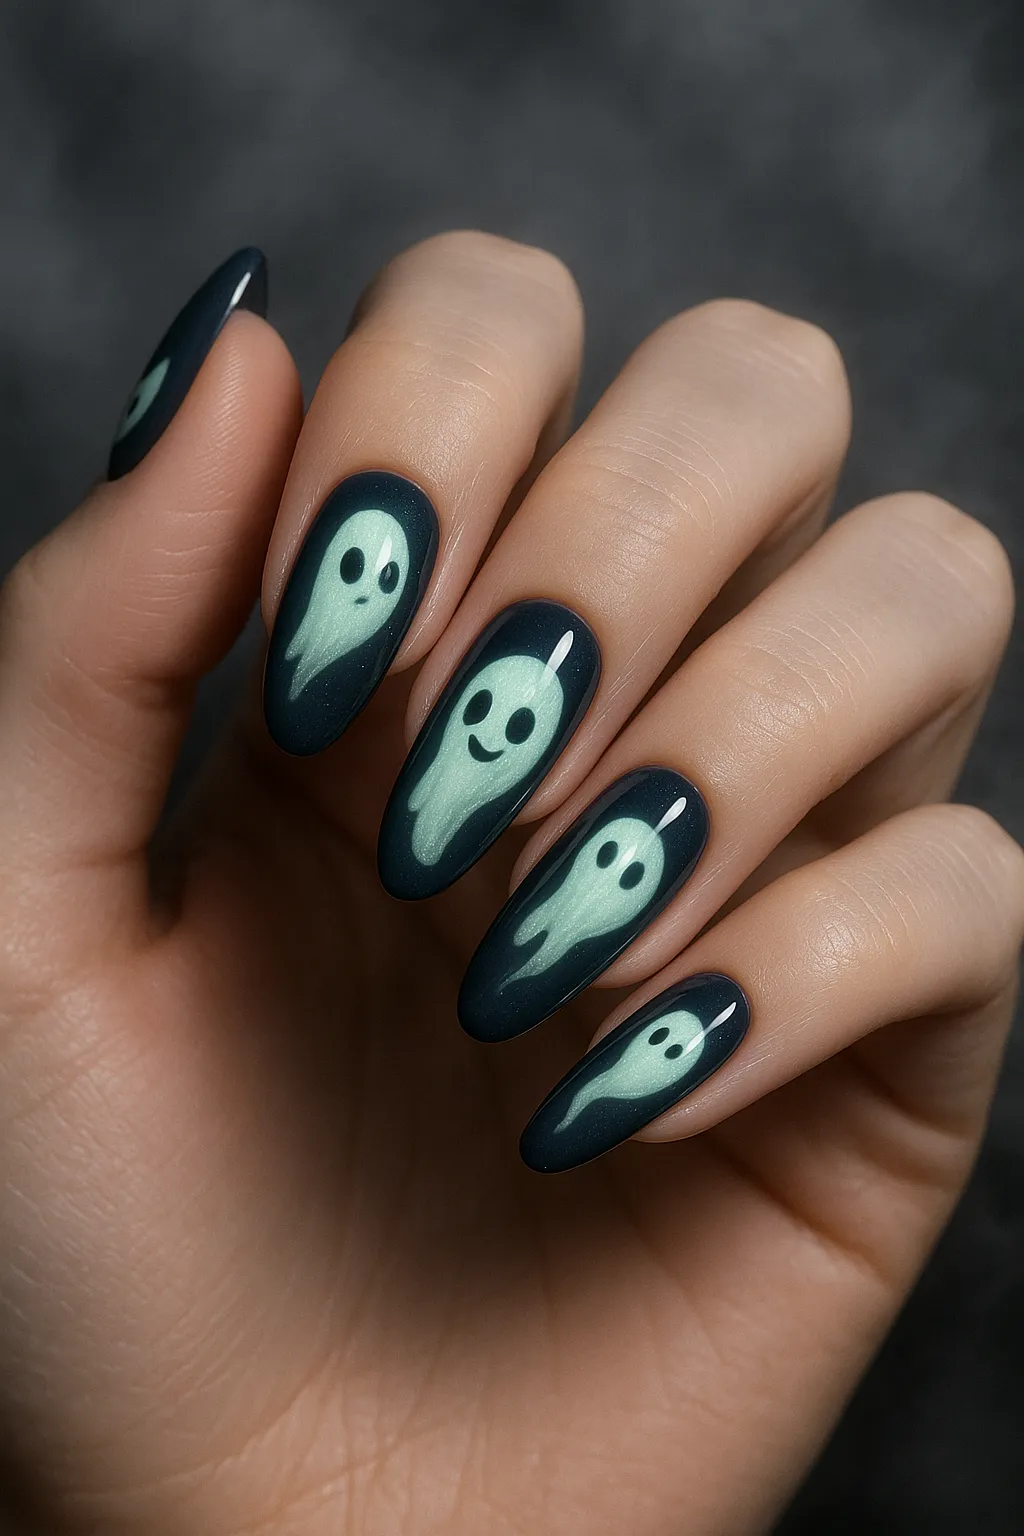
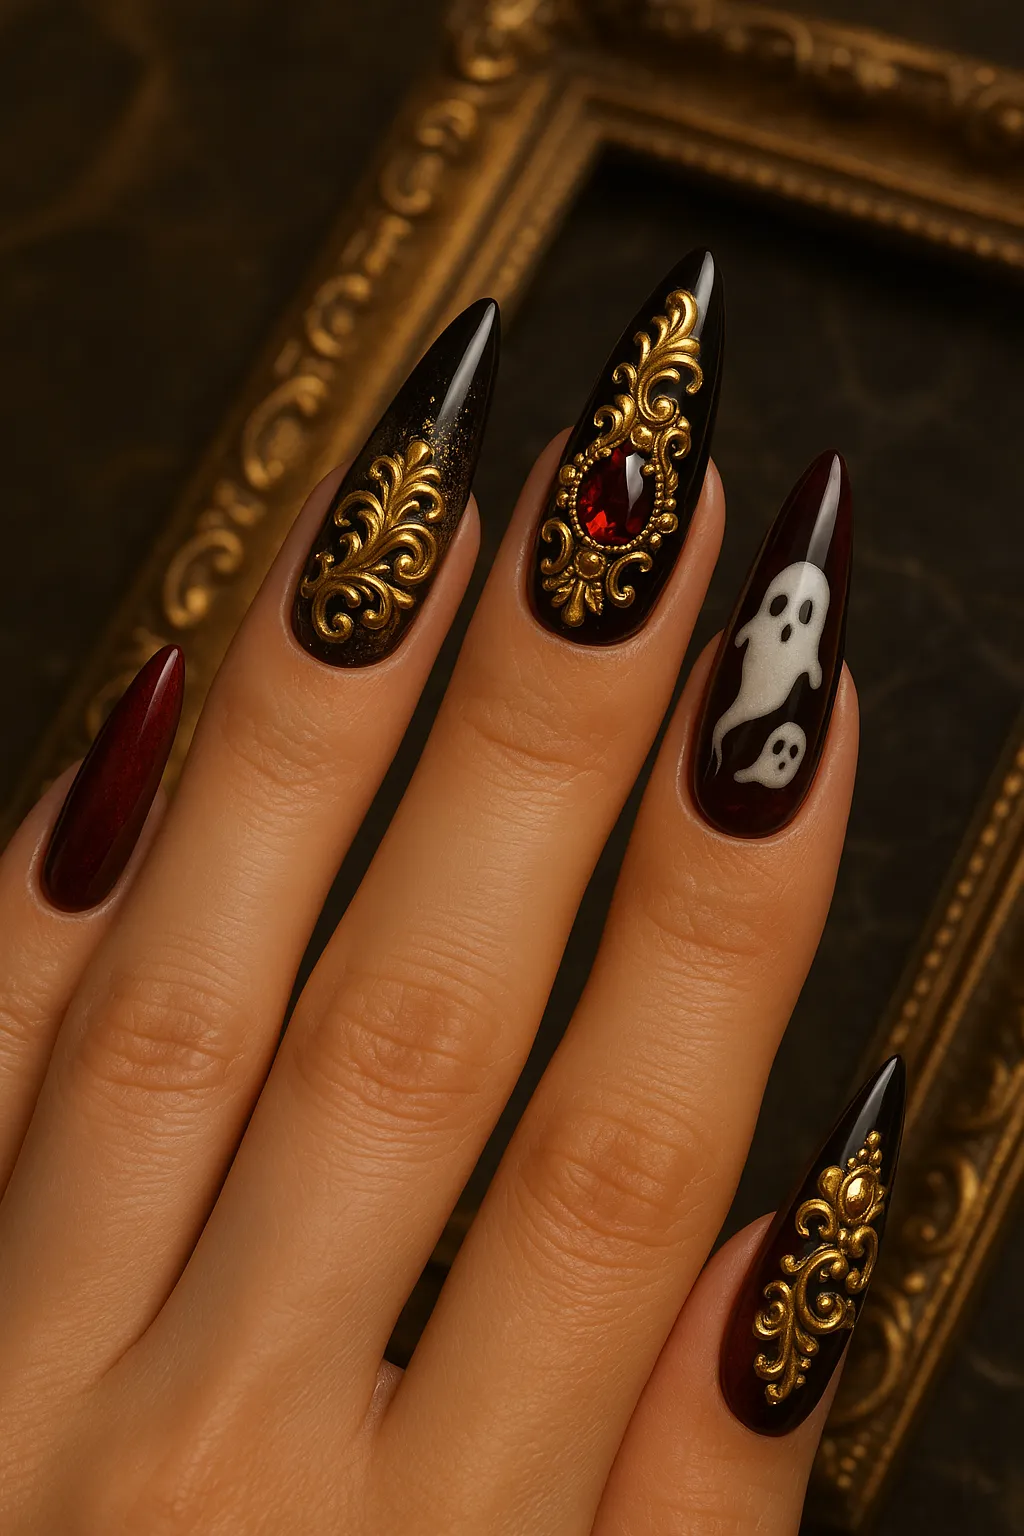
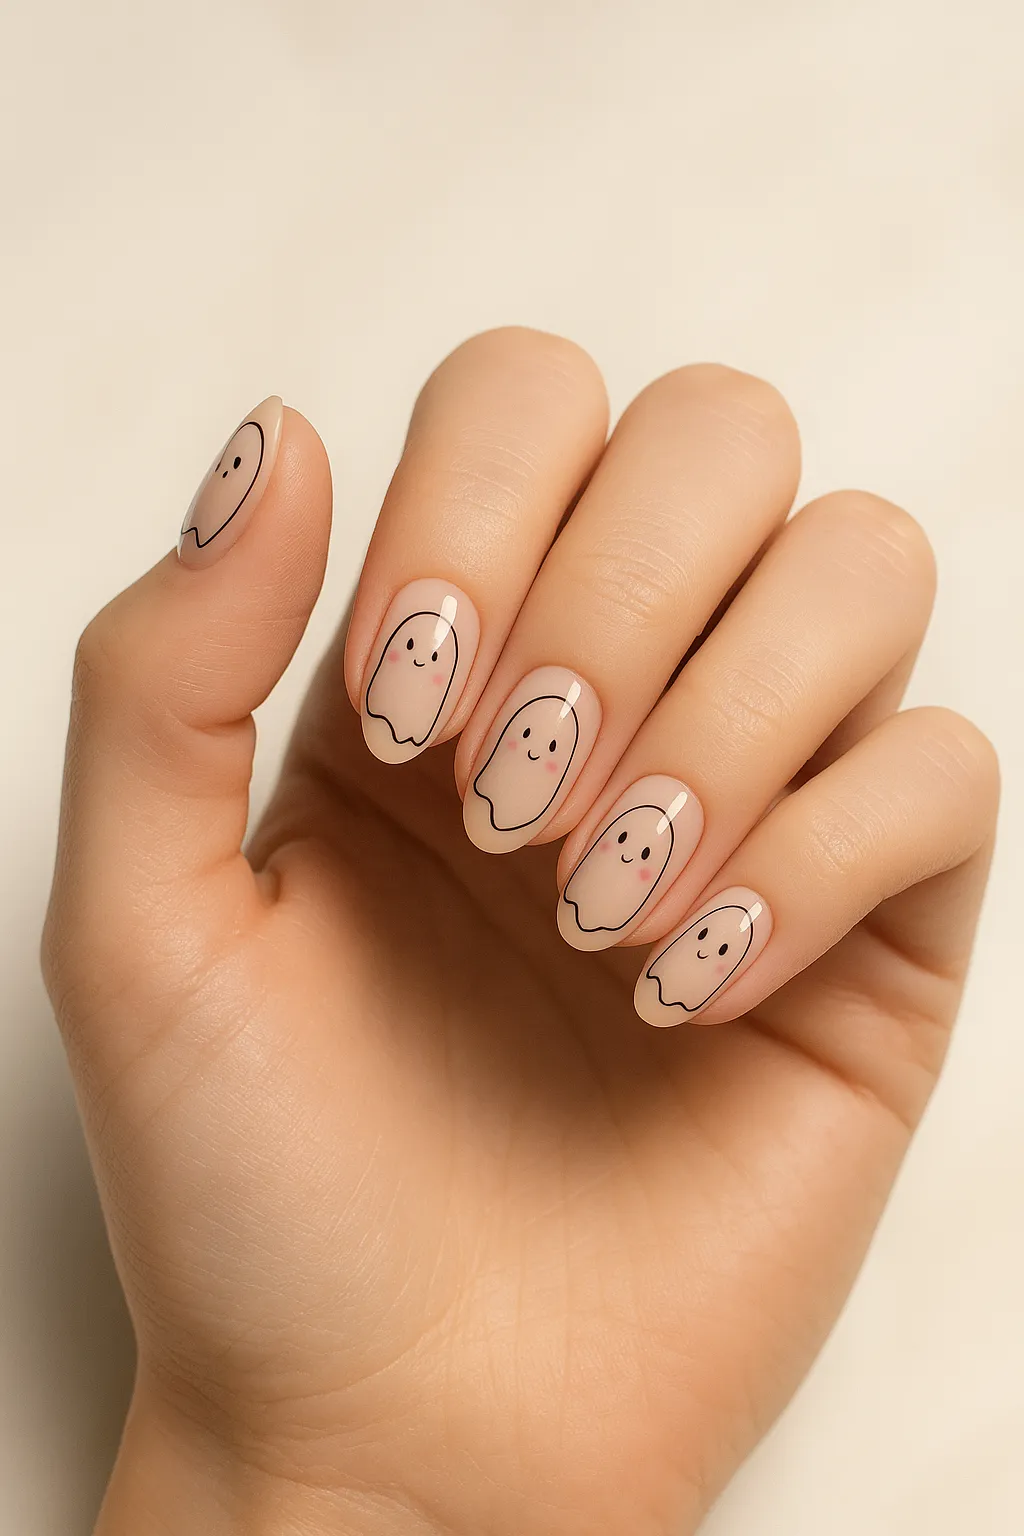
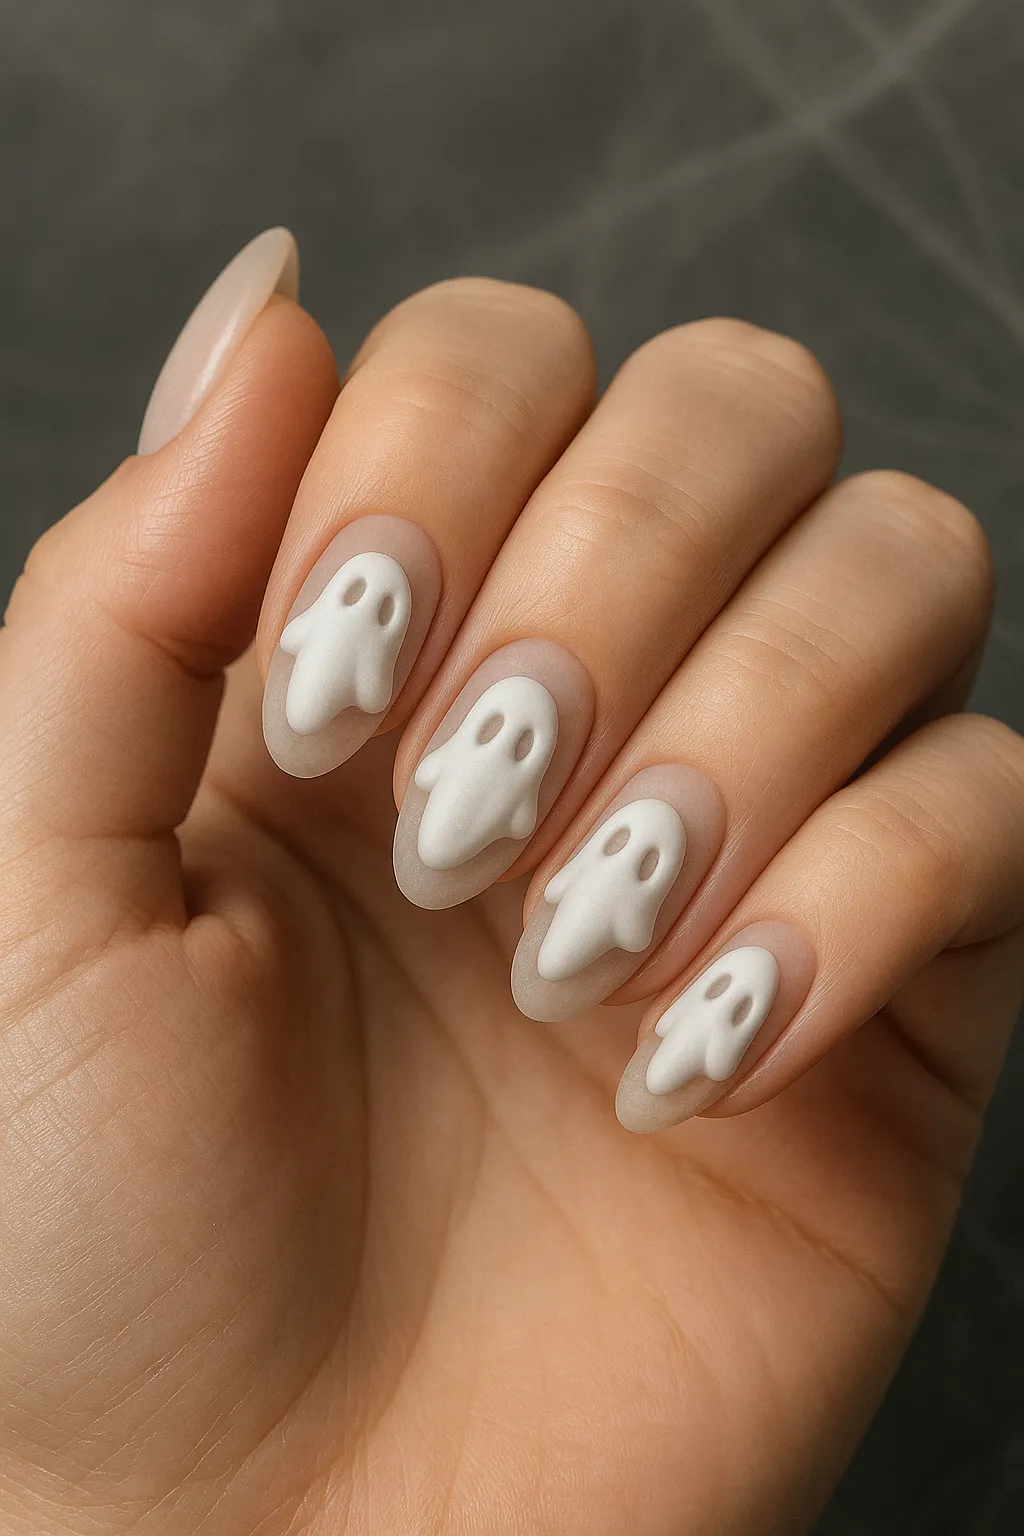
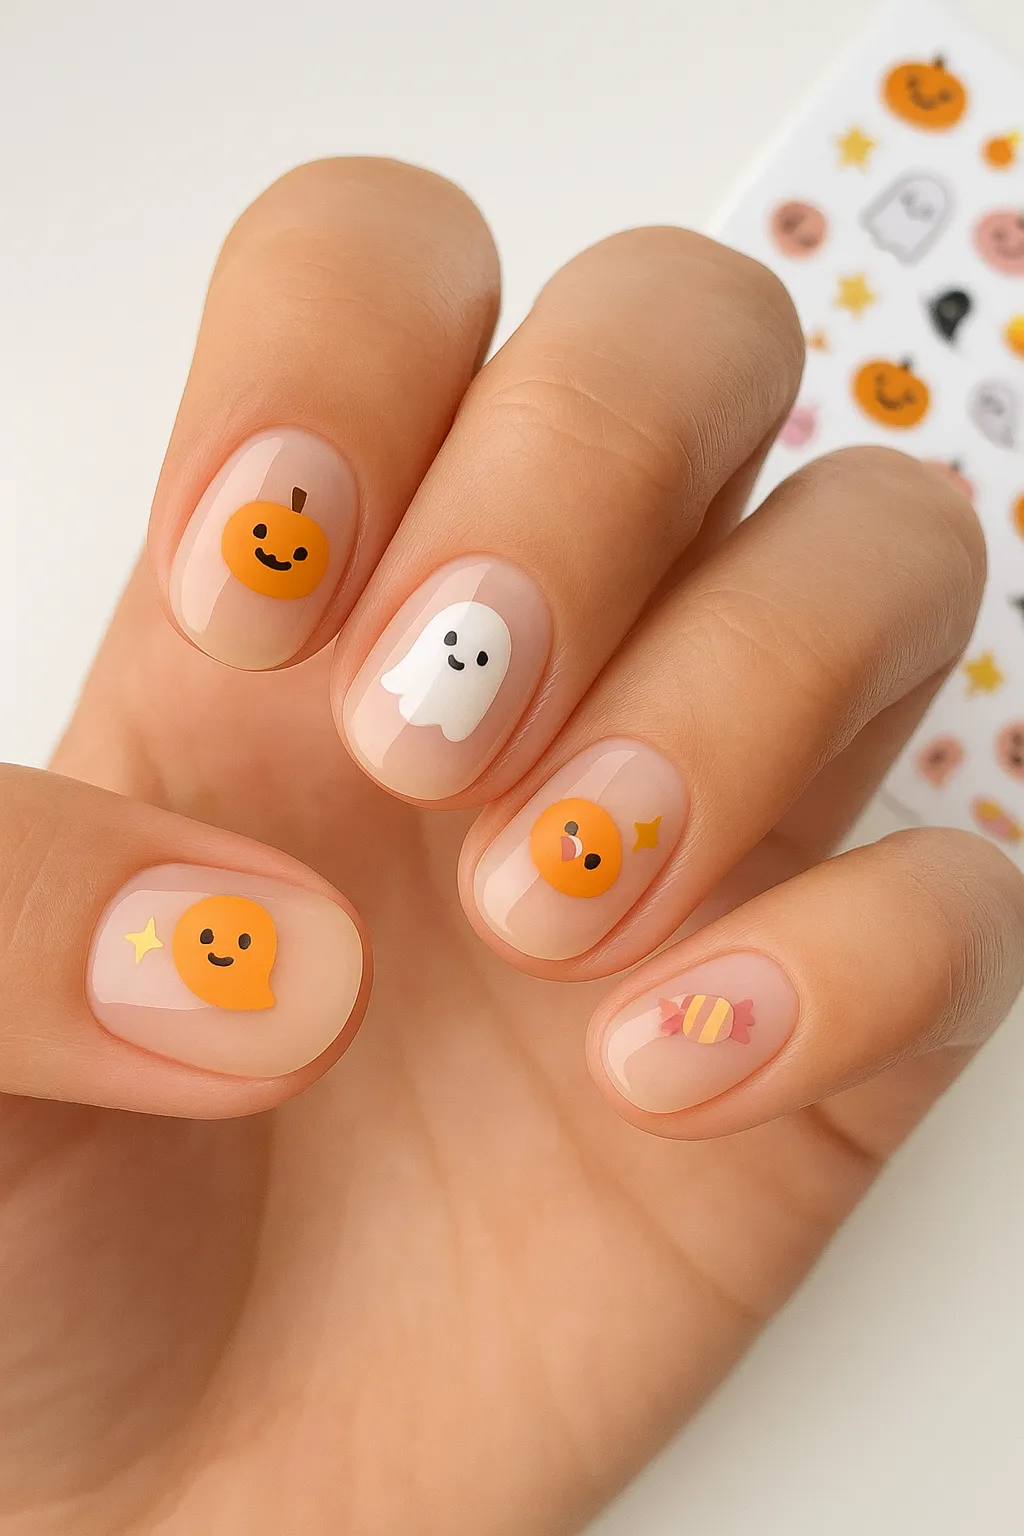
- Ghostly Apparitions: White or translucent ghosts floating on dark backgrounds. Variations range from minimalist outlines to adorable kawaii ghosts with blushing cheeks. Complexity: Easy–Medium. Time: 20–35 minutes. See soap nail ideas.
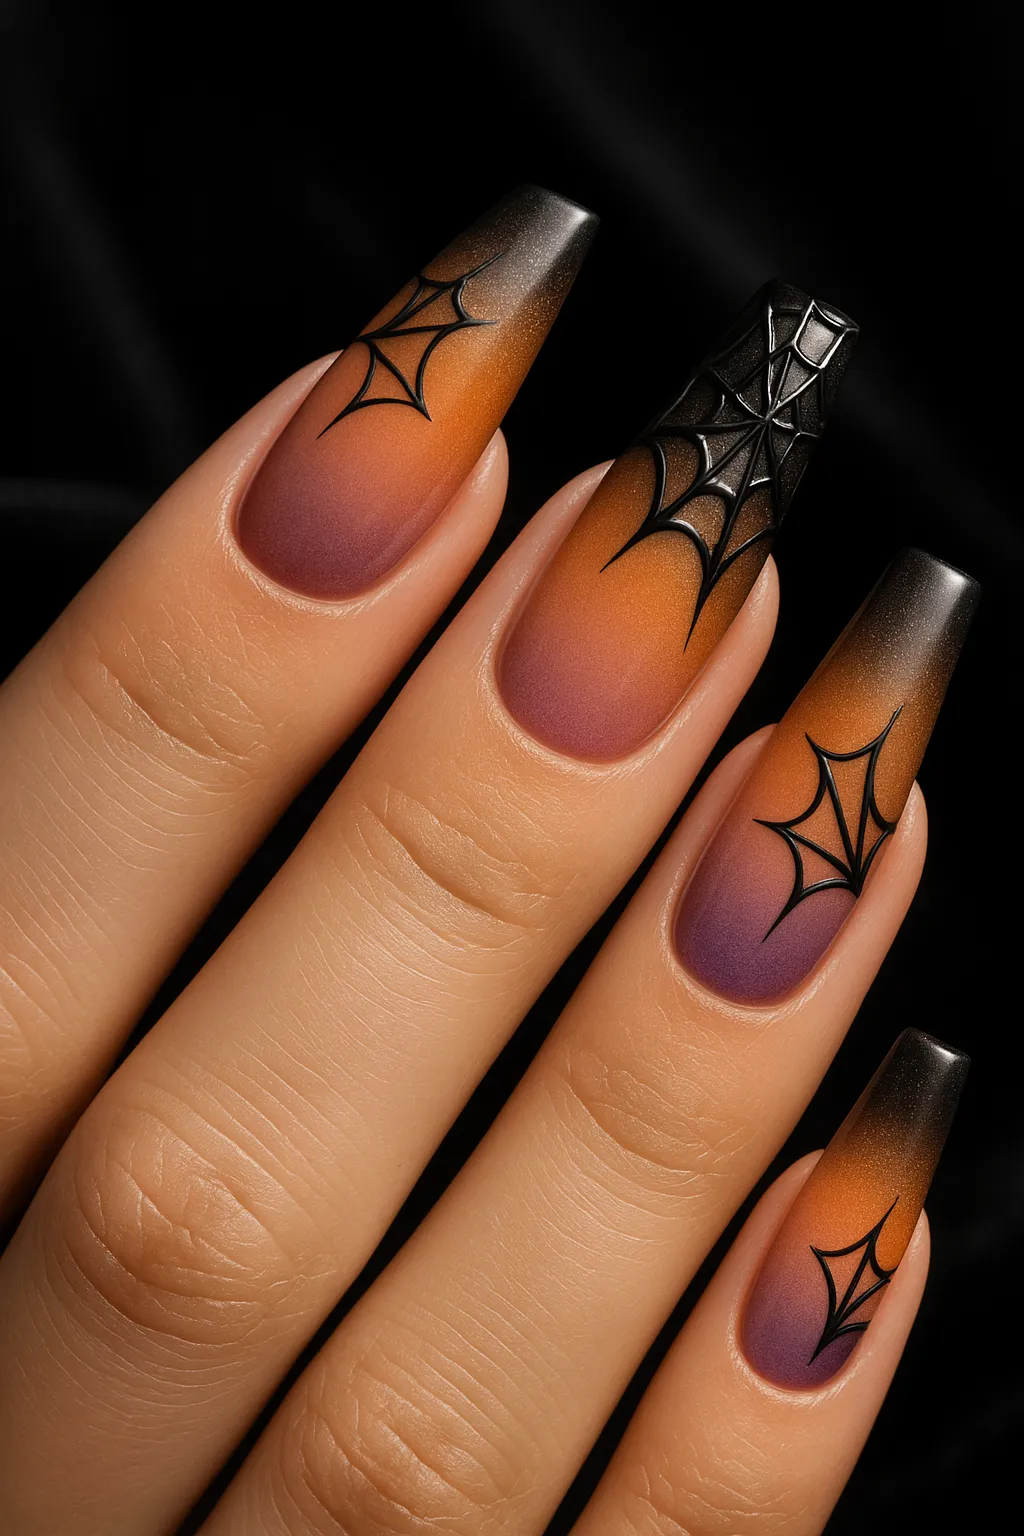
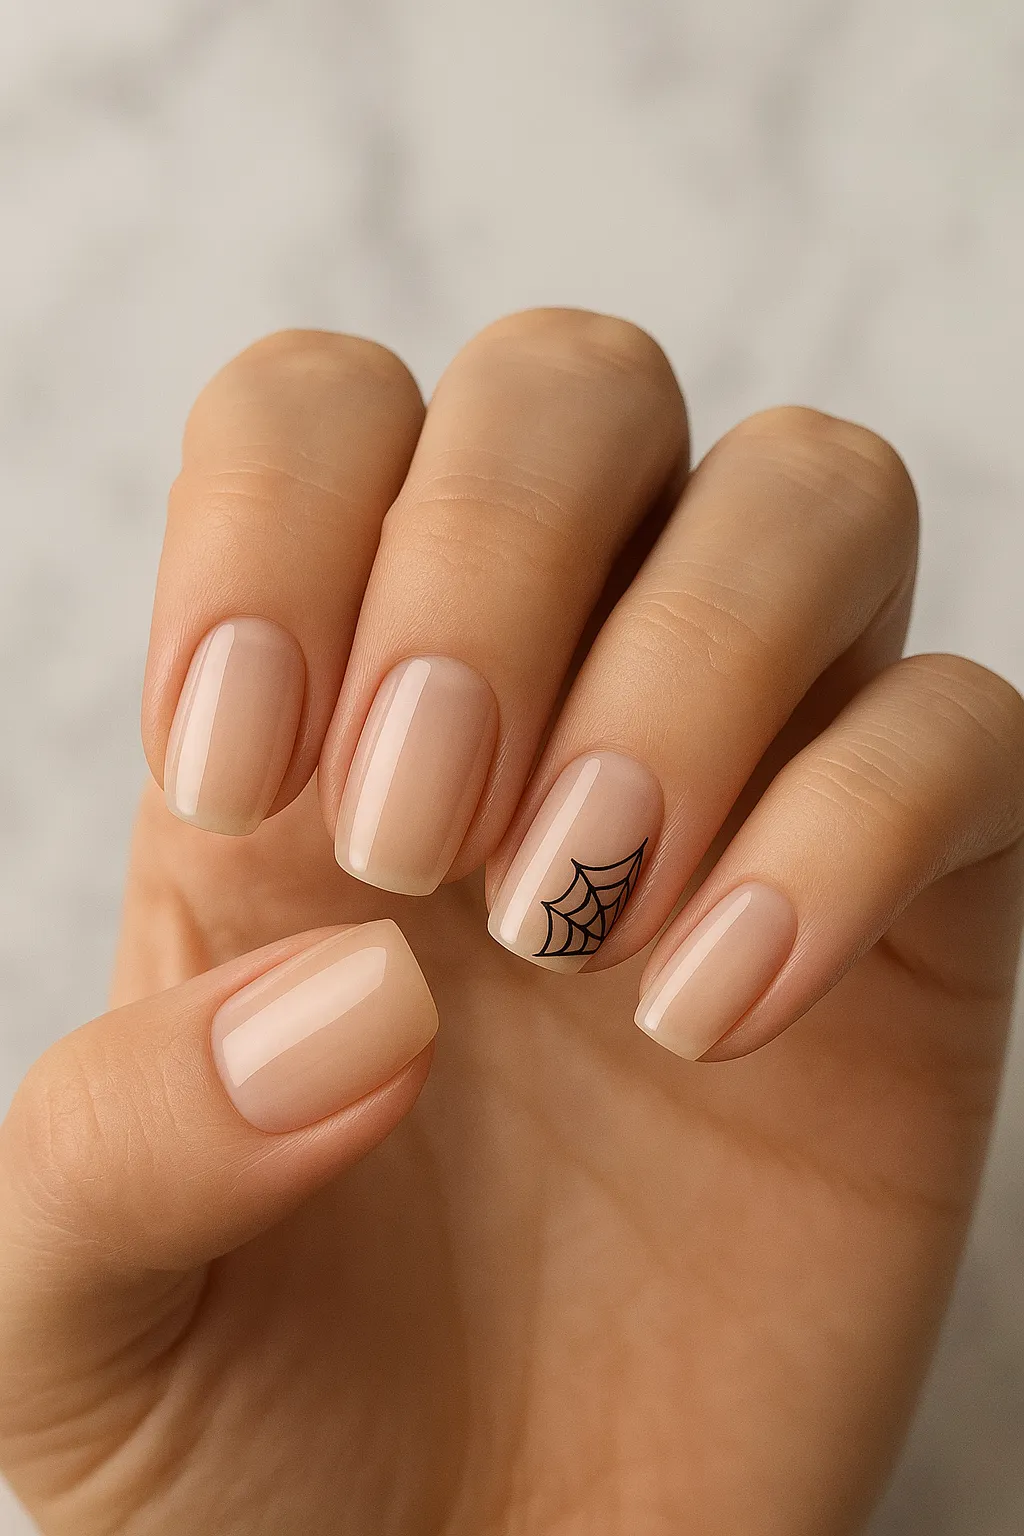
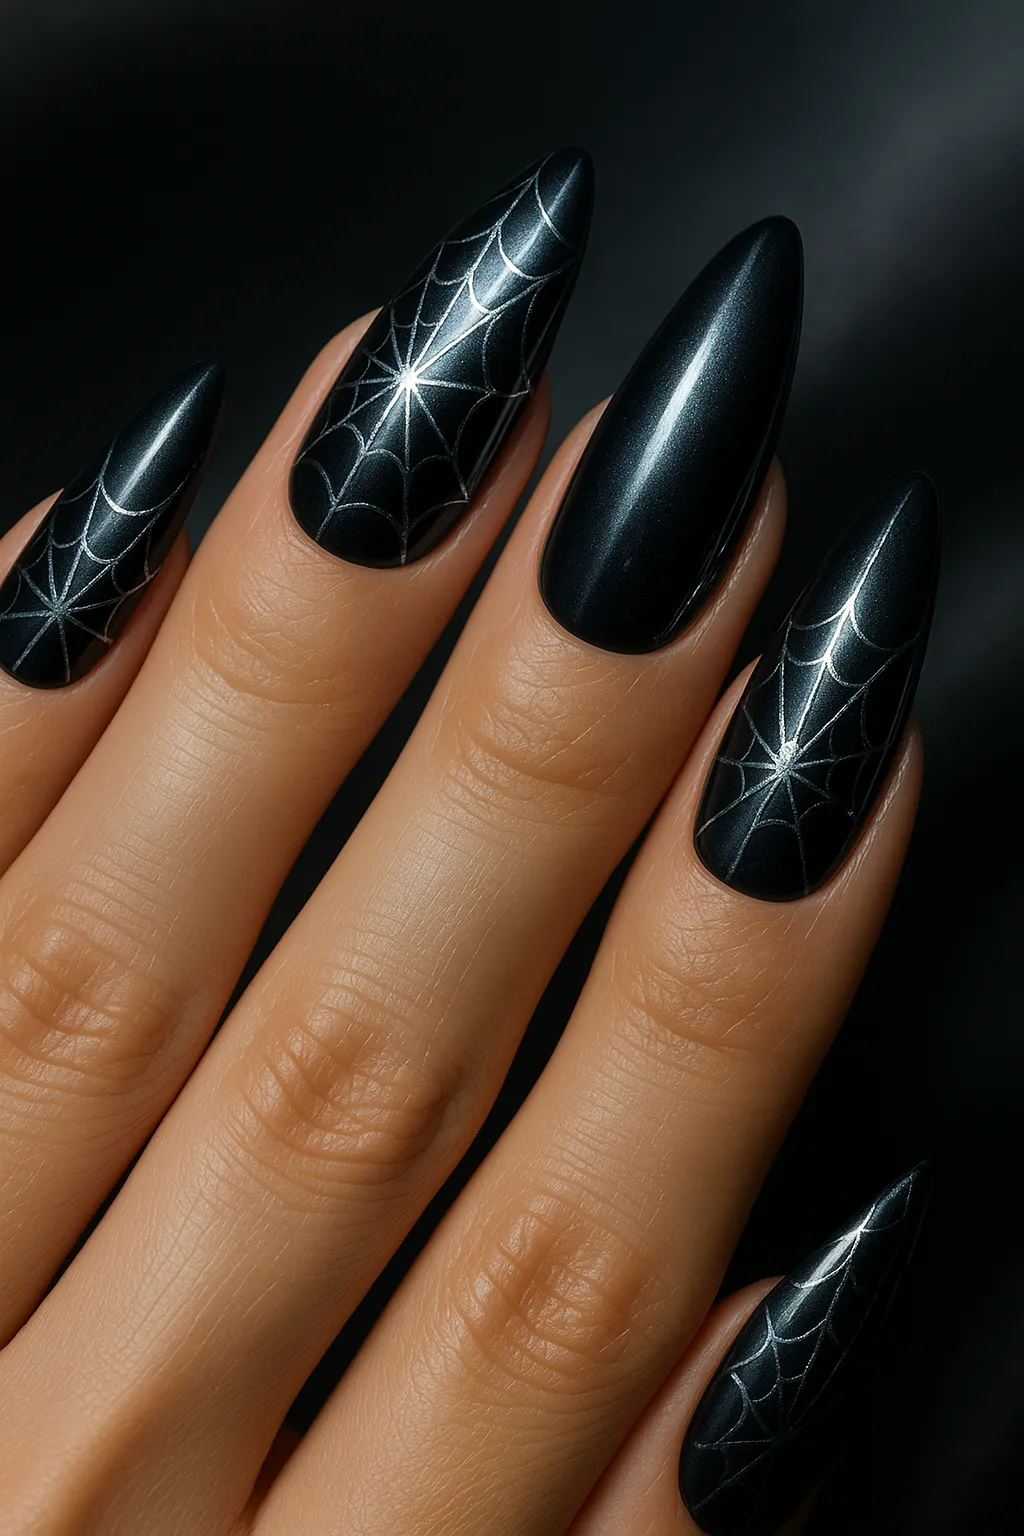
- Creepy Crawly Spiderwebs: Delicate black webbing over nude, orange, or deep purple bases. Includes corner accent placements and full-nail 3D web effects that really pop. Complexity: Medium. Time: 30–45 minutes.
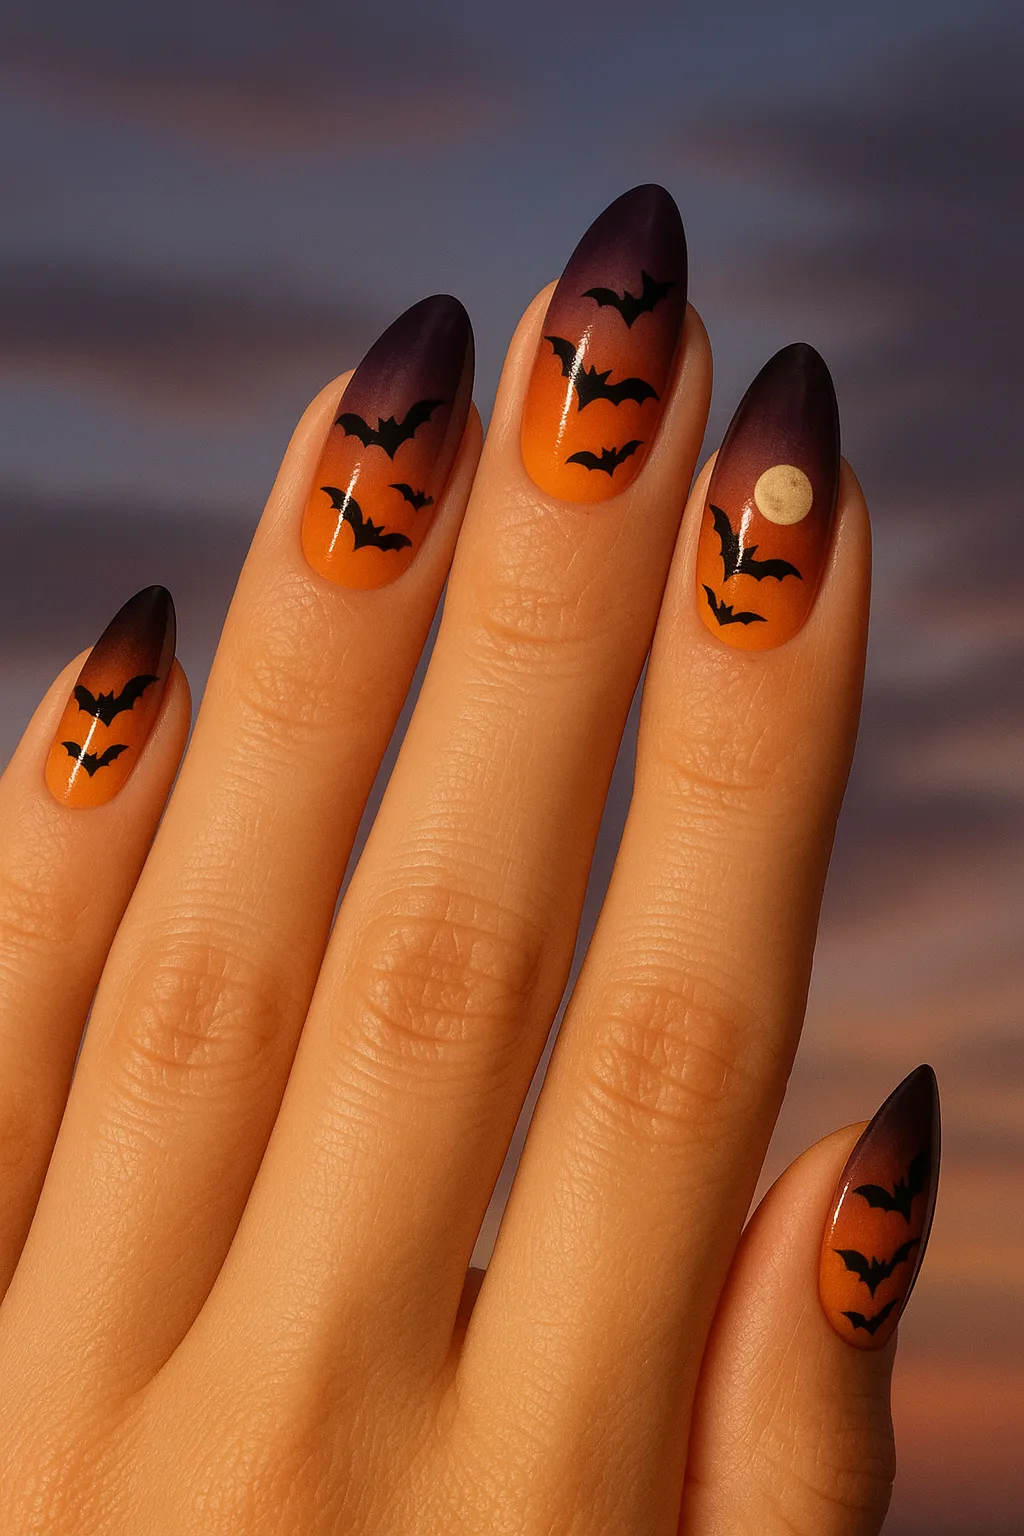
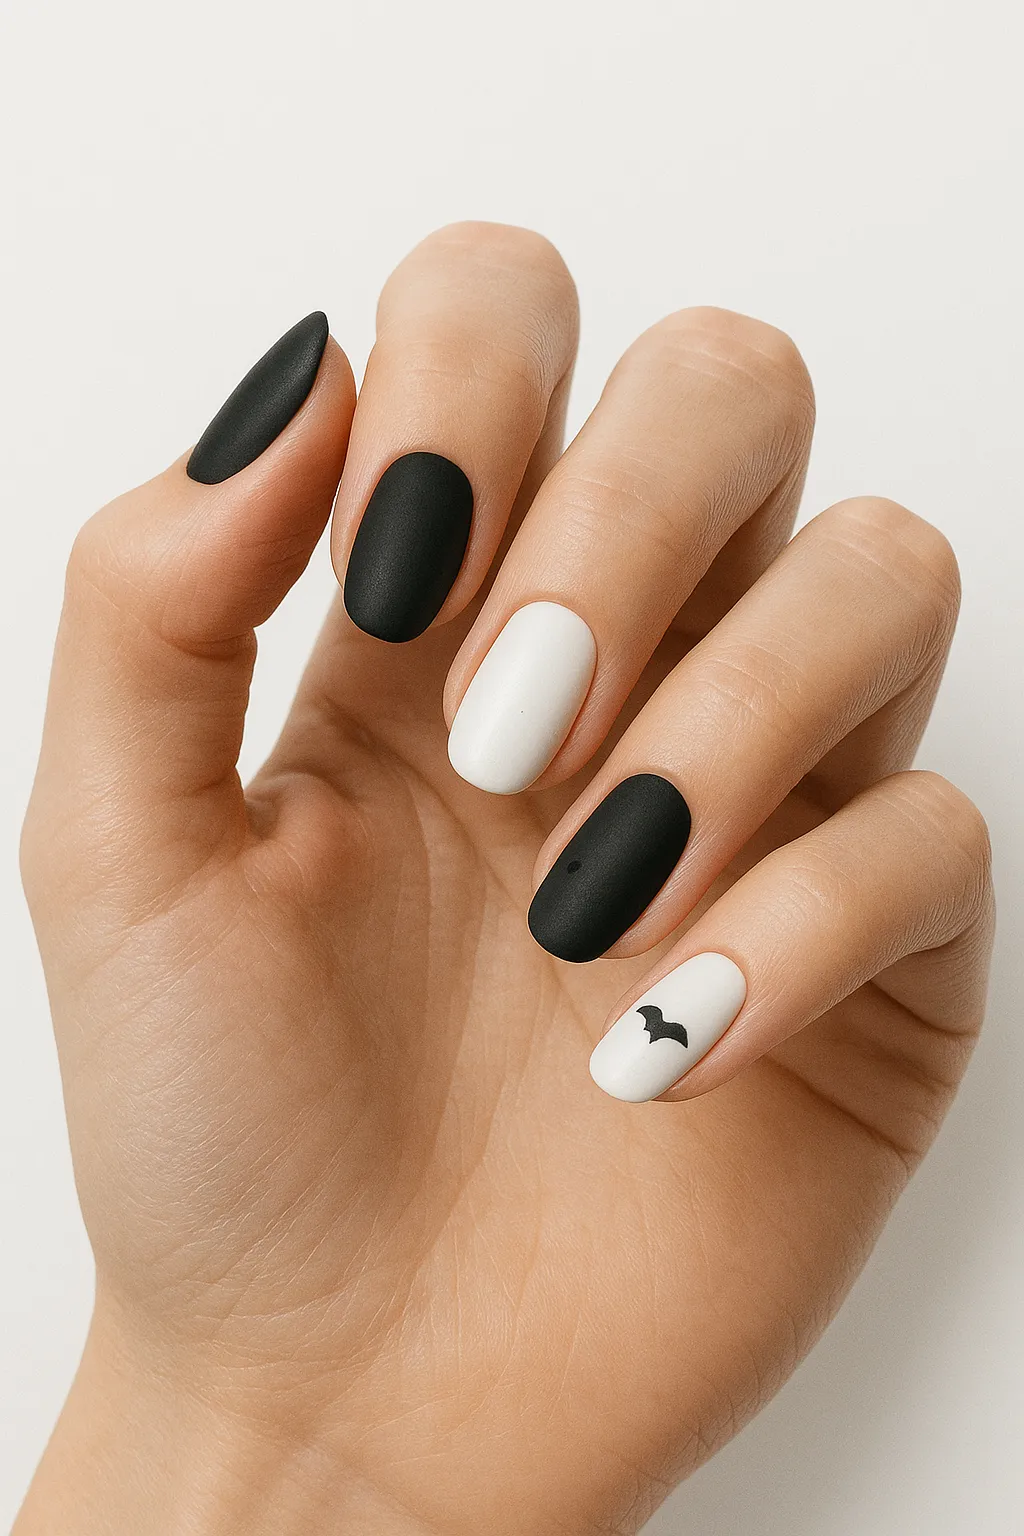
- Bat Silhouettes: Black bats soaring across gradient sunset skies. Try single accent nail versions or bat-shaped French tips. Complexity: Easy–Medium. Time: 25–40 minutes.
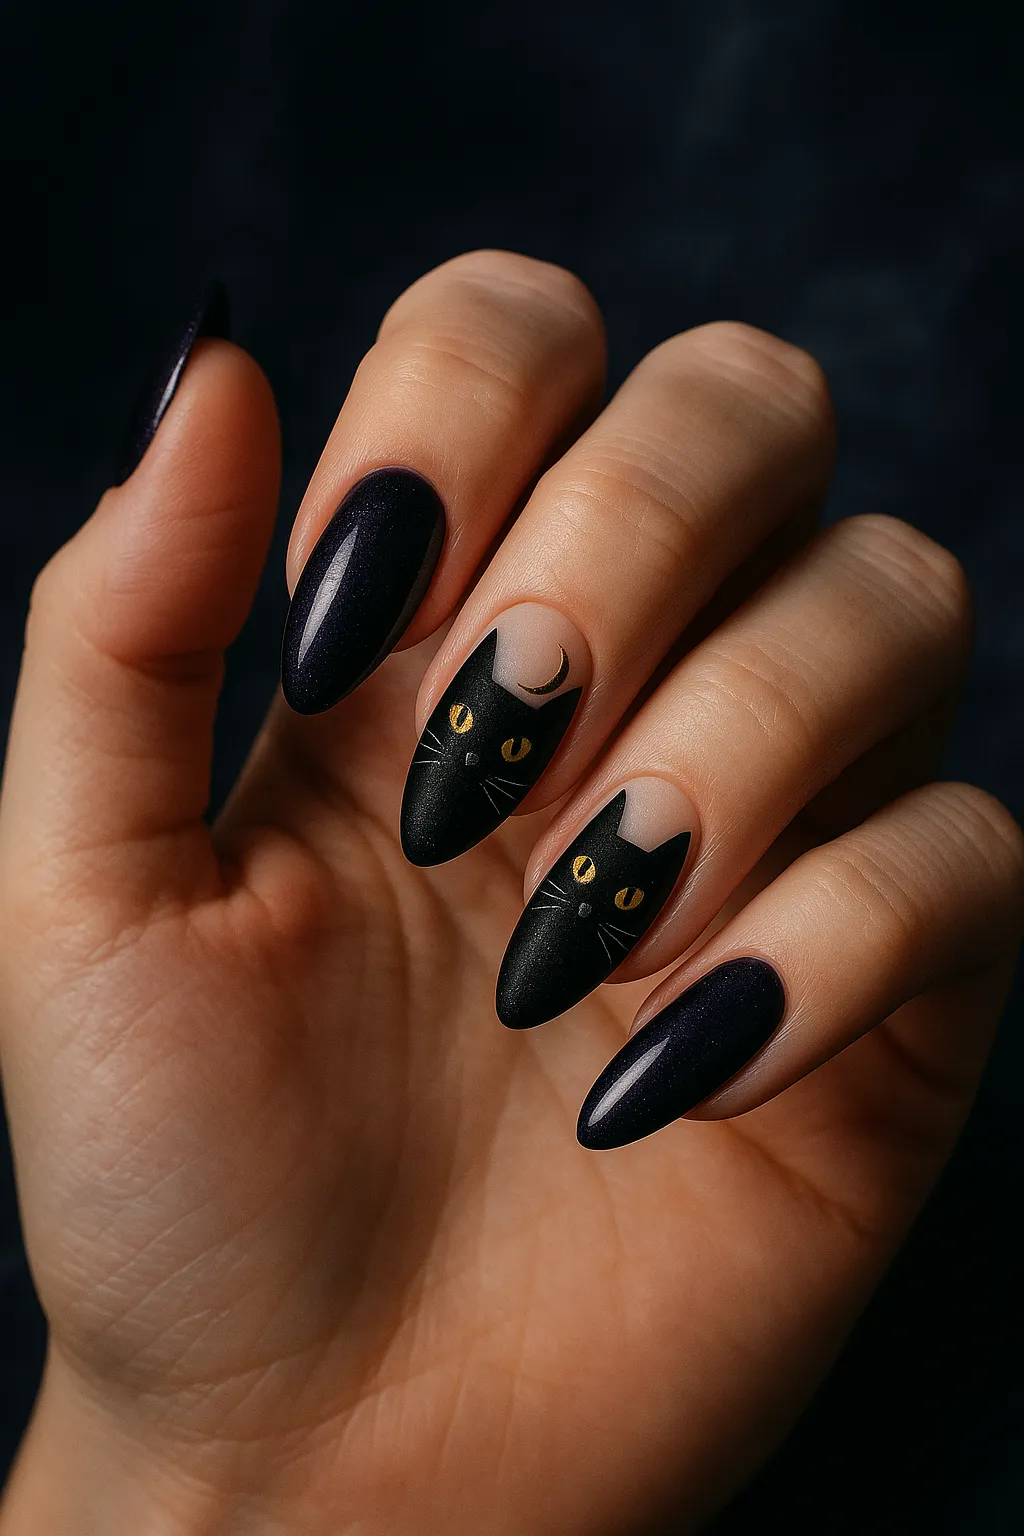
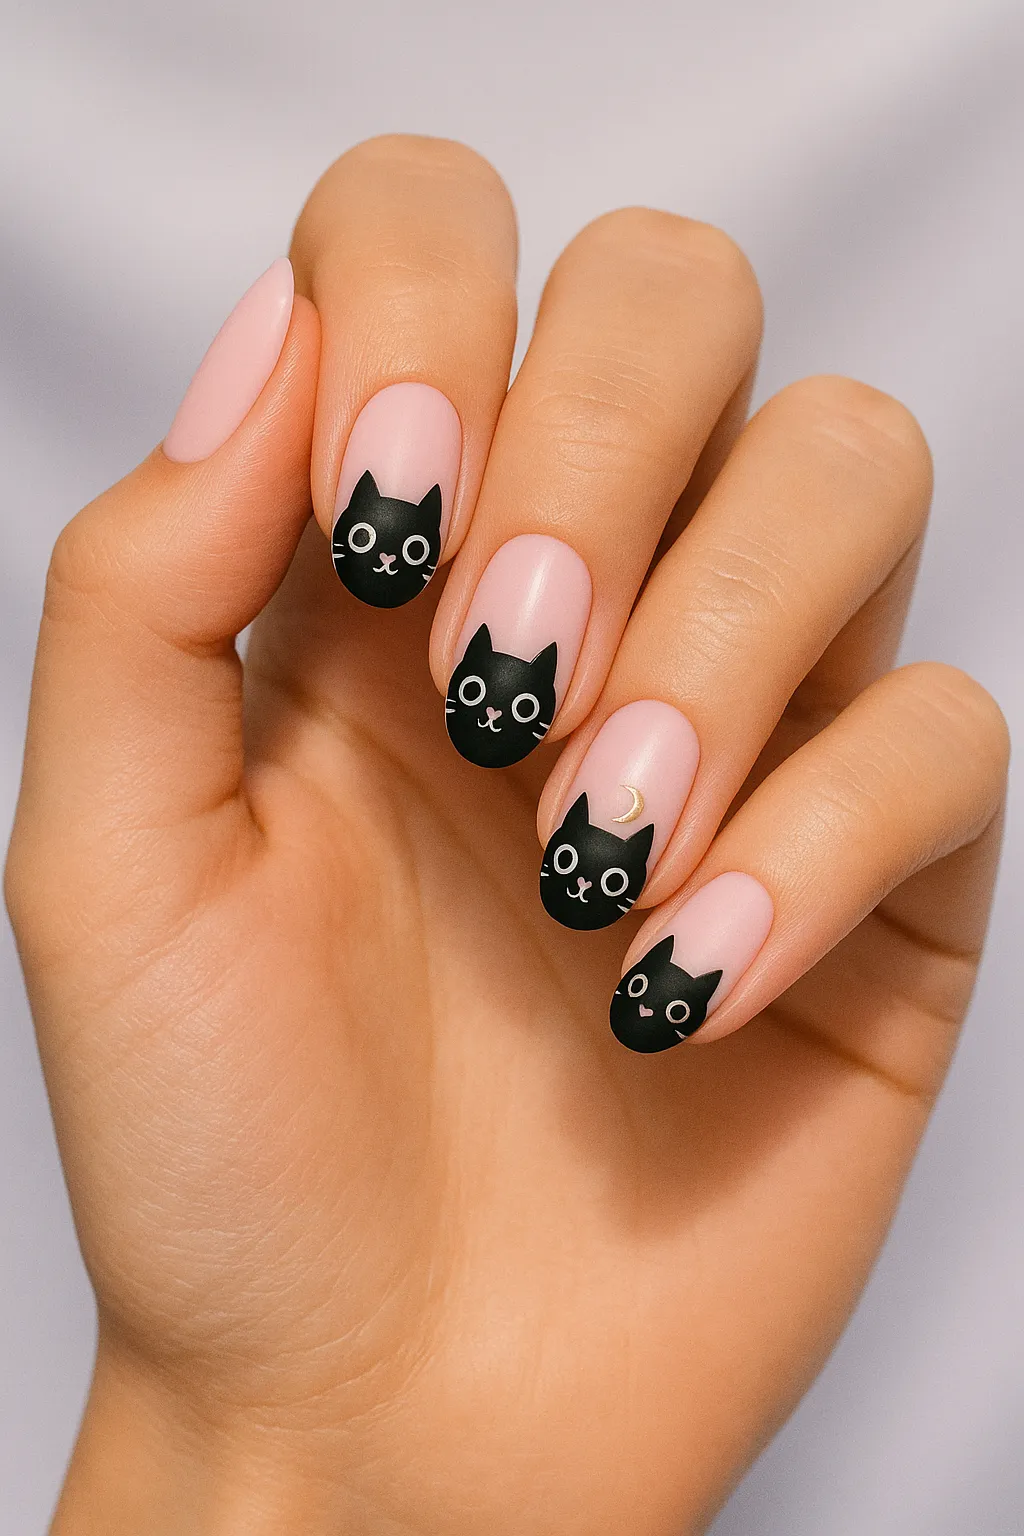
- Black Cat Magic: Mysterious silhouettes with glowing eyes and delicate whiskers. Adding moon motifs creates extra mystique. Complexity: Easy–Medium. Time: 25–40 minutes.
- Blood Drips: Realistic red drips cascading over nude or white bases. Choose matte finishes for dried blood or glossy for fresh horror vibes. Complexity: Easy–Medium. Time: 20–35 minutes.
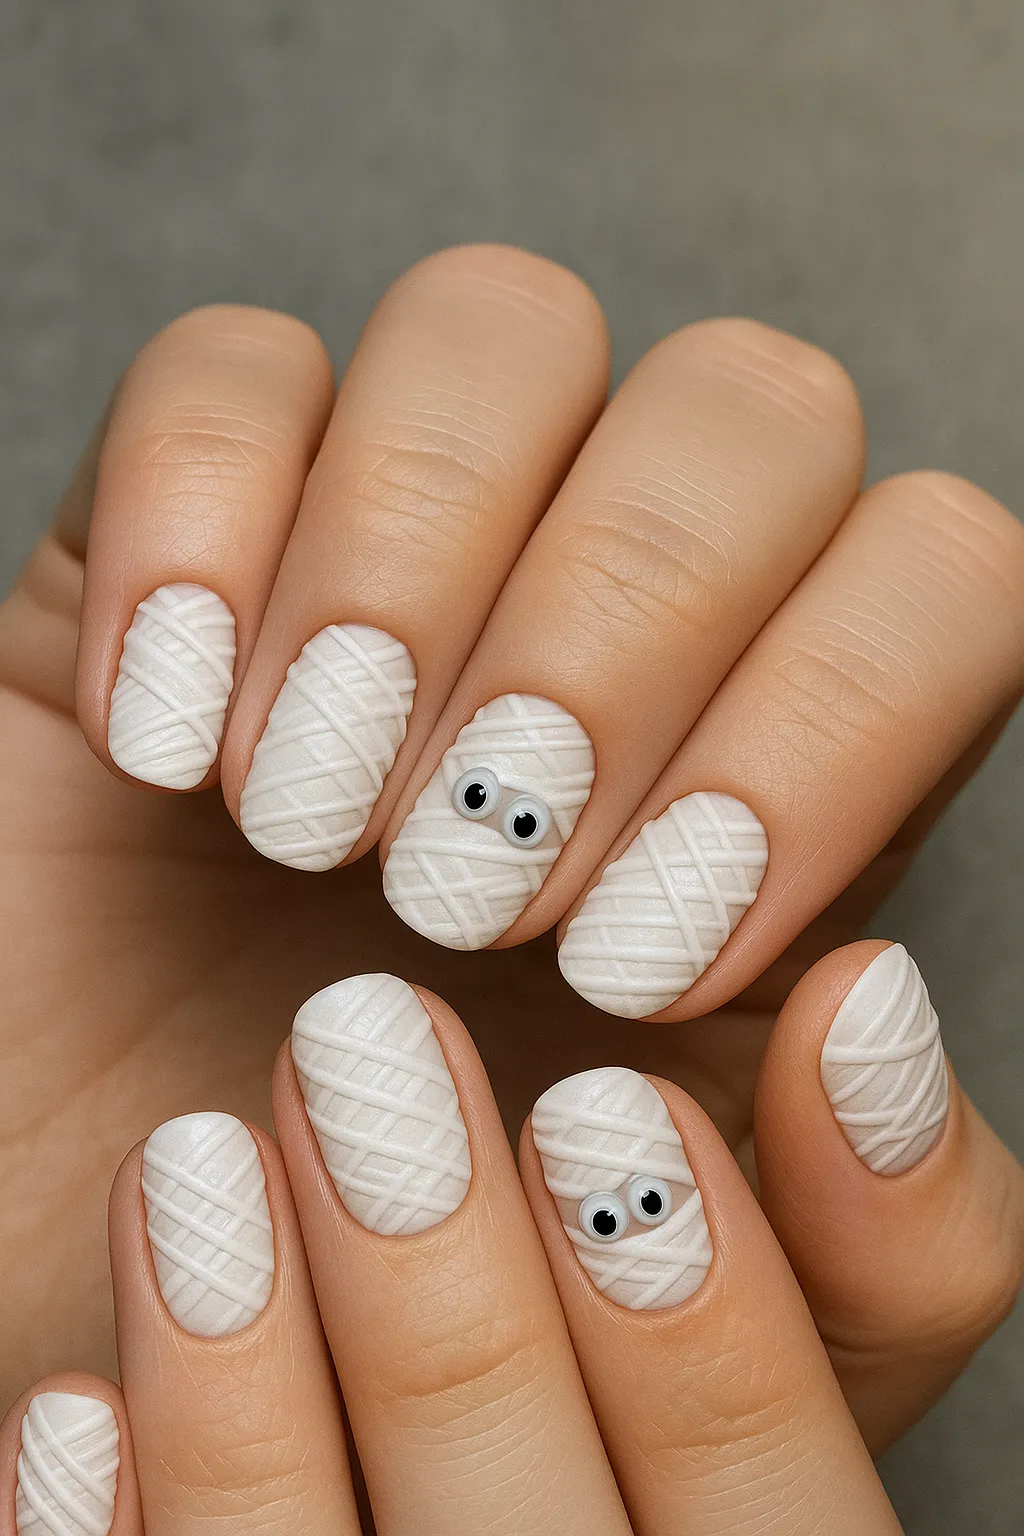
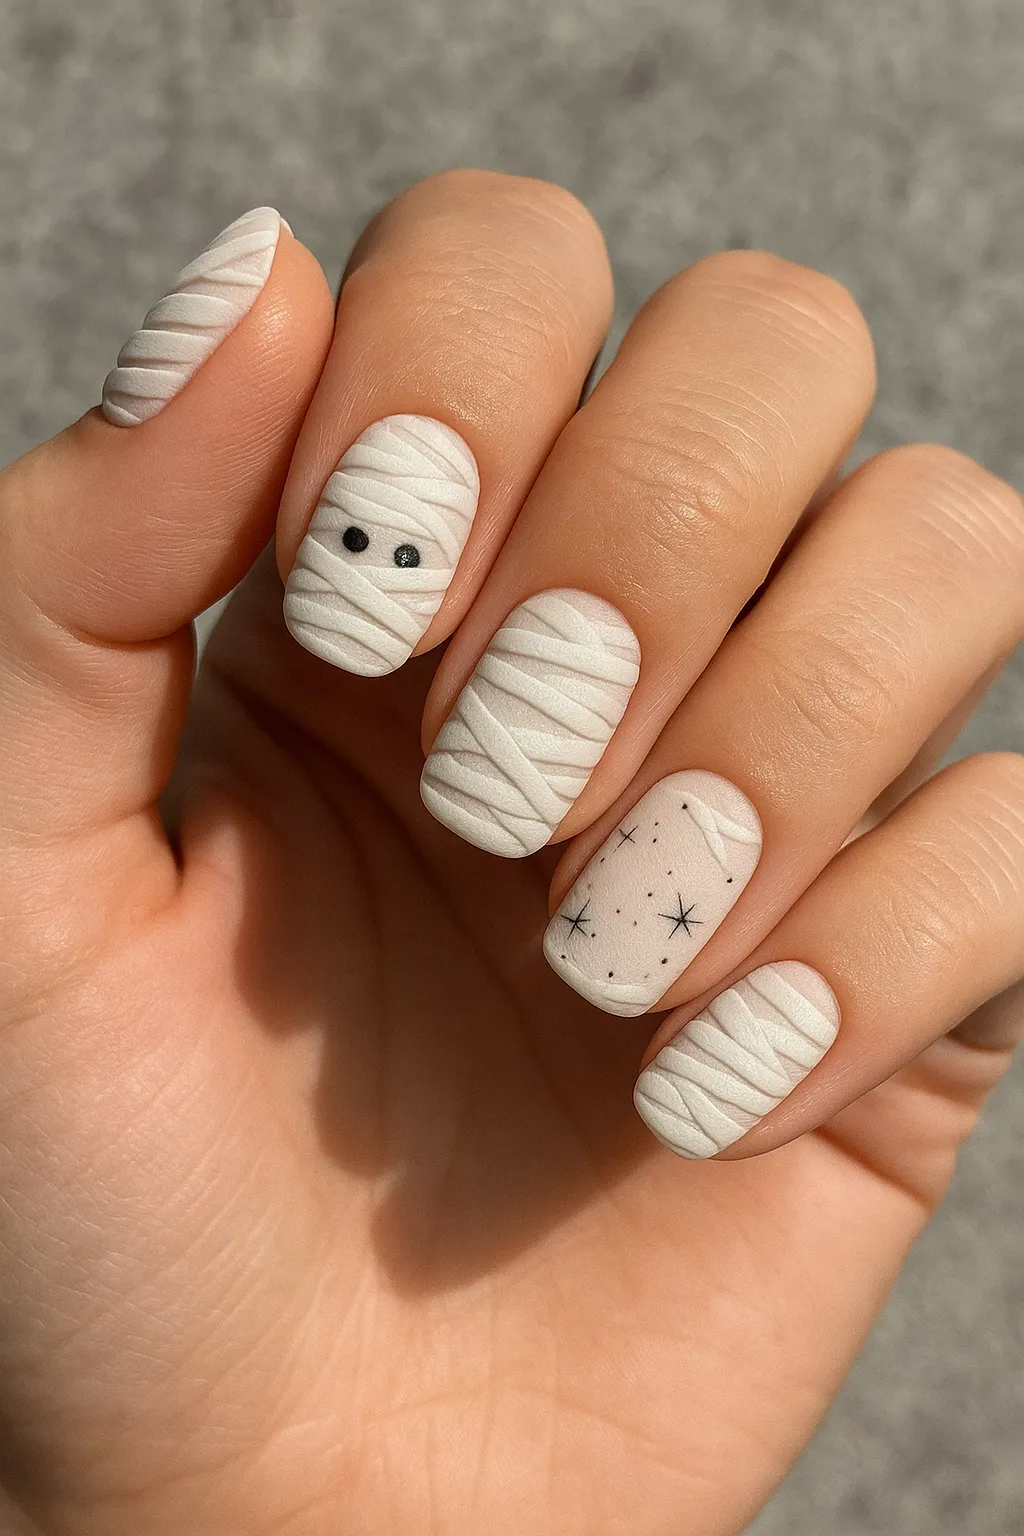
- Mummy Bandages: Crisscrossing white bandages with cute googly eyes peeking through. Use tape or striping brushes for realistic texture. Complexity: Medium. Time: 30–45 minutes.
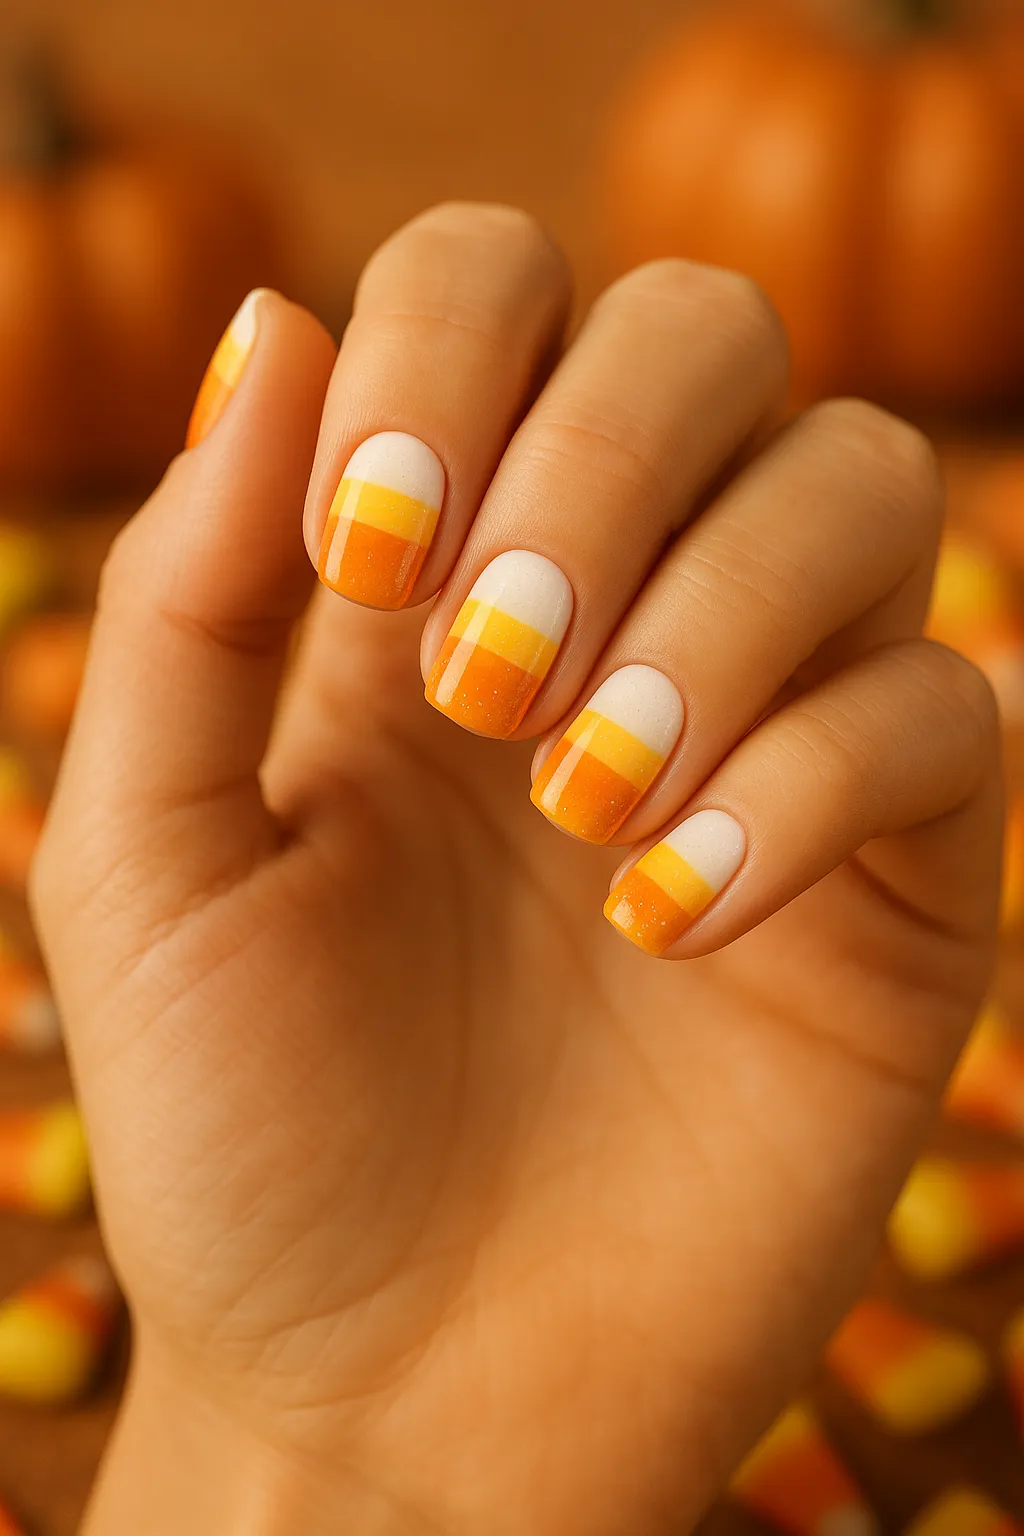
- Candy Corn: Classic tri-color design featuring yellow, orange, and white. Try gradient versions or add holographic glitter for 2025 sparkle. Complexity: Easy–Medium. Time: 20–35 minutes. Related: DIY fall nails.
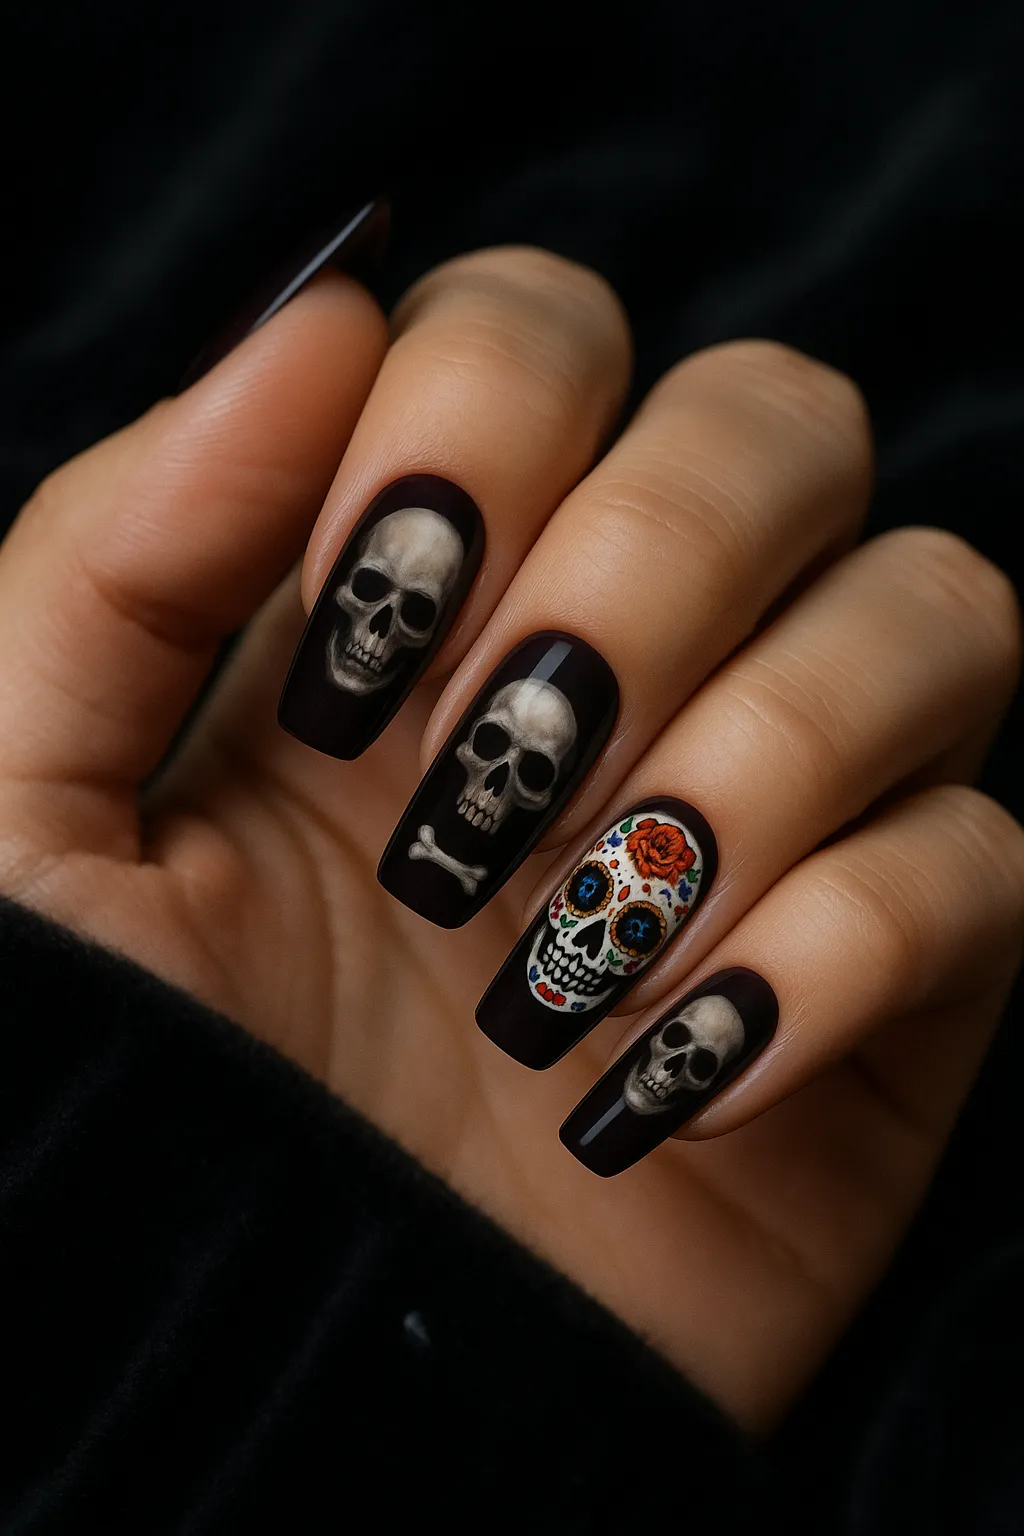
- Skulls & Skeletons: Hand-painted skulls with shading, delicate bone motifs, or vibrant sugar skulls inspired by Día de los Muertos. Complexity: Medium–Advanced. Time: 40–60 minutes.
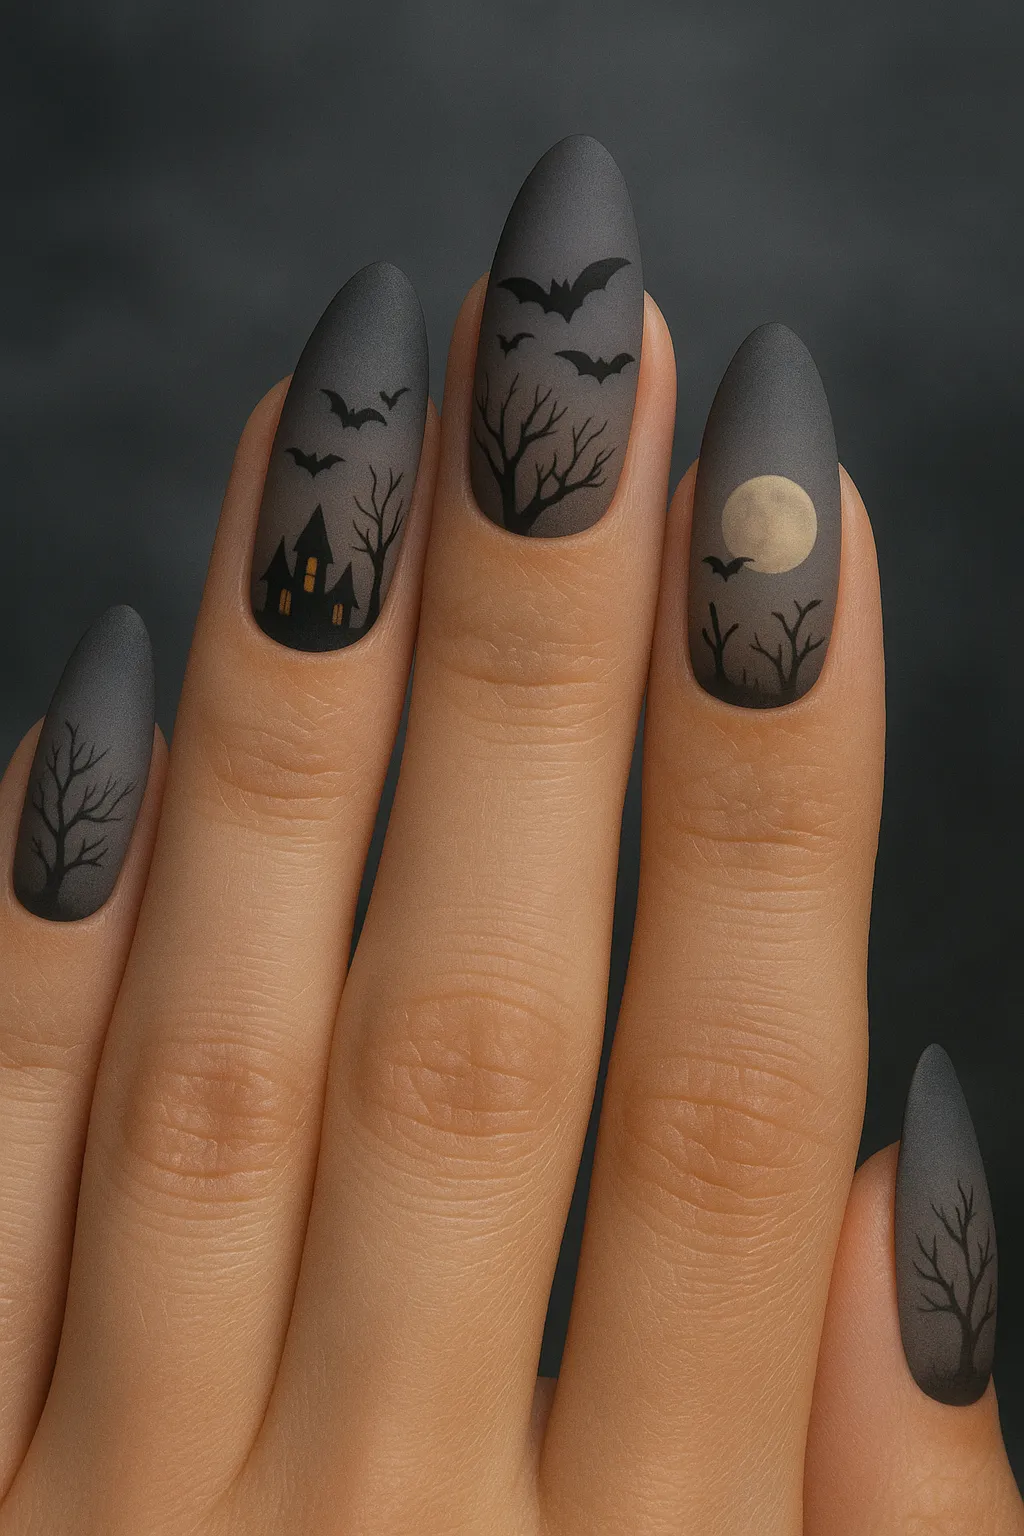
- Haunted Elements: Spooky houses, crumbling tombstones, and full moon scenes. Layer elements to create depth and storytelling across your nails. Complexity: Medium–Advanced. Time: 40–60 minutes.
Pro Tip: Classic motifs work beautifully on any nail length and are perfect for beginners using stencils or stamping plates. I always recommend starting here if you’re new to Halloween nails!
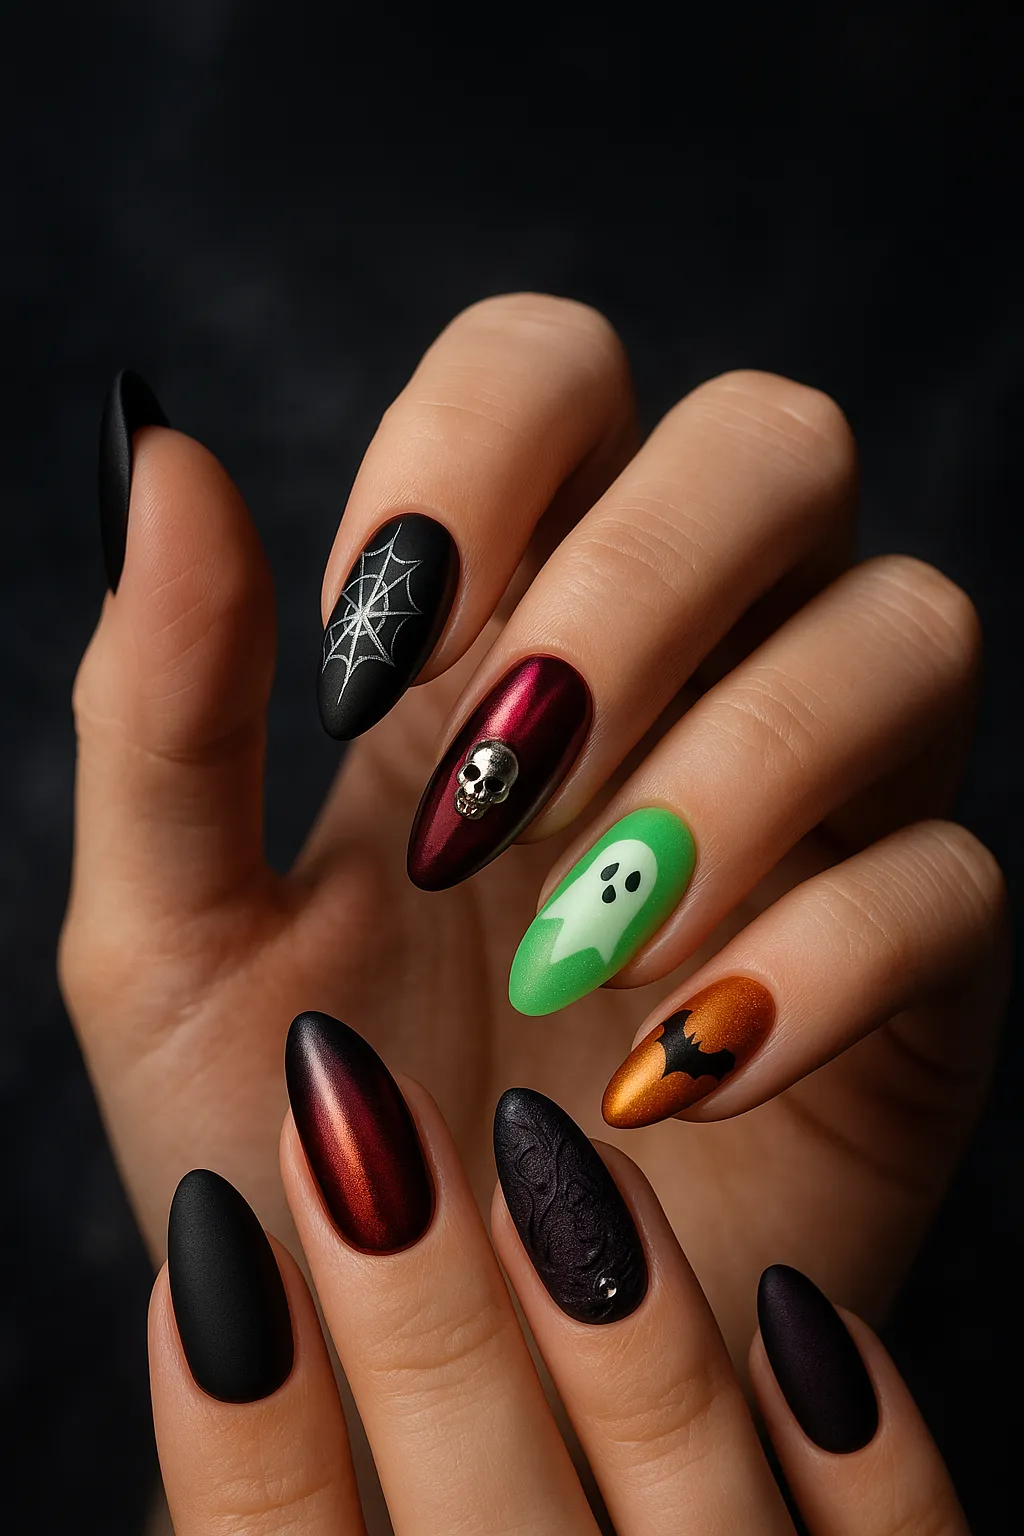
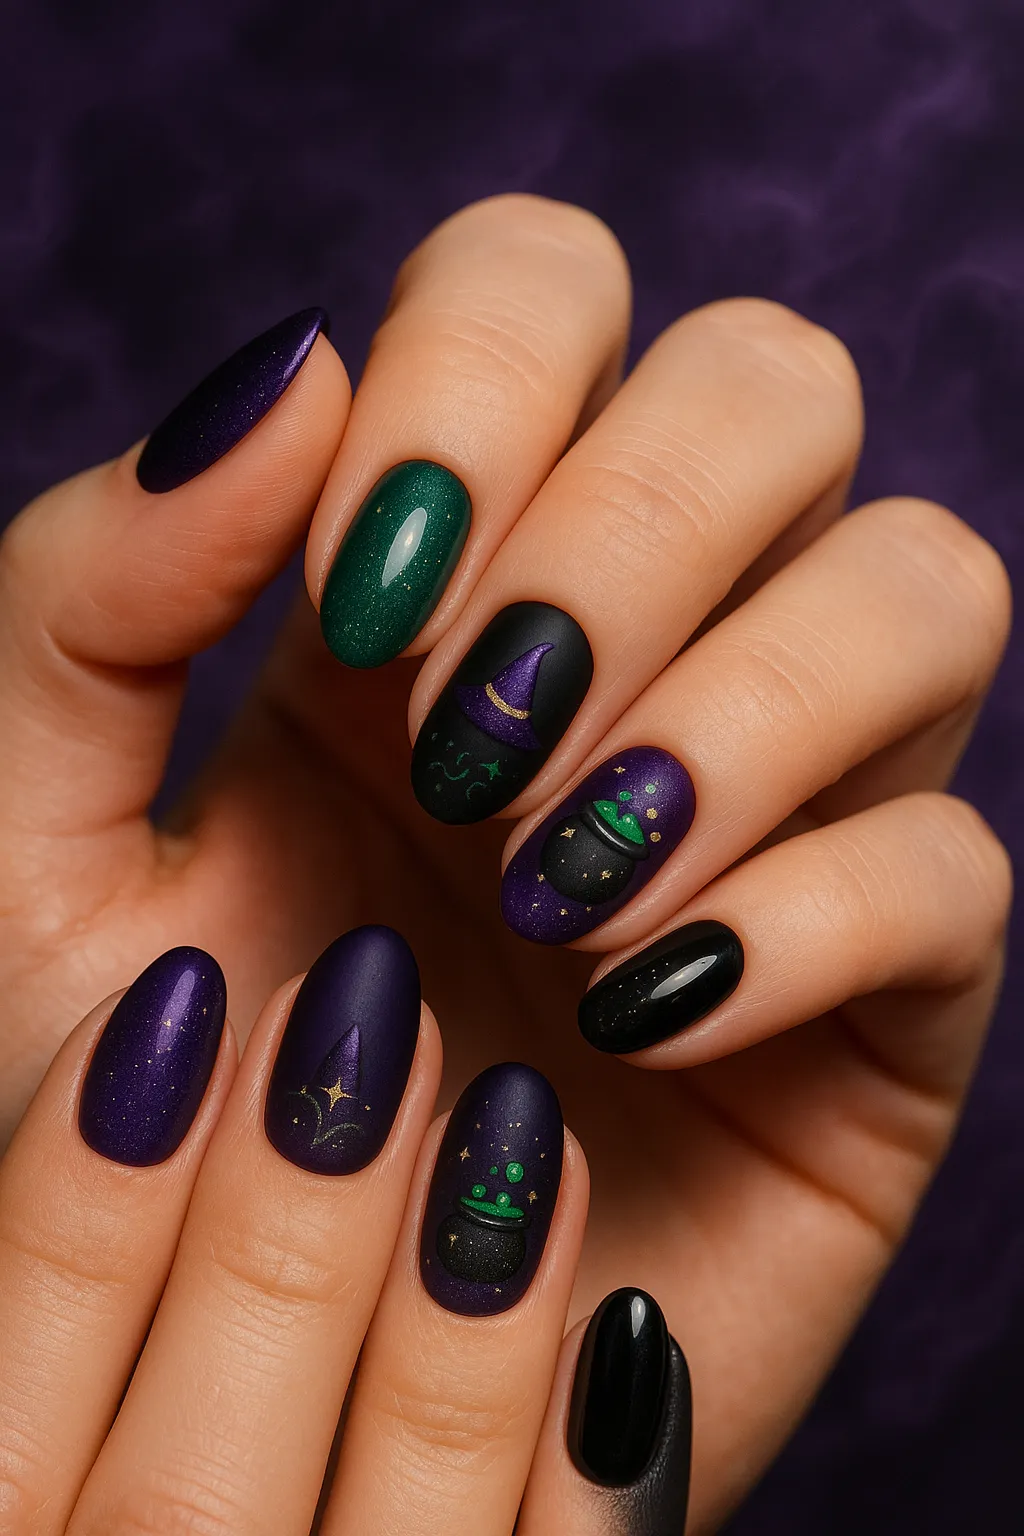
Gothic Glamour & High-Fashion Horror (12+ Sophisticated Looks)
- Black Lace Overlays: Nude or deep burgundy bases adorned with intricate lace patterns created via stamping or meticulous hand-painting. Complexity: Advanced. Time: 45–60 minutes.
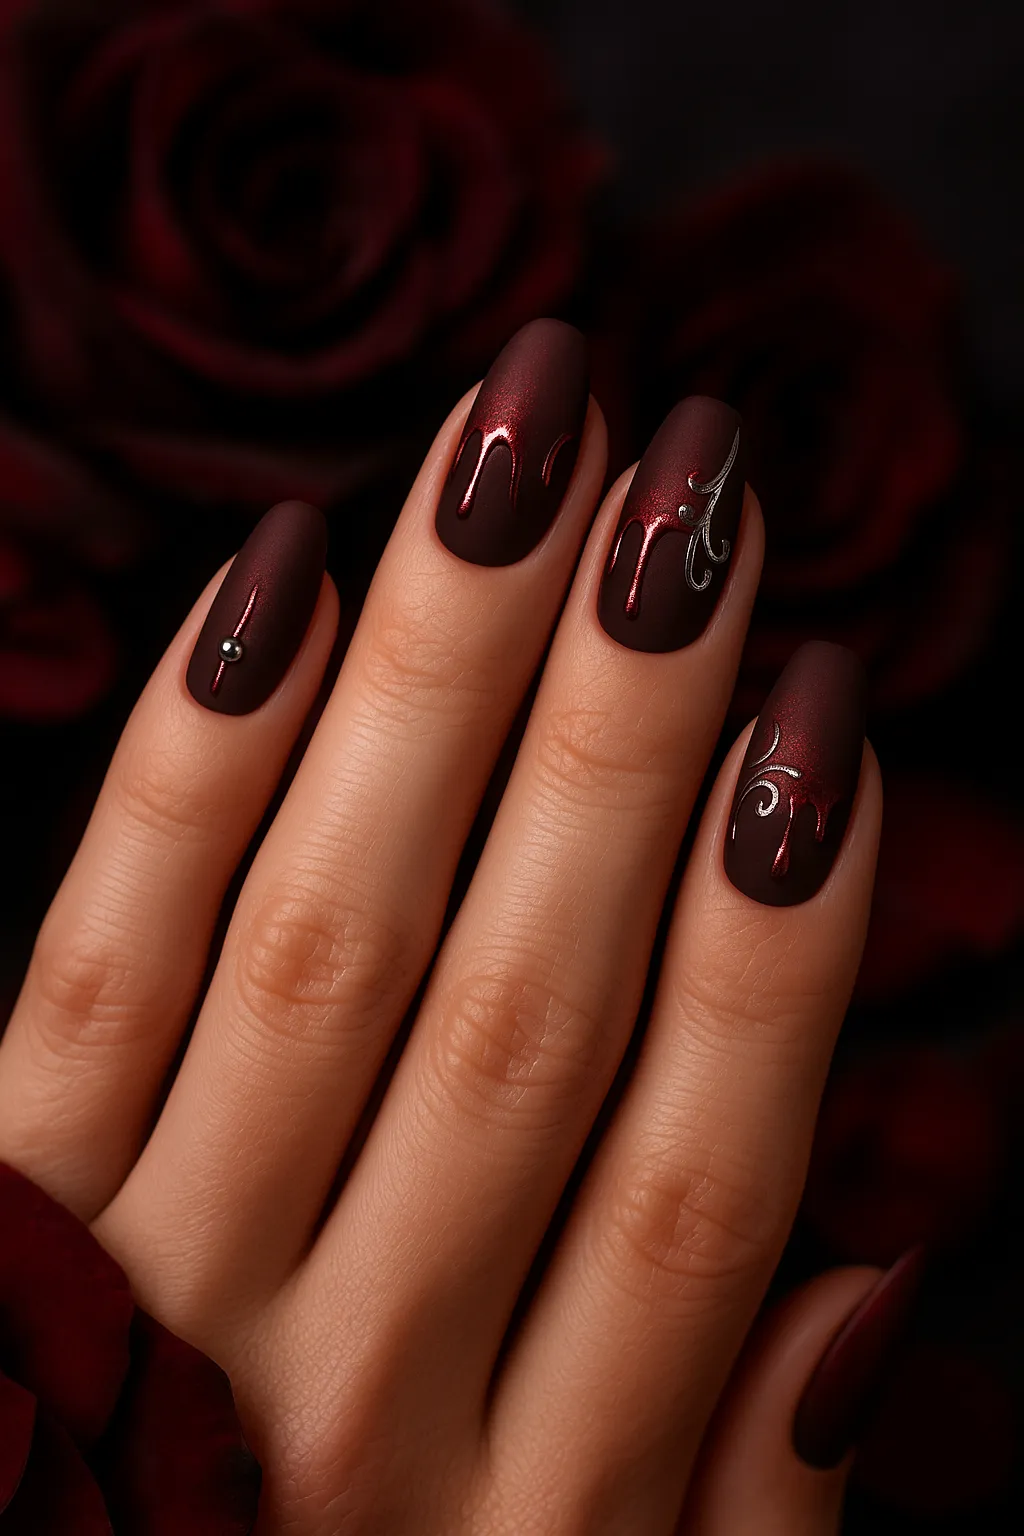
- Oxblood & Burgundy Elegance: Deep, wine-red shades with matte or glossy finishes. Add gold foil accents for a luxurious Victorian touch. Complexity: Medium–Advanced. Time: 40–55 minutes.
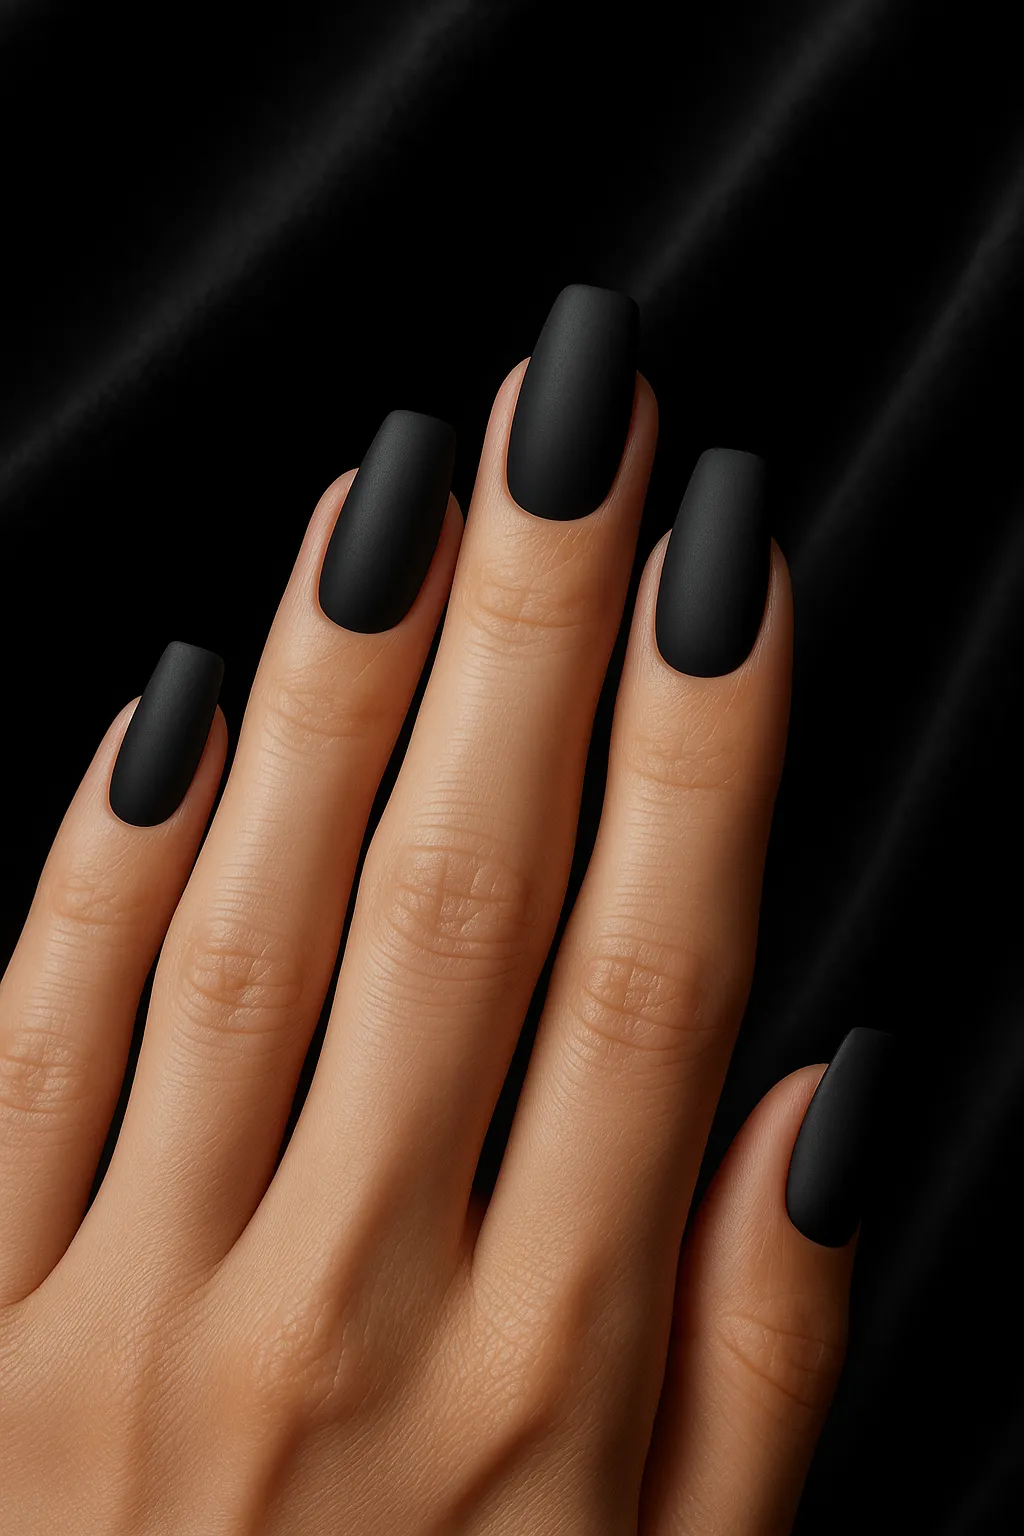
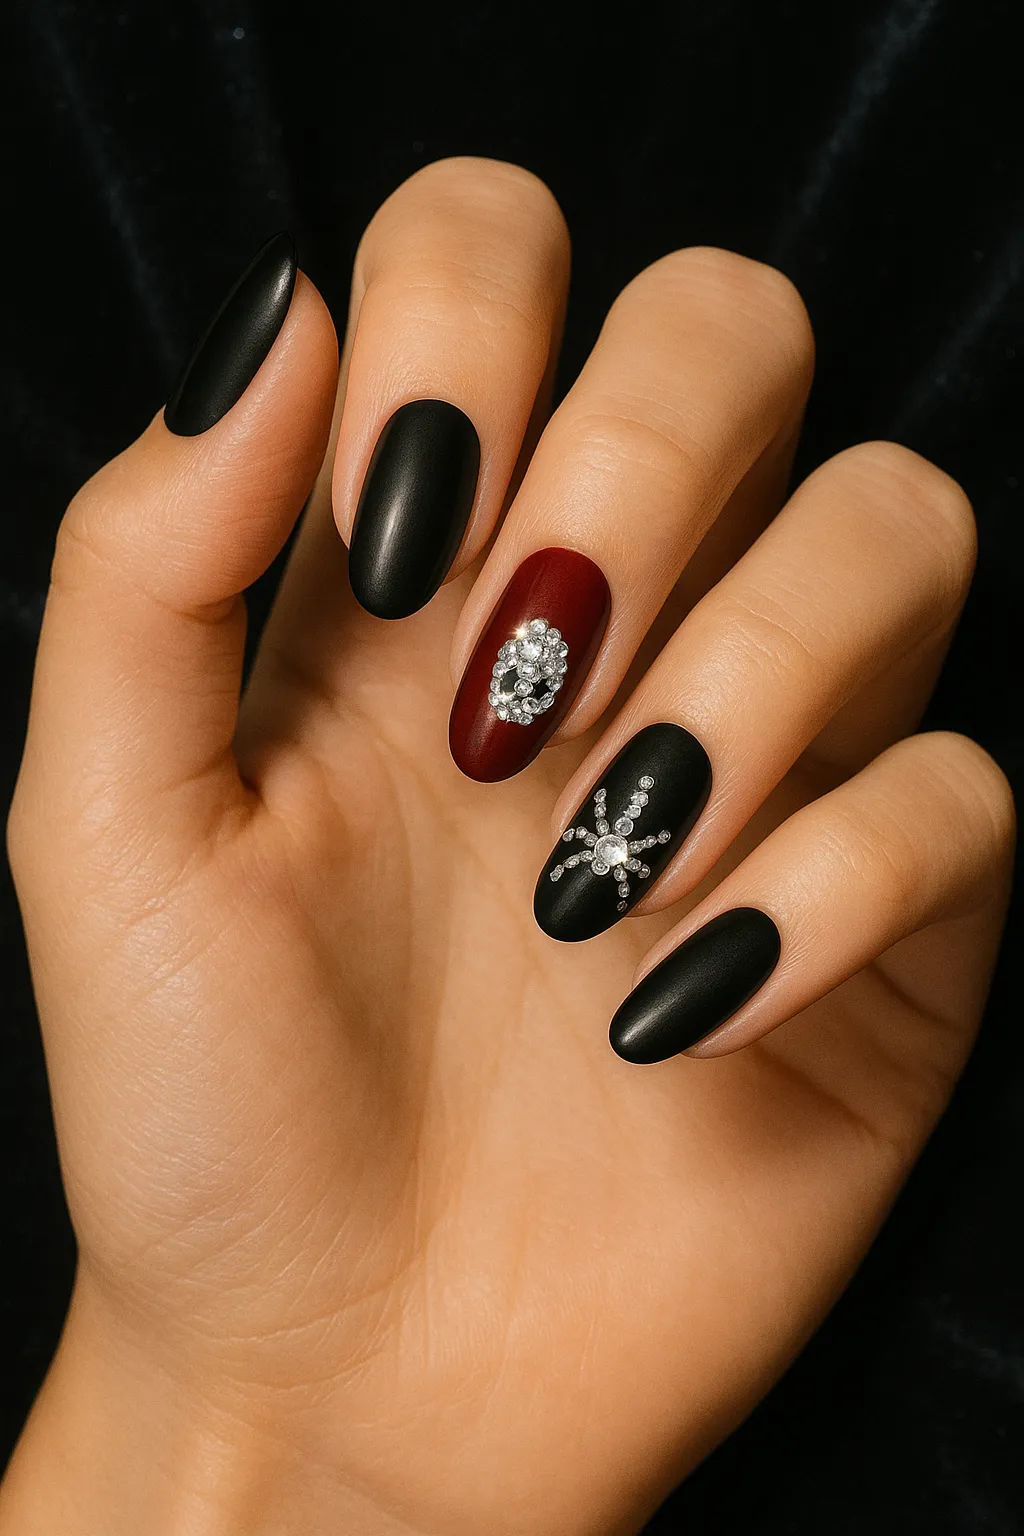
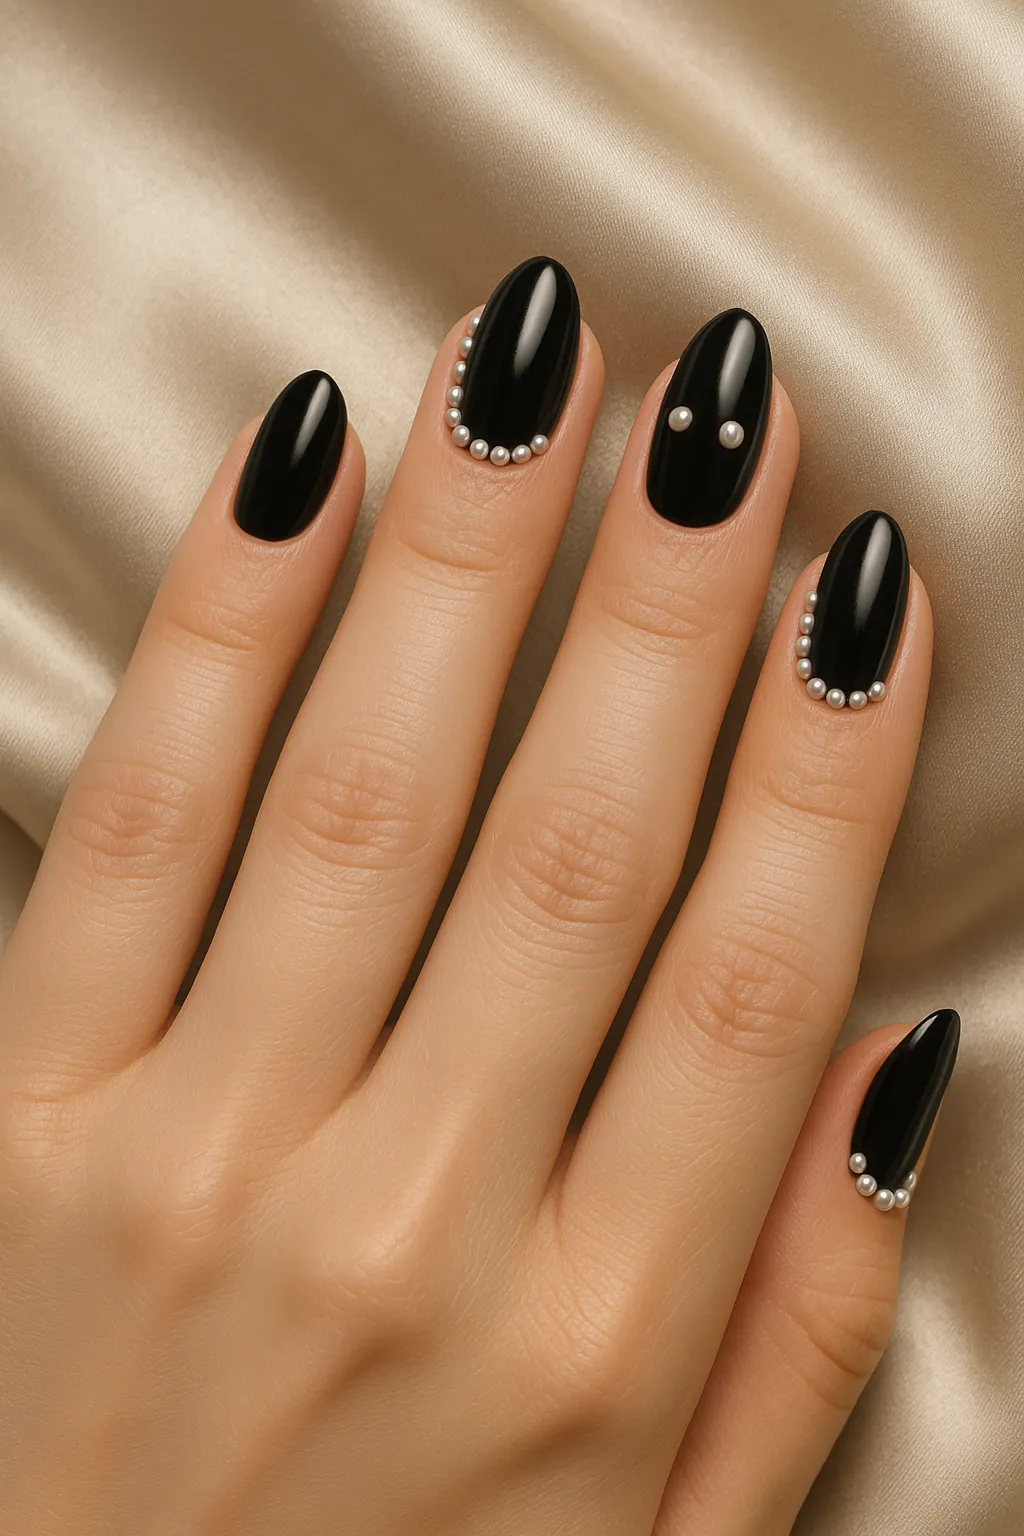
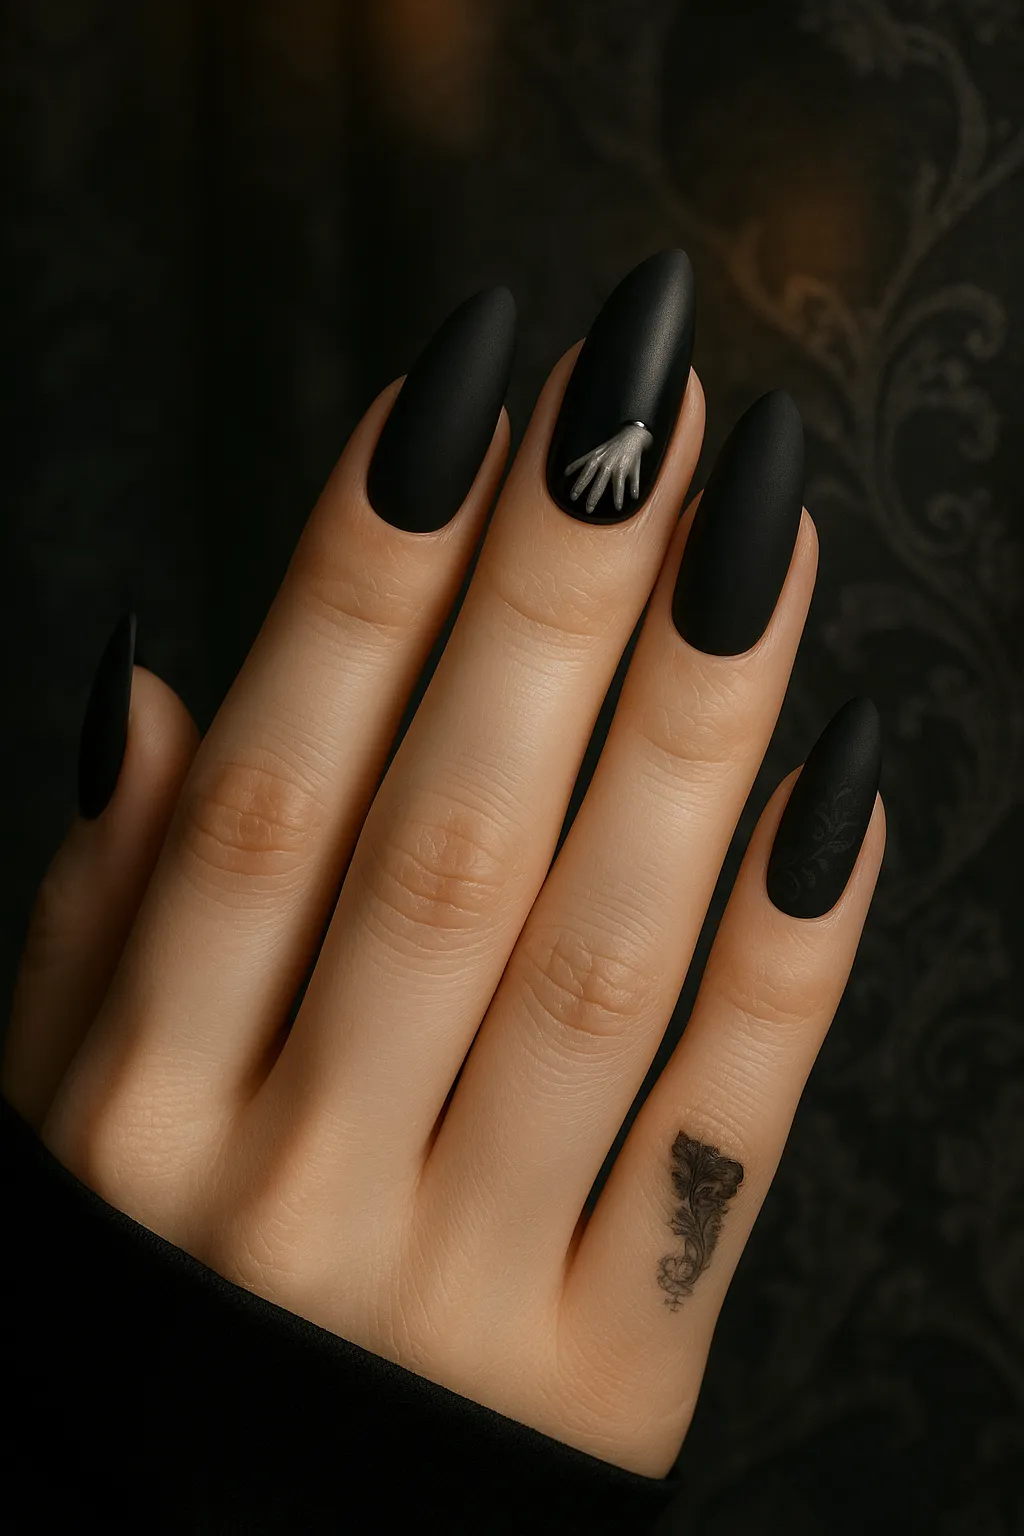
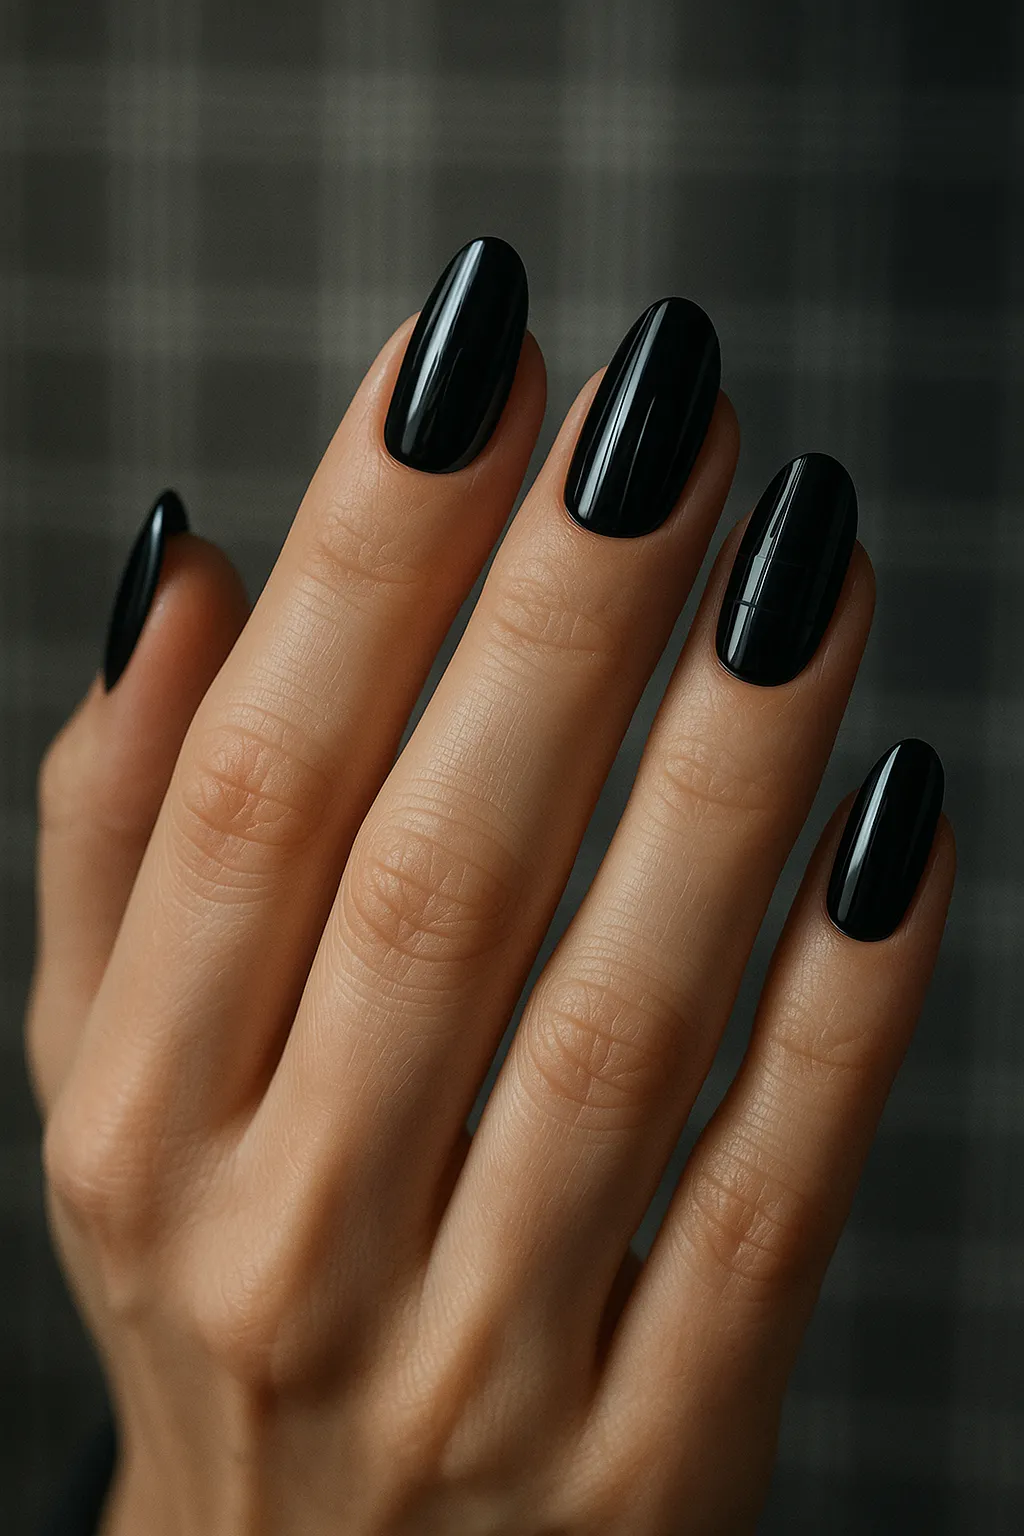
- Velvet Matte Black: Sophisticated all-black matte nails with a single crystal or metallic accent nail for understated drama. Complexity: Easy–Medium. Time: 30–45 minutes.
- Baroque & Victorian Details: Ornate gold filigree patterns, Renaissance-inspired scrollwork, and jewel embellishments that scream opulence. Complexity: Advanced. Time: 50–70 minutes.
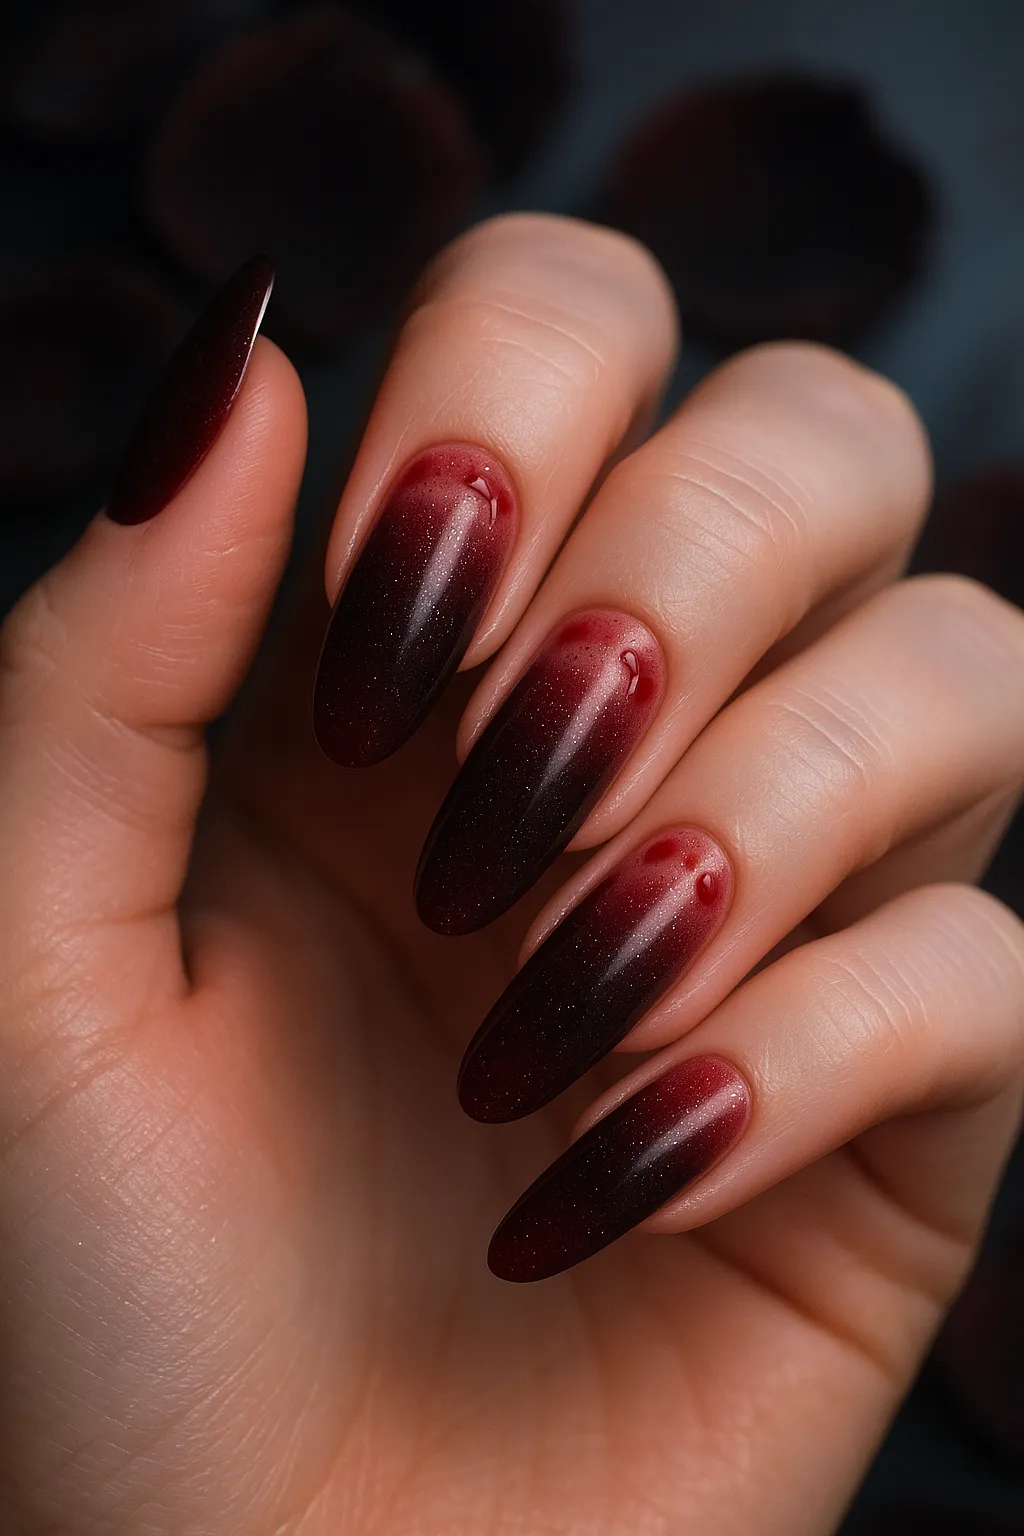
- Blood Moon: Deep crimson gradients fading to black with delicate crescent moon details painted in metallic gold. Complexity: Medium. Time: 40–55 minutes.
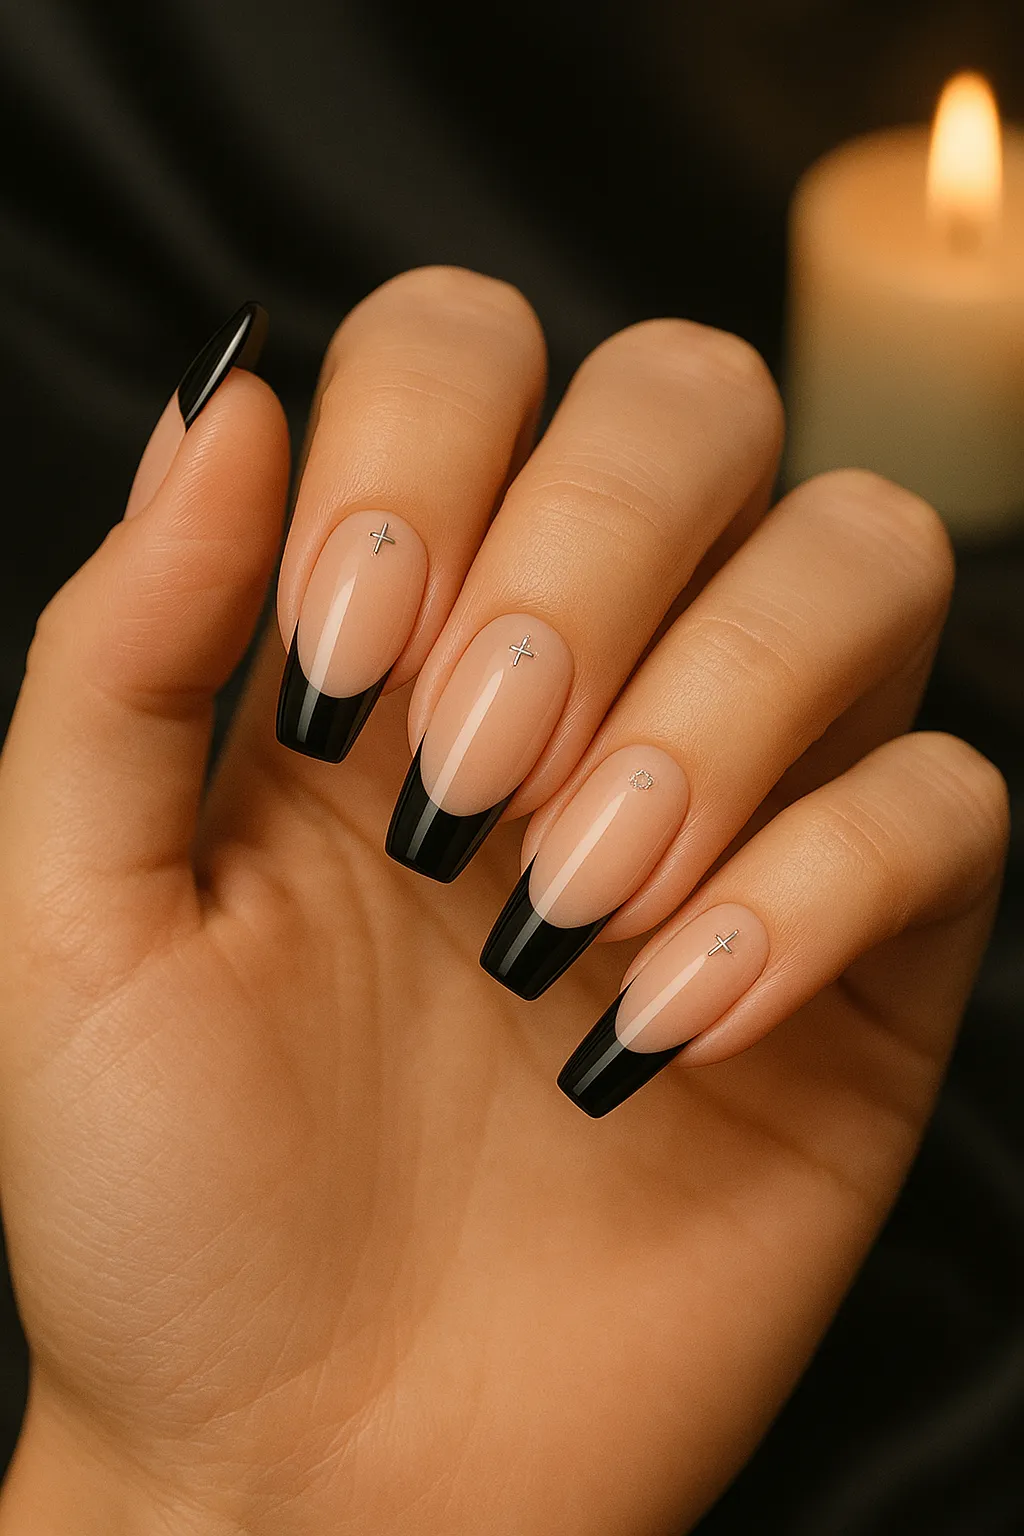
- Gothic French Tips: Twist the classic French with black tips on nude bases, enhanced with delicate chain details or tiny cross symbols. Complexity: Advanced. Time: 45–60 minutes.
- Horror Film Aesthetics: Moody, atmospheric motifs inspired by classic films. Think vintage color palettes and cinematic drama. Complexity: Advanced. Time: 50–70 minutes.
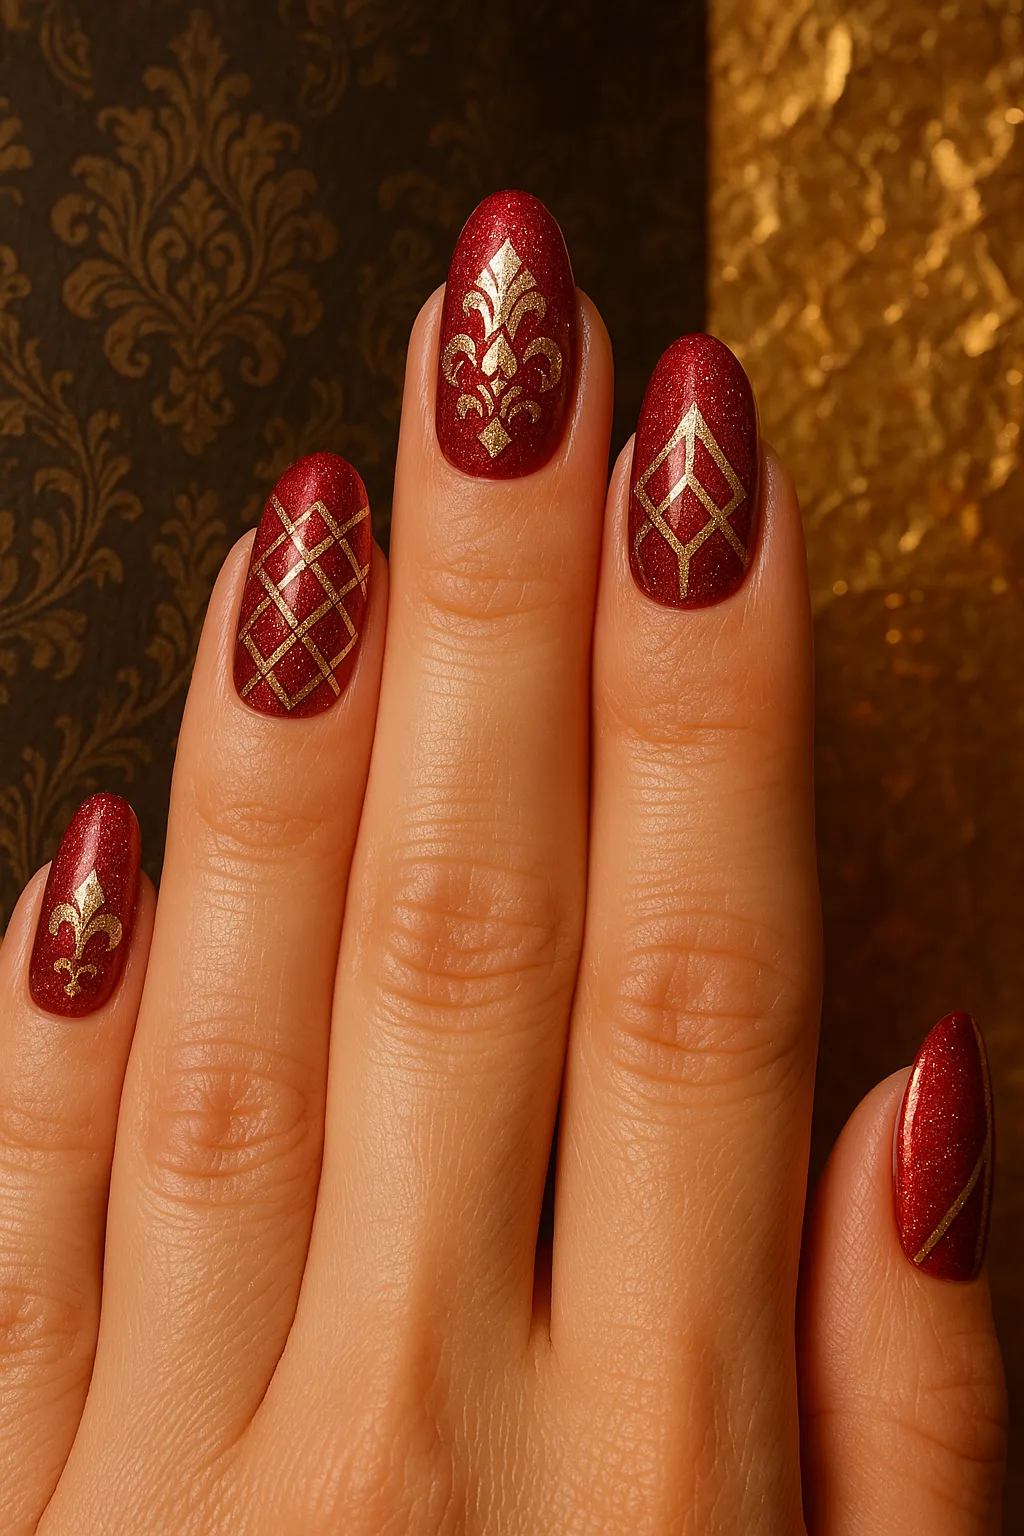
- Crimson & Gold: Regal red base with metallic gold geometric accents and damask patterns. Complexity: Medium–Advanced. Time: 40–60 minutes.
- Widow’s Lace: Black lace overlaying a blood-red base for mourning elegance. Add tiny pearls or rhinestones for extra sophistication. Complexity: Advanced. Time: 50–70 minutes.
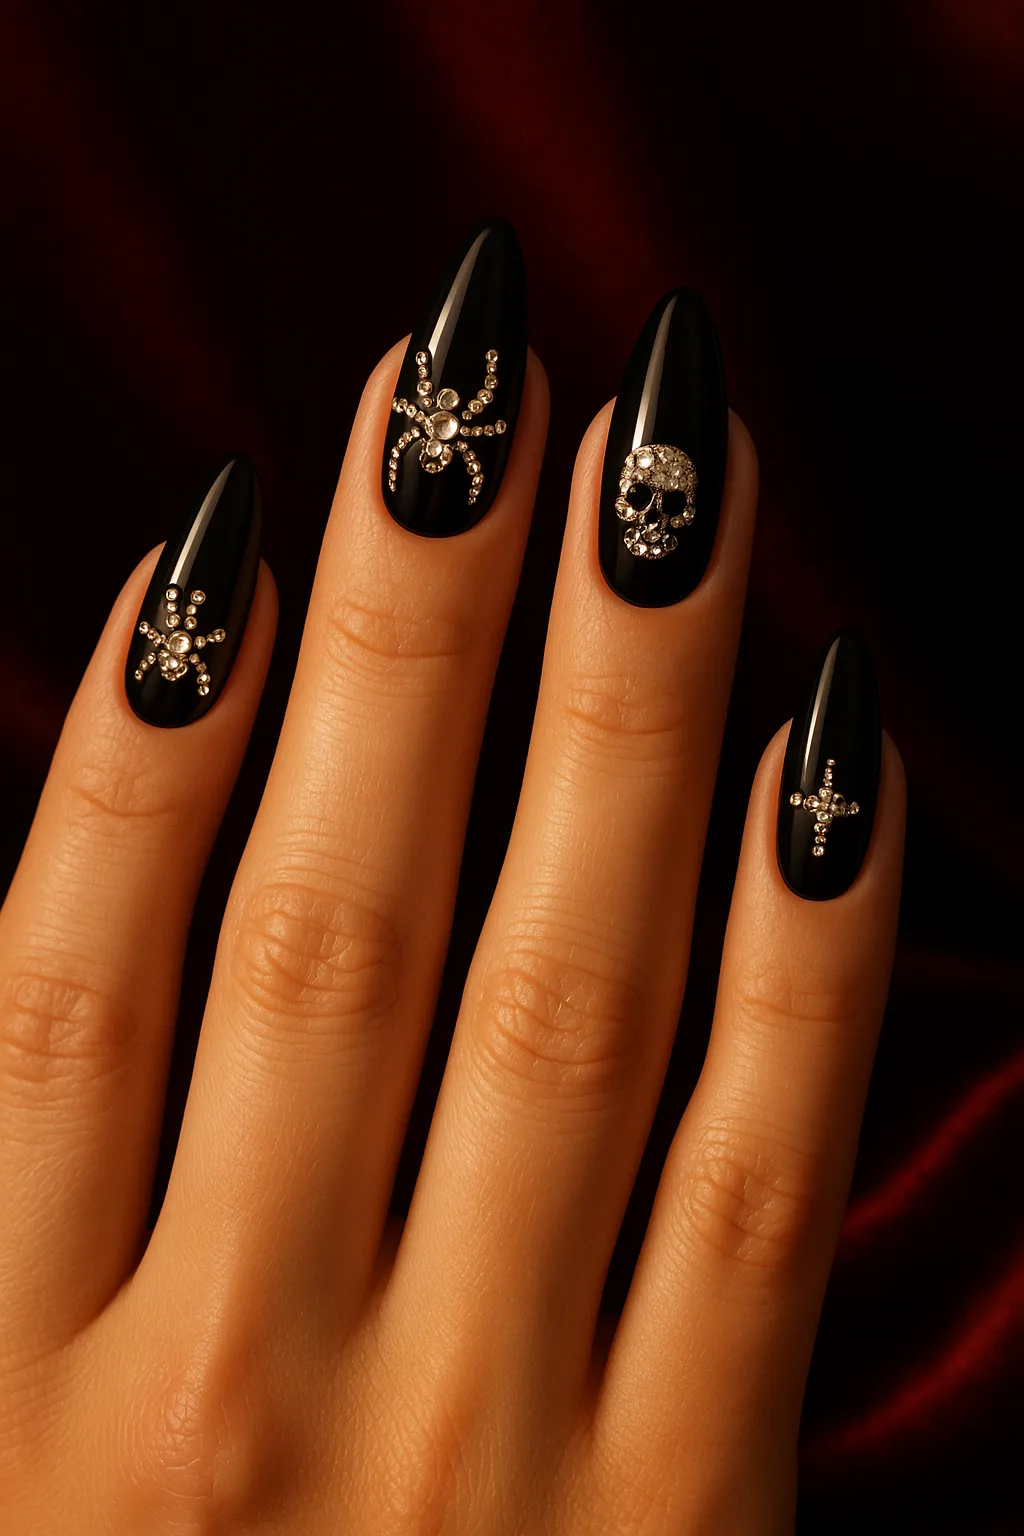
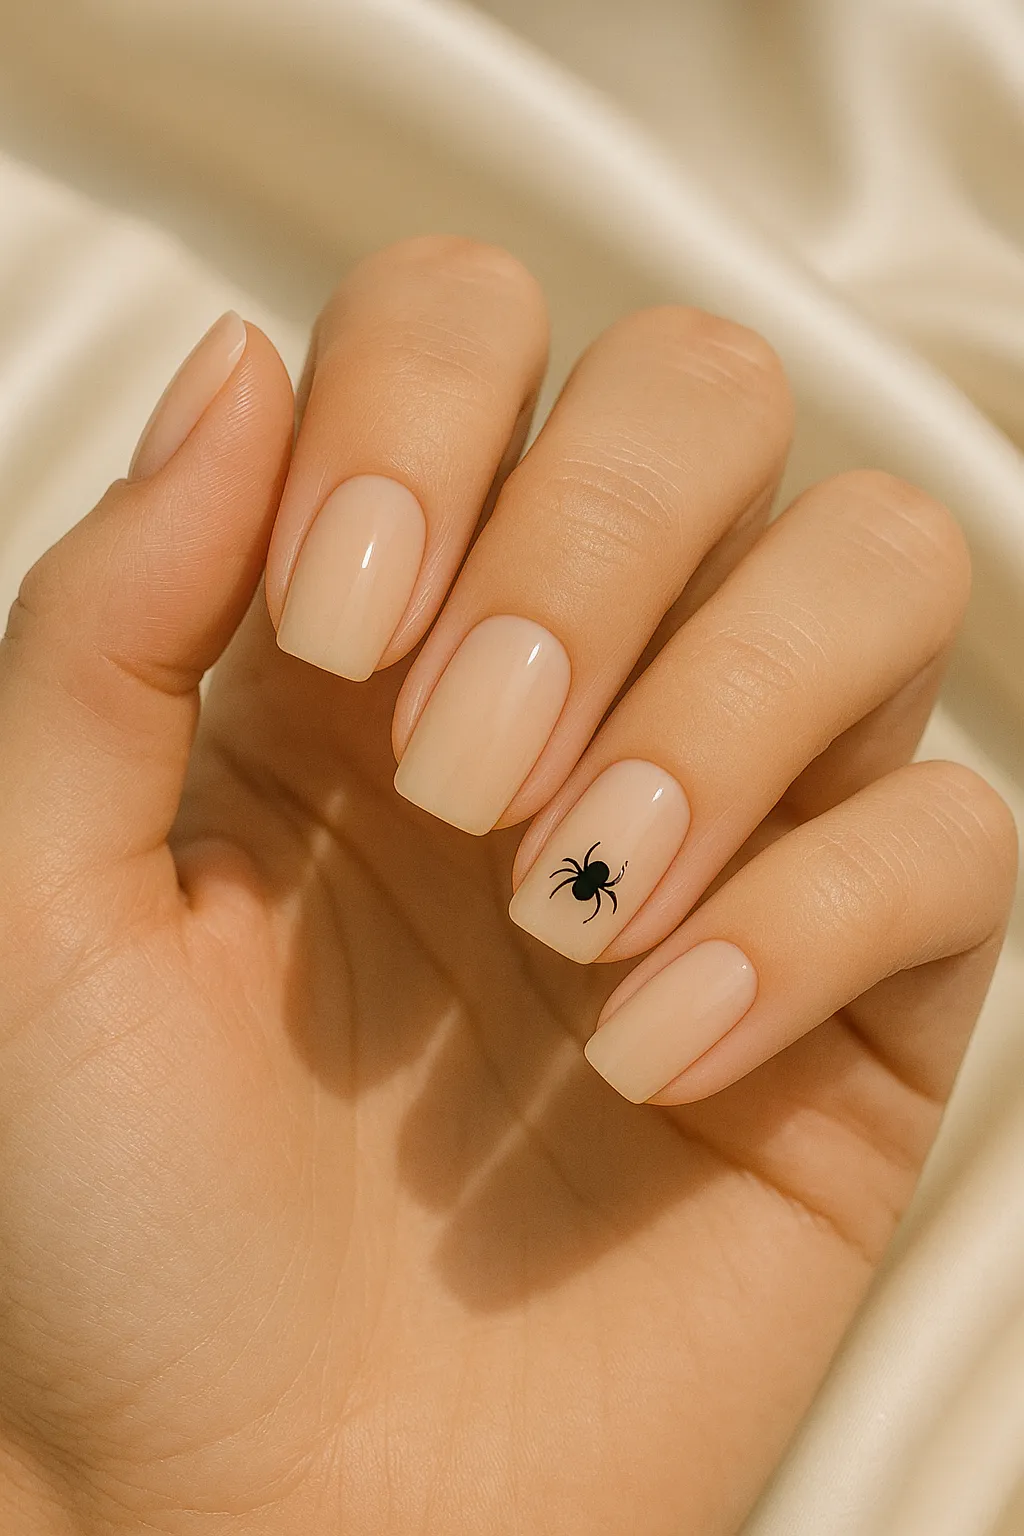
- Dark Crystals: Midnight black base with crystals strategically placed to form spider shapes, skull eyes, or constellation patterns. Complexity: Advanced. Time: 60–80 minutes.
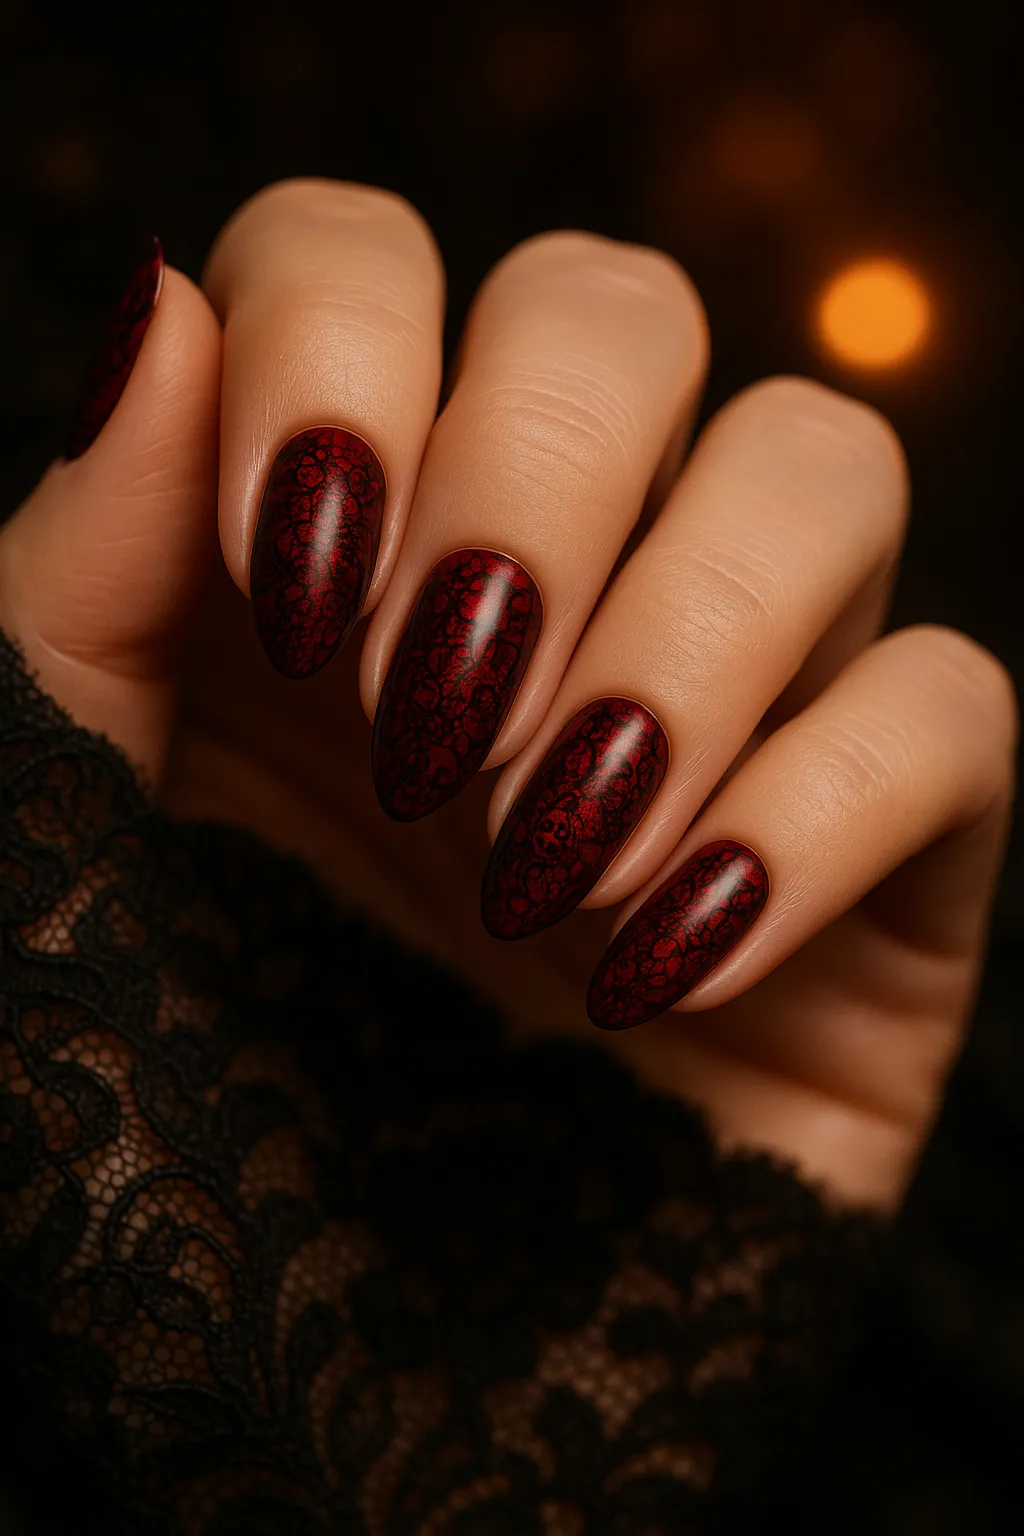
- Vampire Chic: Deep wine shades with subtle dripping accents and metallic details that evoke eternal elegance. Complexity: Medium–Advanced. Time: 40–60 minutes.
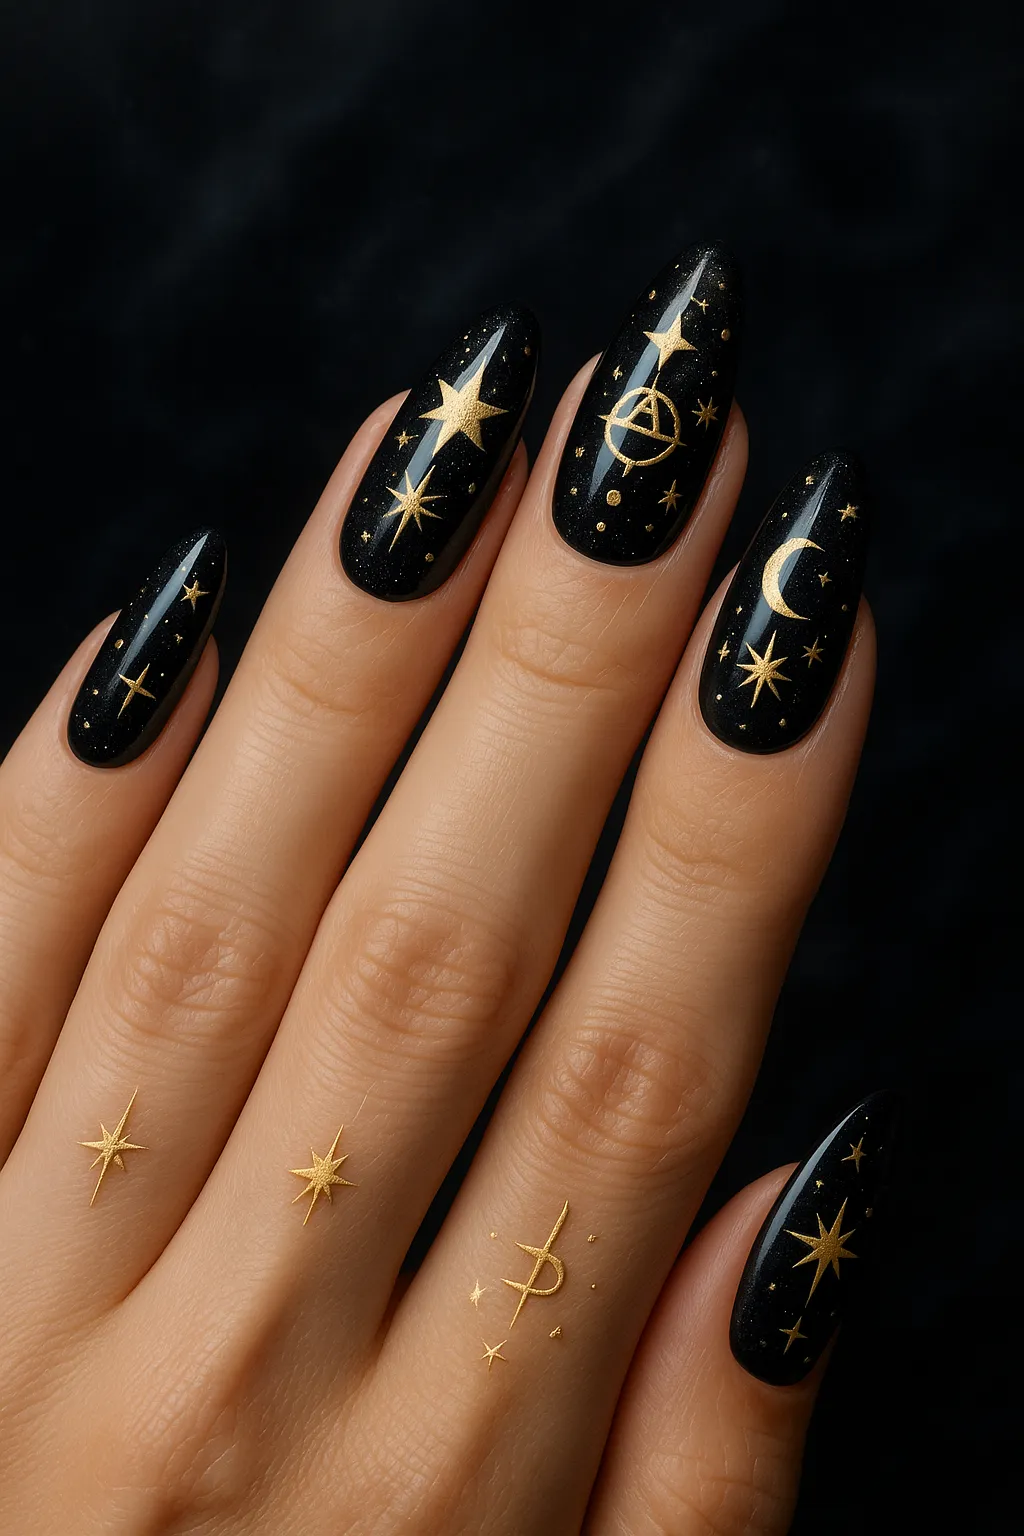
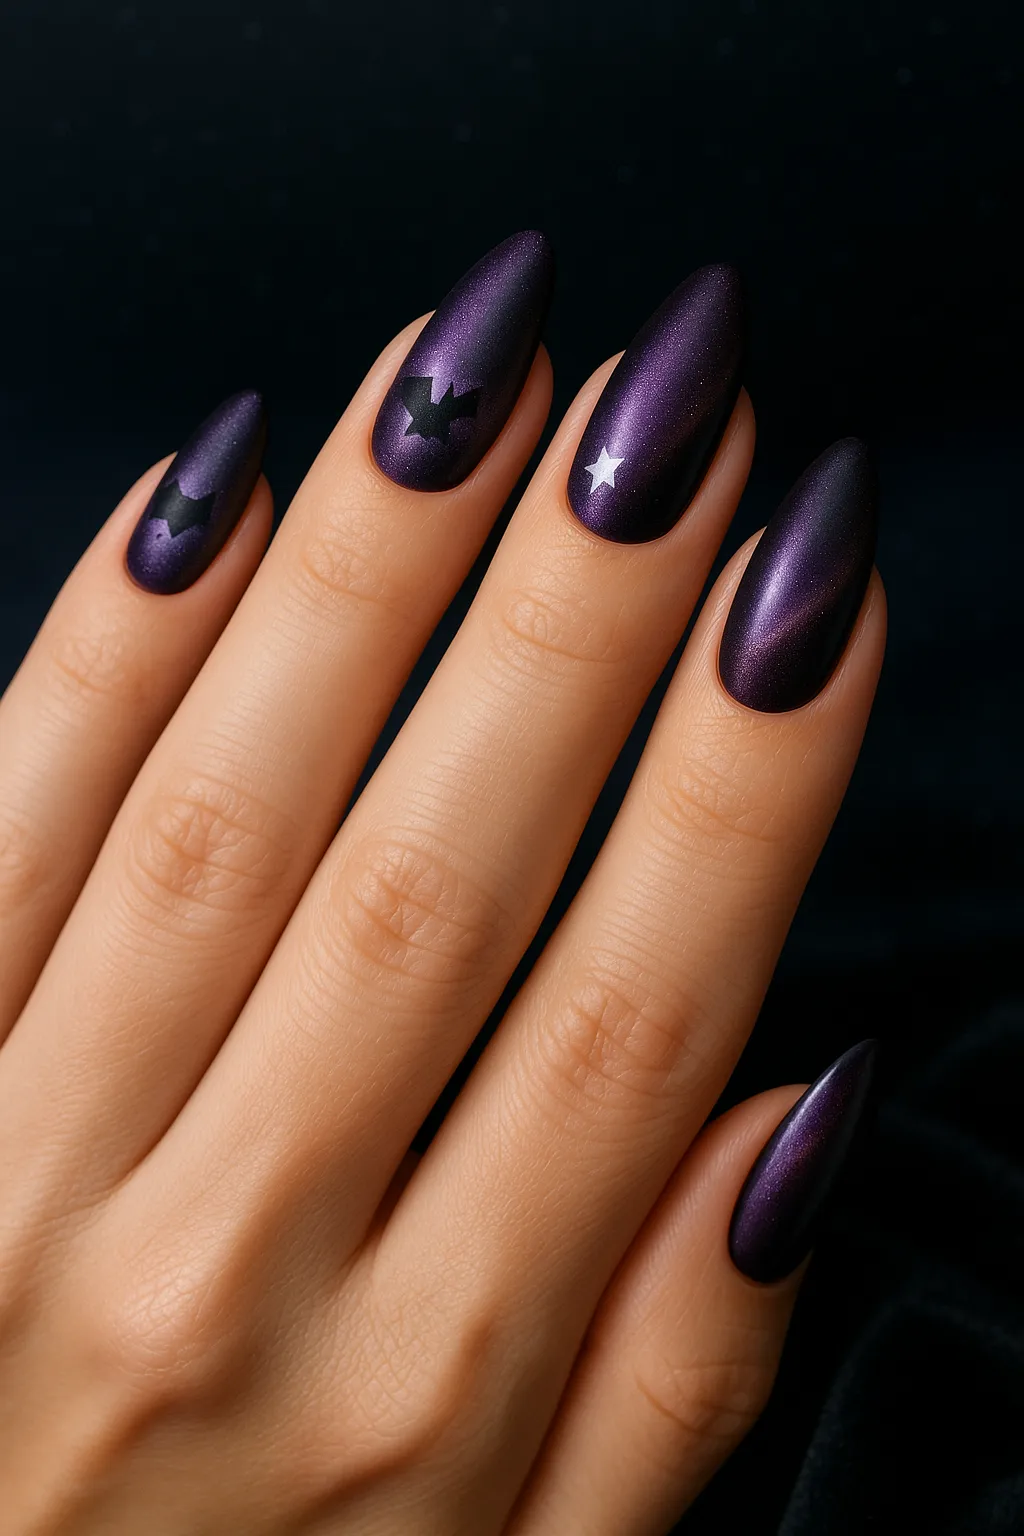
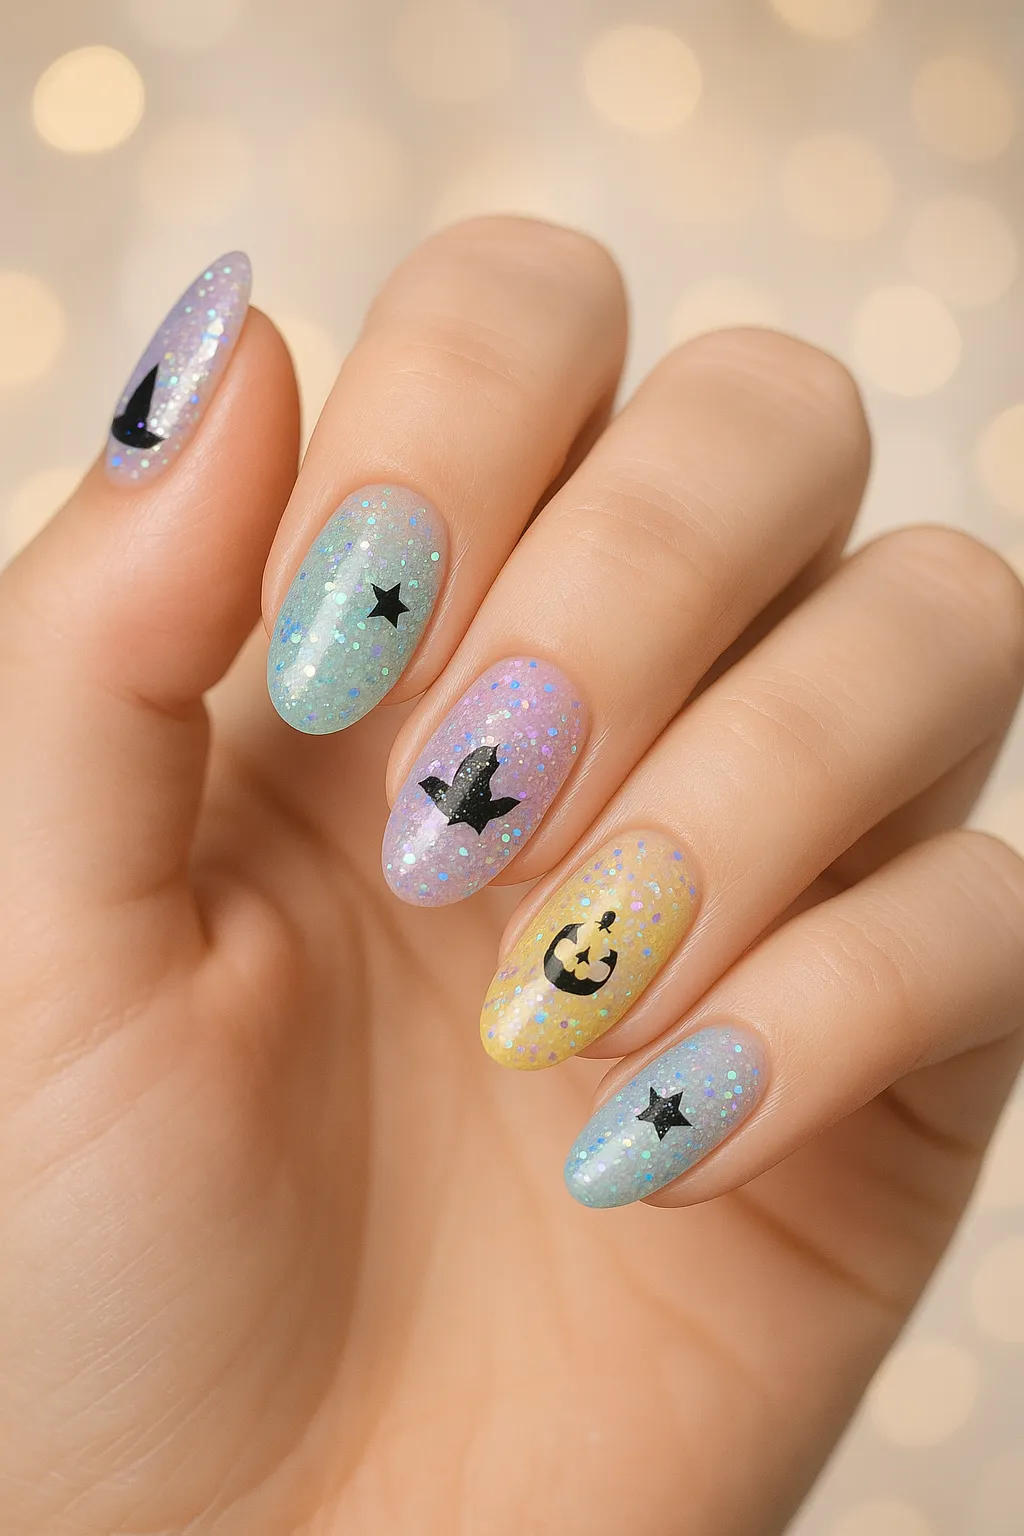
- Midnight Celestial: Black base with gold or silver stars, moons, and mystical symbols for witchy sophistication. Complexity: Medium–Advanced. Time: 40–60 minutes.

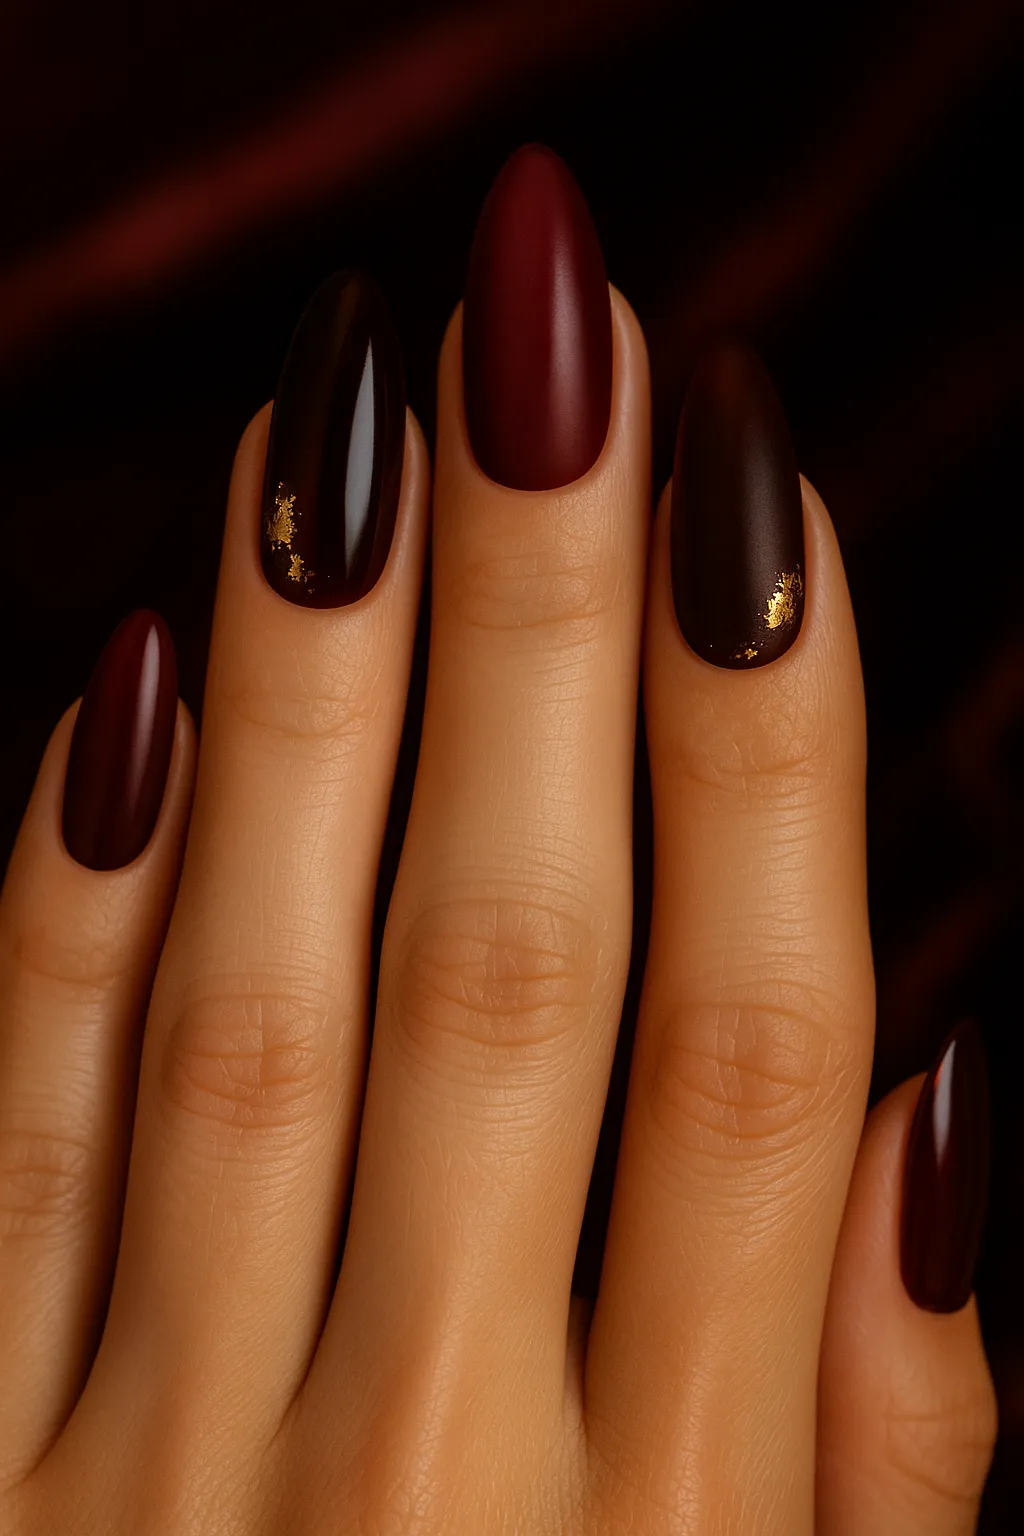

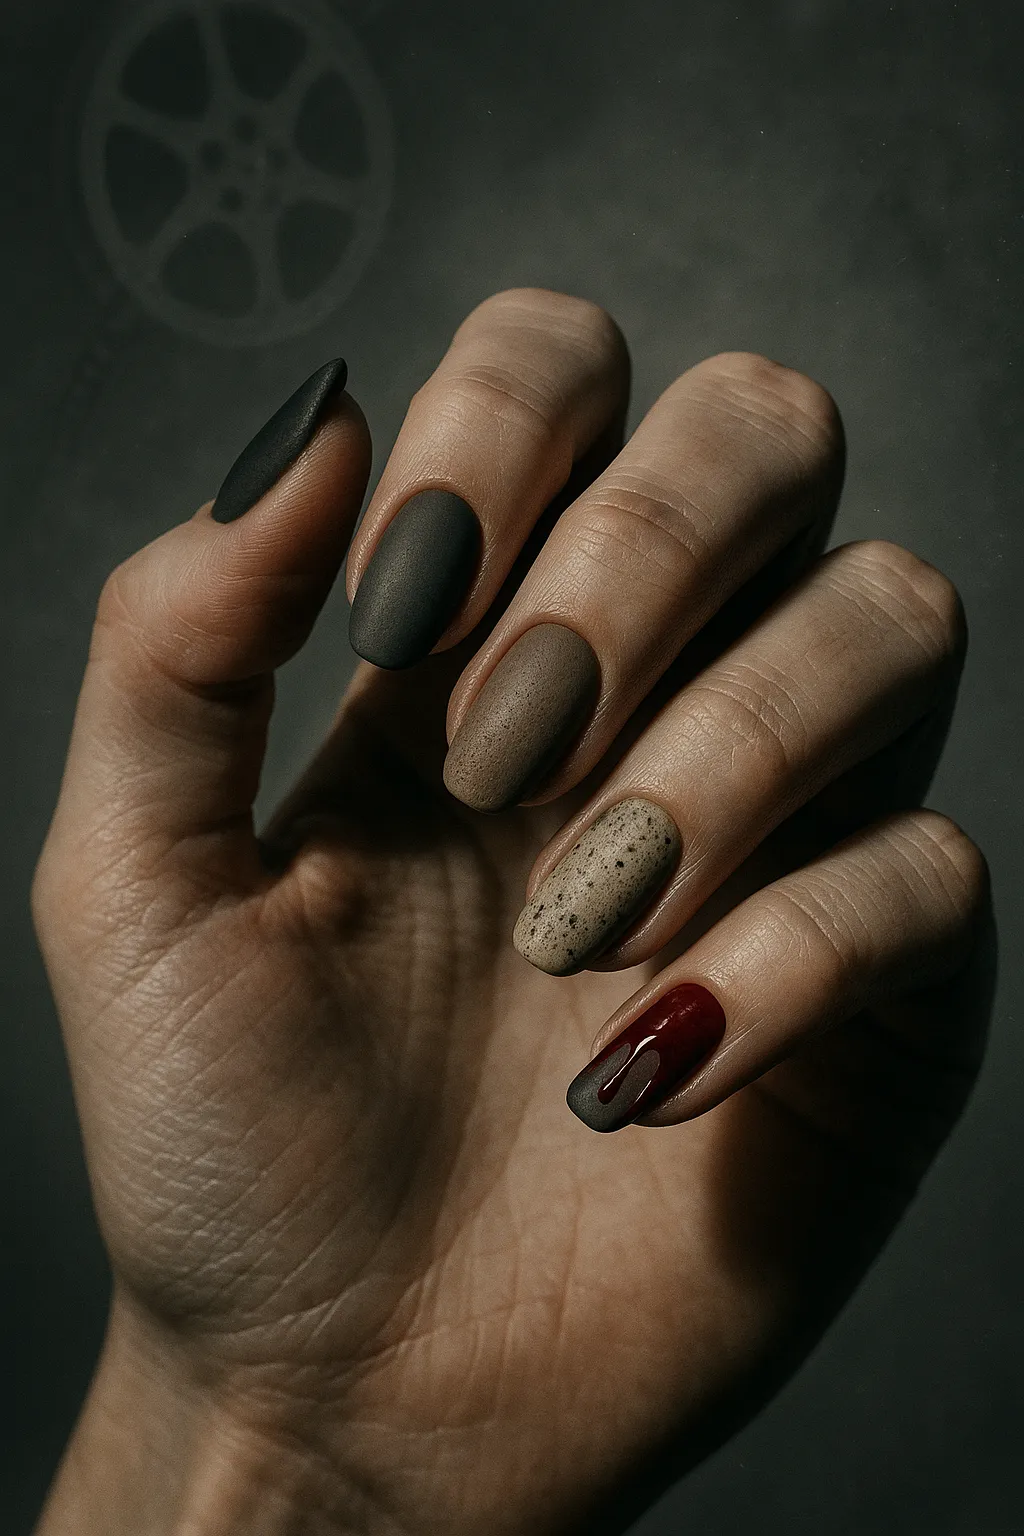
“Gothic nails bridge the gap between Halloween fun and high-fashion elegance—perfect for adults seeking sophisticated seasonal style that works for both costume parties and professional settings.” — Sarah Chen, Celebrity Nail Artist
Modern Minimalist: Negative Space & Clean Lines (10 Fresh Designs)
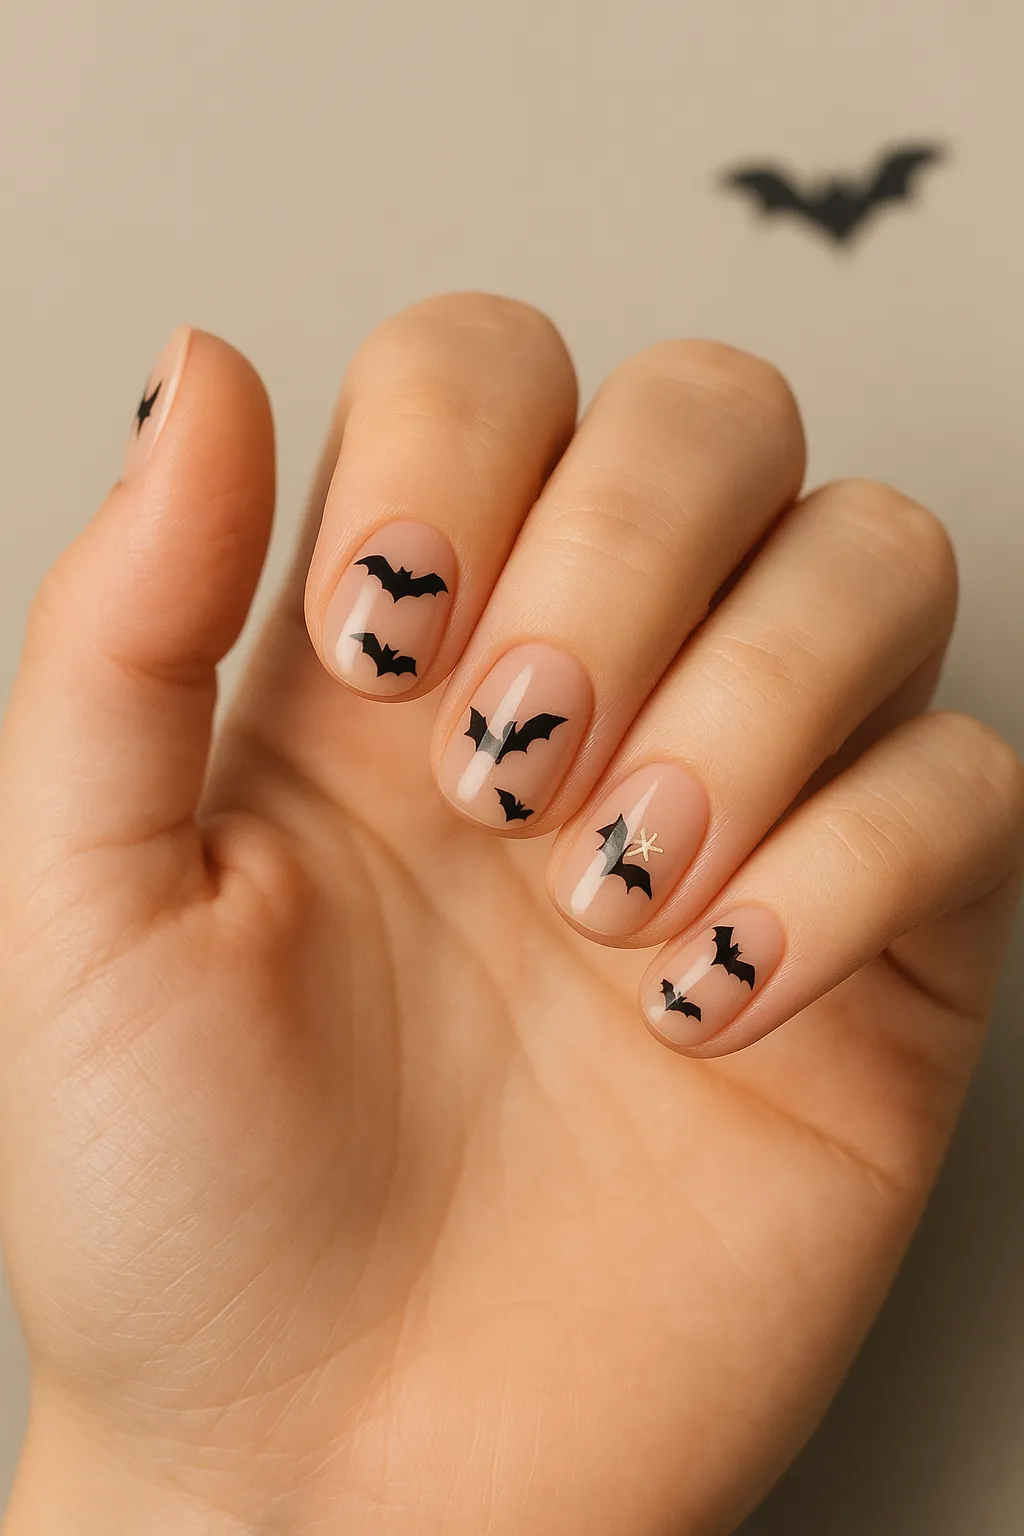
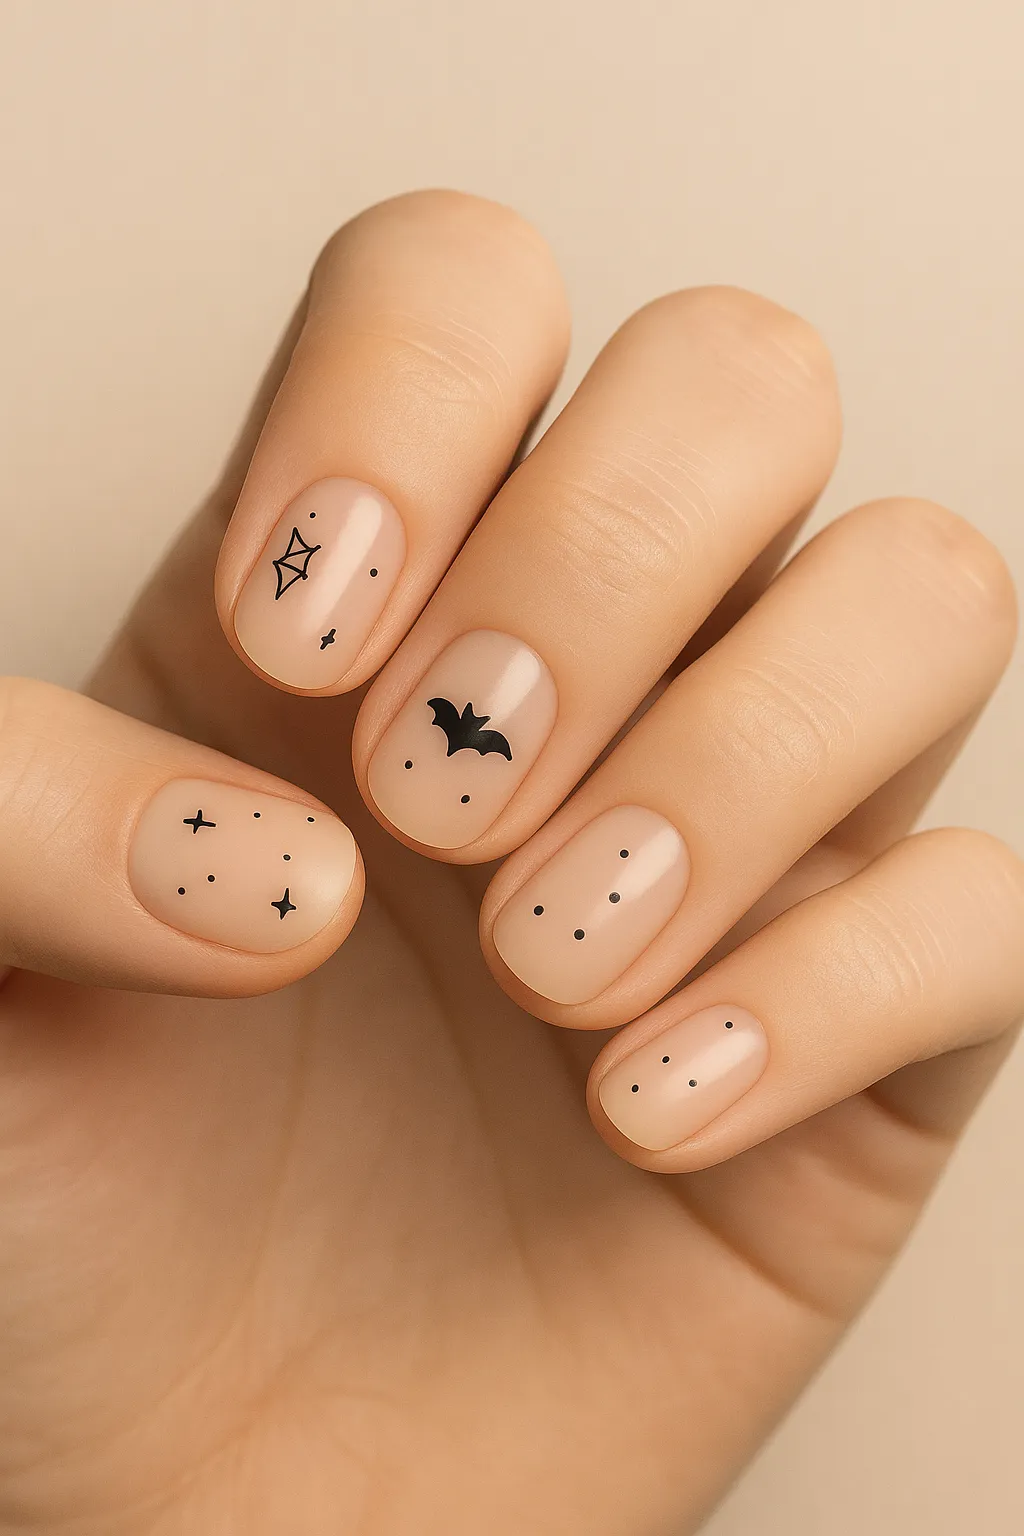
- Tiny Bat Silhouettes: Miniature bats on nude or sheer pink nails with asymmetrical placements. Complexity: Easy. Time: 20–30 minutes.
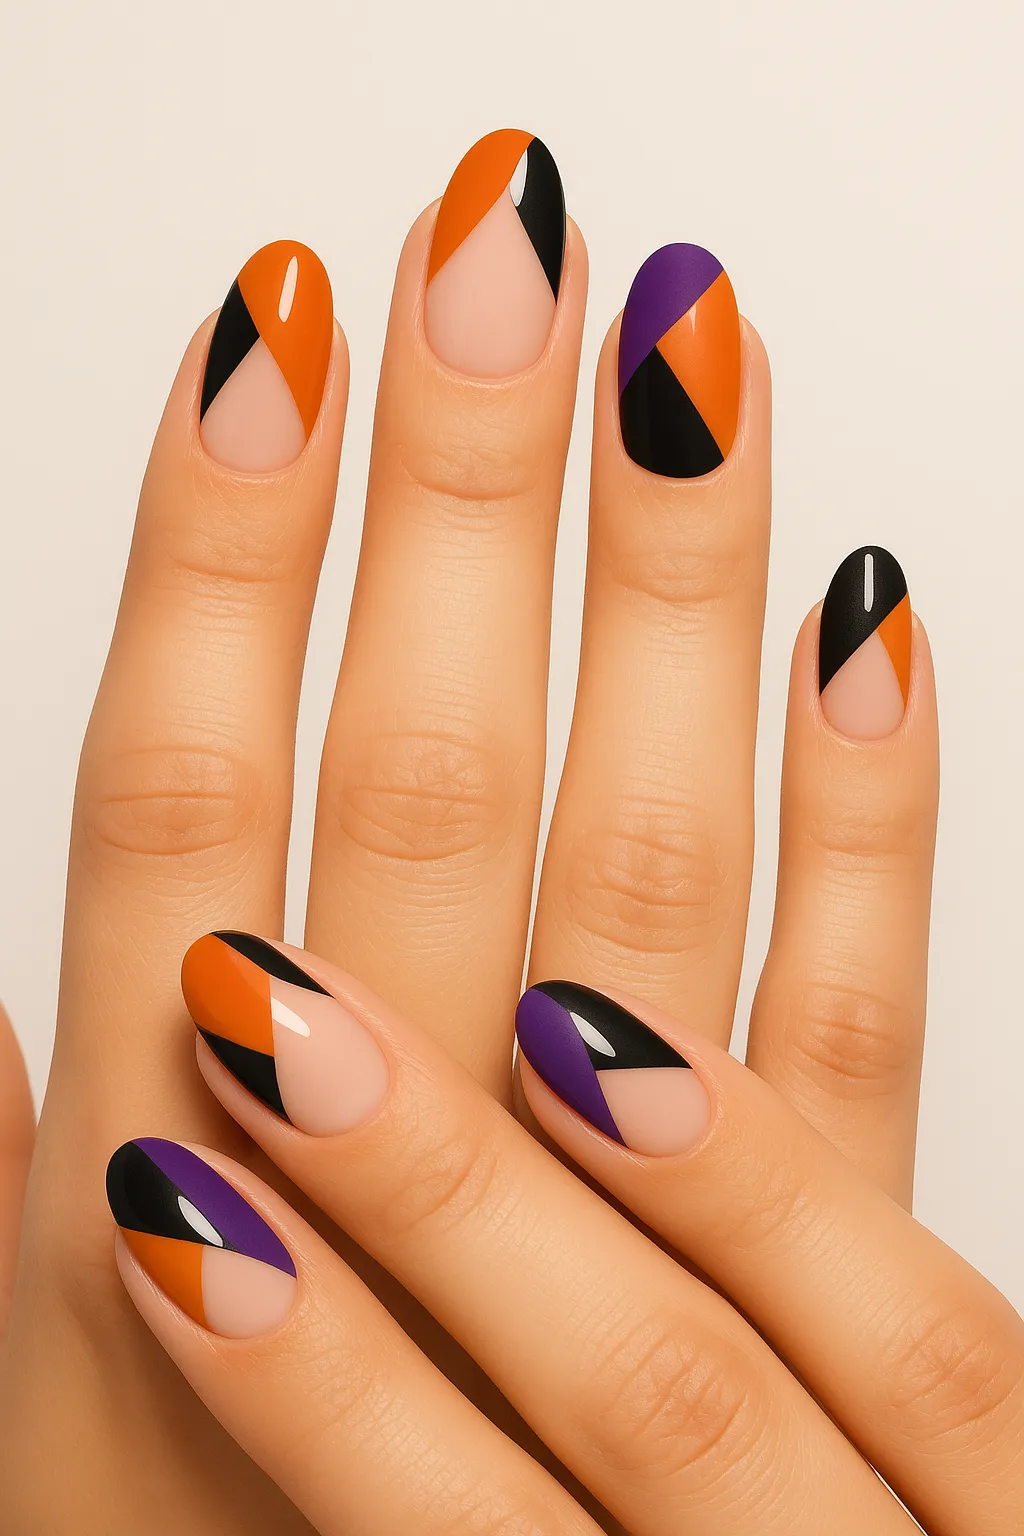
- Abstract Halloween: Orange, black, and purple geometric shapes with strategic negative space creating contemporary art. Complexity: Easy–Medium. Time: 25–40 minutes.
- Minimalist Spiderweb: A single, delicate web placed in one corner for understated spookiness. Complexity: Easy. Time: 15–25 minutes.
- Line Art Ghosts: Simple ghost outlines drawn with fine black lines on nude or sheer bases. Complexity: Easy. Time: 20–30 minutes. See soap nail techniques.
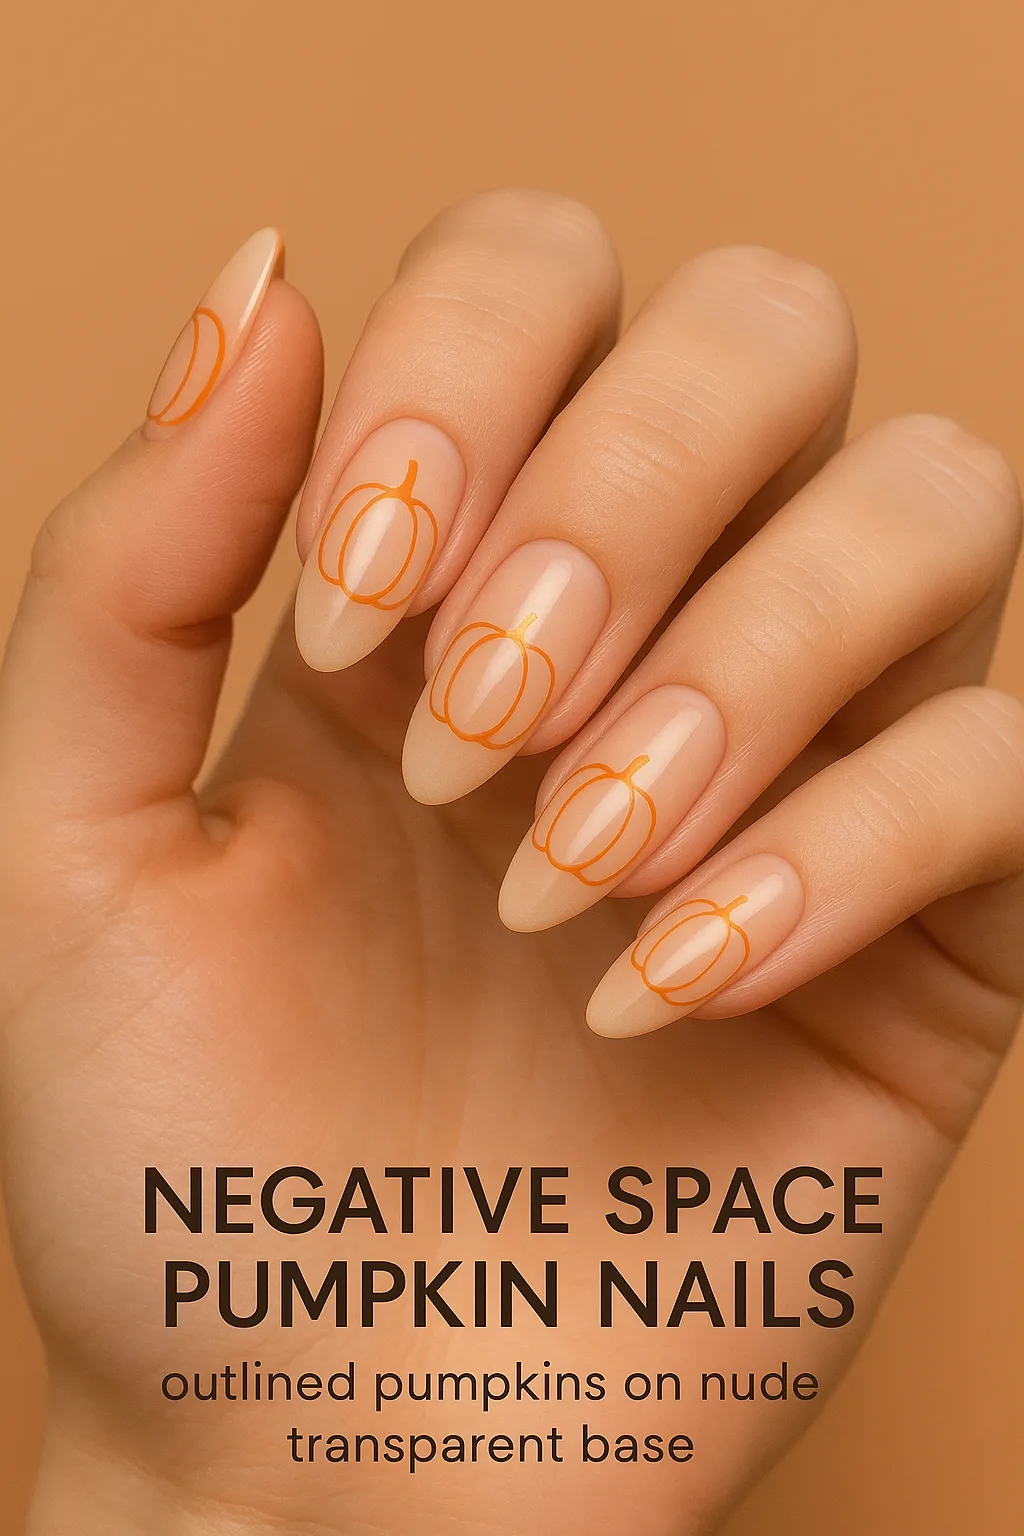
- Negative Space Pumpkins: Outlined pumpkins leaving the center of the nail beautifully bare. Complexity: Easy–Medium. Time: 20–30 minutes.
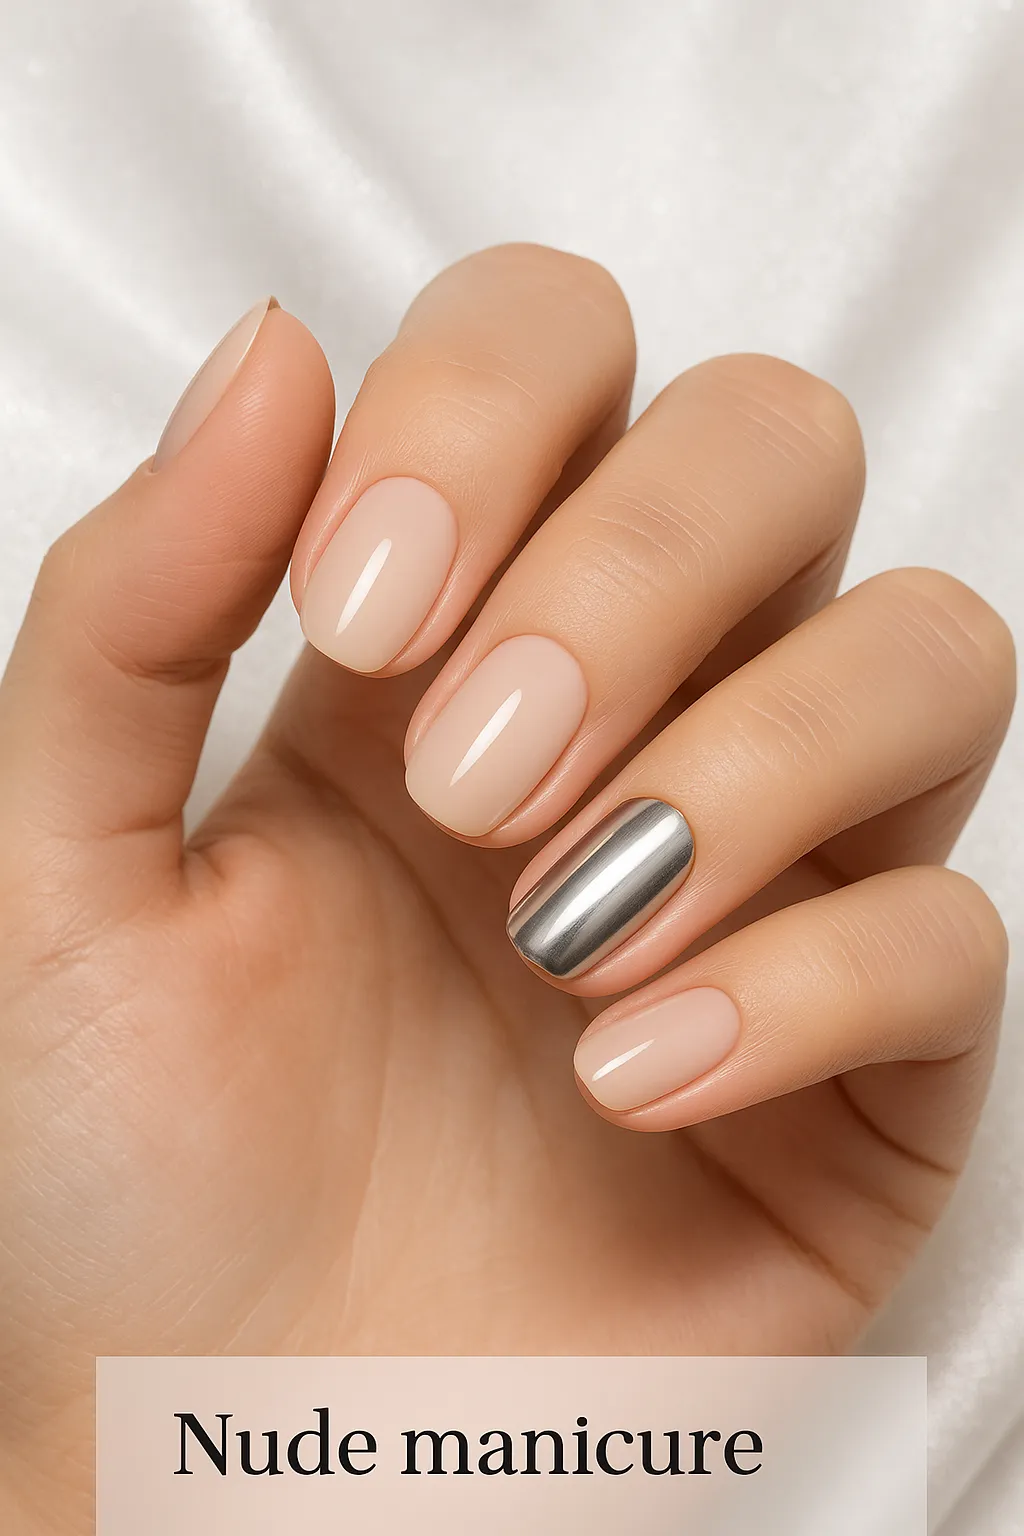
- Single Accent: Four neutral nude nails with one bold Halloween statement nail. Complexity: Easy. Time: 15–25 minutes.
- Monochrome Magic: All black or all white with one tiny Halloween detail per hand. Complexity: Easy. Time: 15–25 minutes.
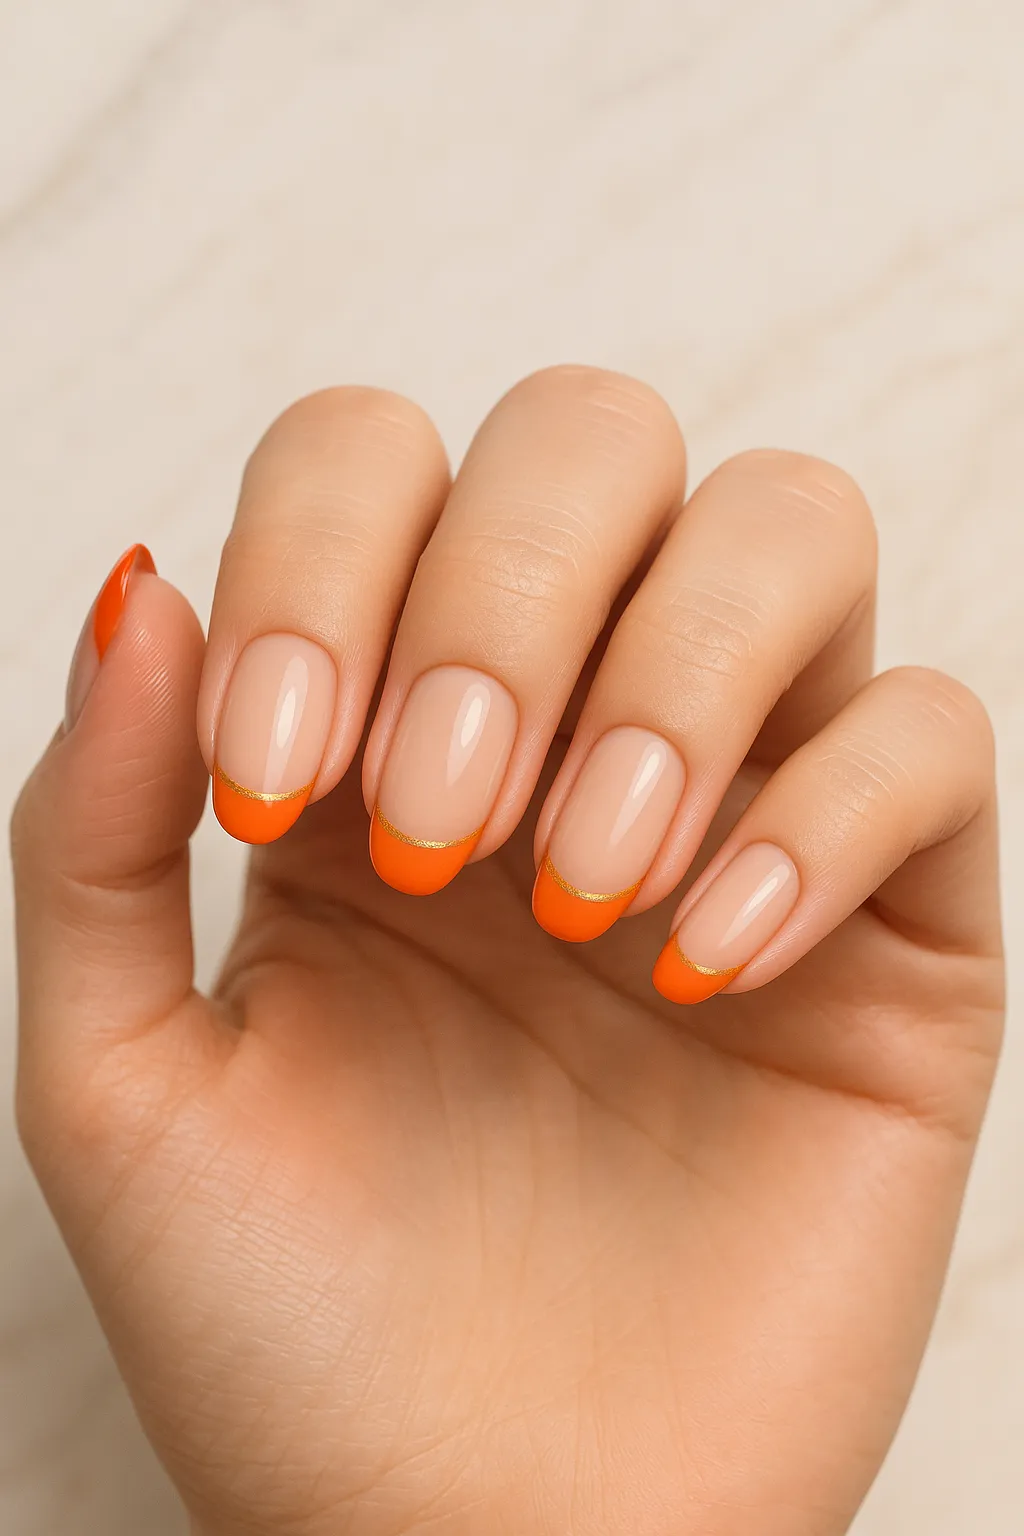
- Halloween French Tips: Black or orange tips on nude nails for a seasonal twist on the classic. Complexity: Easy. Time: 20–30 minutes.
- Dot & Dash Patterns: Minimalist dots and dashes forming subtle Halloween cues. Complexity: Easy–Medium. Time: 20–30 minutes.
- Metallic Accents: Nude nails with a single chrome or holographic accent nail. Complexity: Easy–Medium. Time: 20–30 minutes.
Negative-space designs are 30% faster to create than full-coverage art, and fashion-forward Instagram artists are championing this trend hard in 2025. I absolutely love how wearable these are! Read more about simple nail designs.
3D Effects & Textured Designs (10+ Dimensional Looks)
- Builder Gel Ghosts: Raised 3D ghost shapes sculpted with white builder gel. Complexity: Advanced. Time: 60–90 minutes.
- Chrome Spiderwebs: Shimmering web effects created with chrome powder over magnetic polish. Complexity: Advanced. Time: 60 minutes.
- Cat-Eye Polish Magic: Magnetic cat-eye effect on black or purple bases with hand-painted Halloween accents. Complexity: Medium–Advanced. Time: 40–60 minutes.
- 3D Pumpkin Sculptures: Tiny sculpted pumpkins created with acrylic or builder gel on accent nails. Complexity: Advanced. Time: 60–90 minutes.
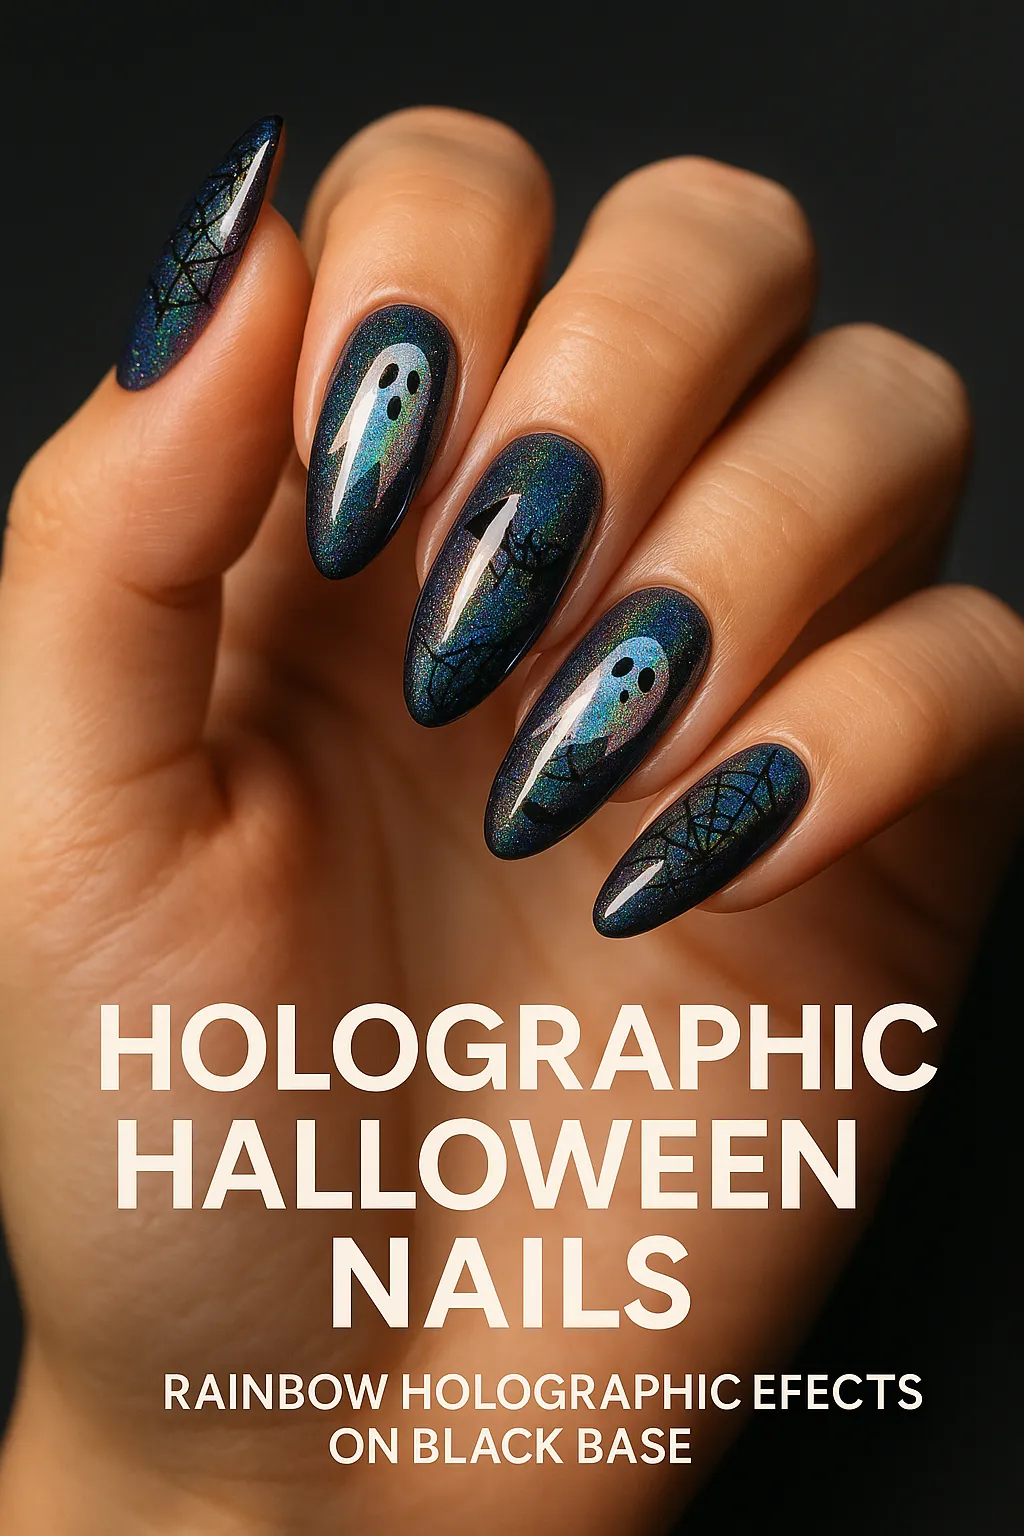
- Holographic Spooky: Rainbow holographic effects layered over Halloween motifs. Complexity: Medium–Advanced. Time: 50–70 minutes.
- Textured Mummy Wraps: Raised bandage texture using builder gel or textured polish. Complexity: Advanced. Time: 60–80 minutes.
- Crystal Embellishments: Rhinestones forming spider bodies or creating glowing skull eyes. Complexity: Advanced. Time: 50–70 minutes.
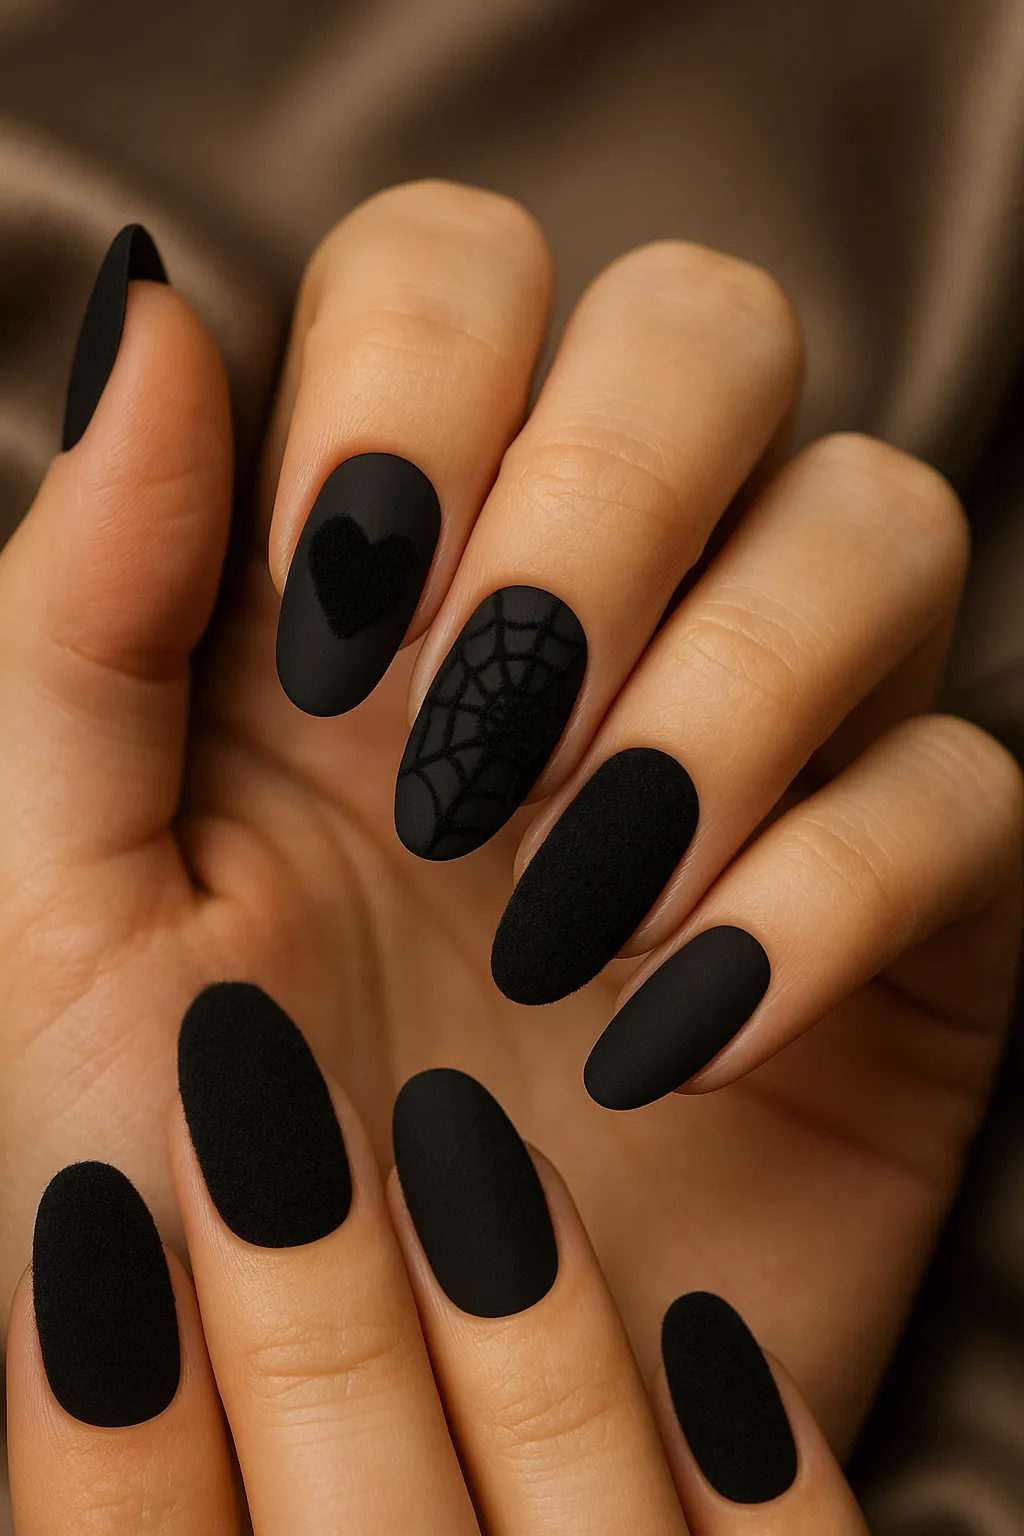
- Velvet/Flocked Powder: Fuzzy texture applied over designs for unique tactile interest. Complexity: Medium. Time: 40–60 minutes.
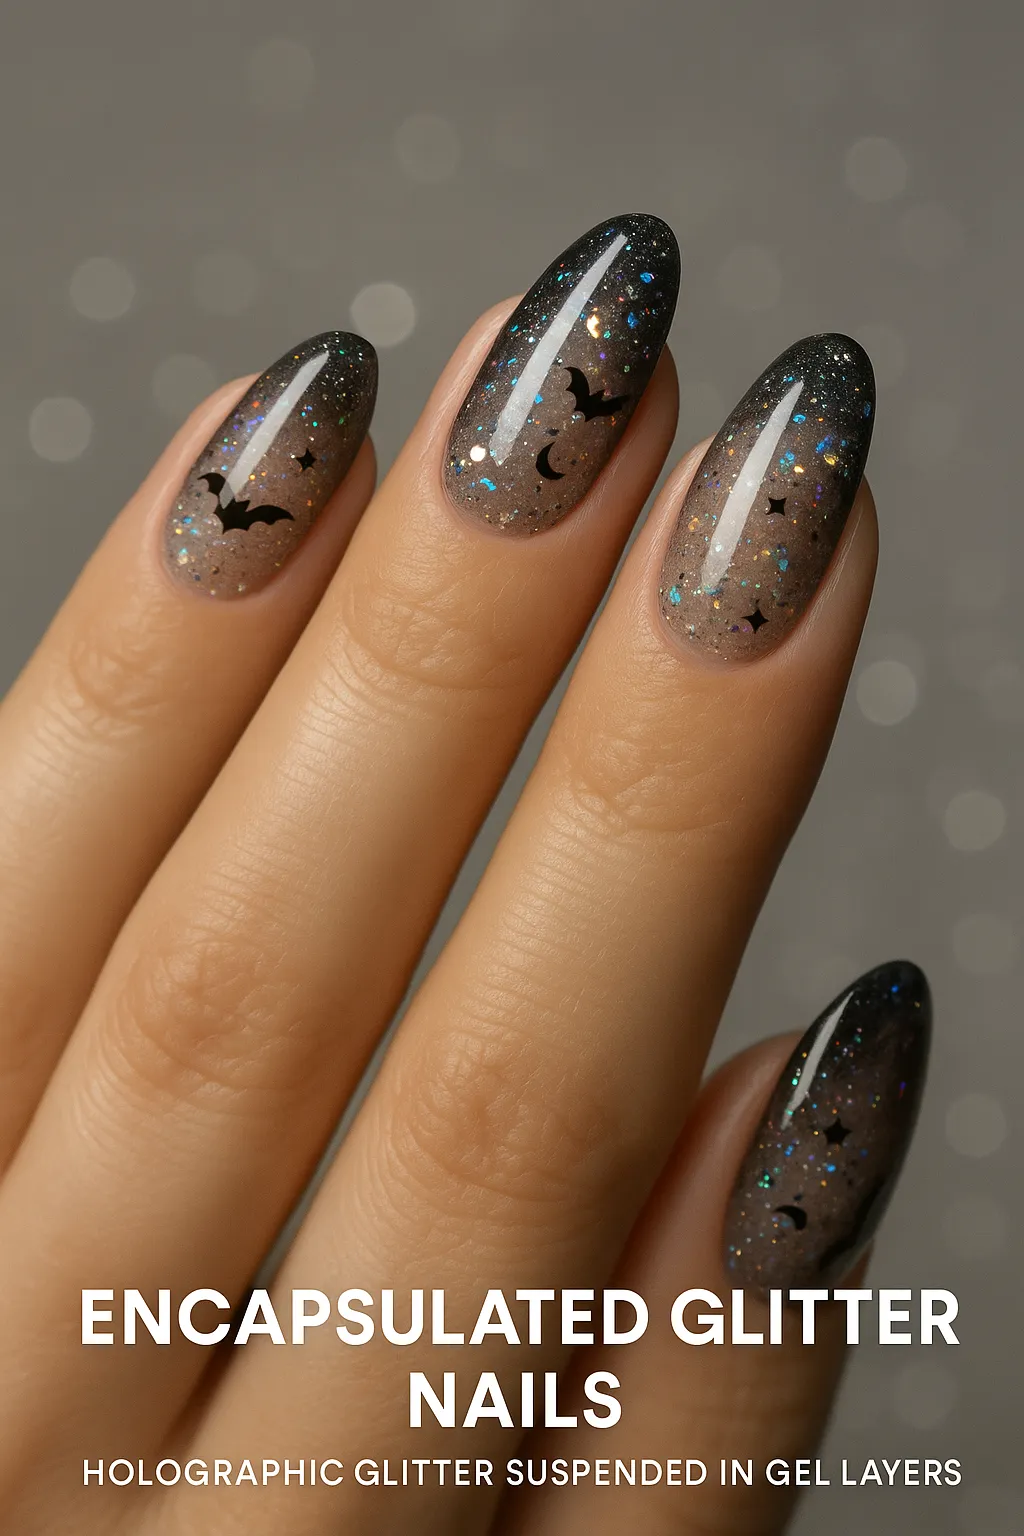
- Encapsulated Glitter: Holographic glitter suspended in layers of clear gel for depth. Complexity: Advanced. Time: 60–90 minutes.
- Pearl Accents: Micro-pearls forming ghost eyes, spider dewdrops, or decorative borders. Complexity: Medium–Advanced. Time: 40–60 minutes.
Cute & Playful Halloween Nails (10+ Adorable Options)
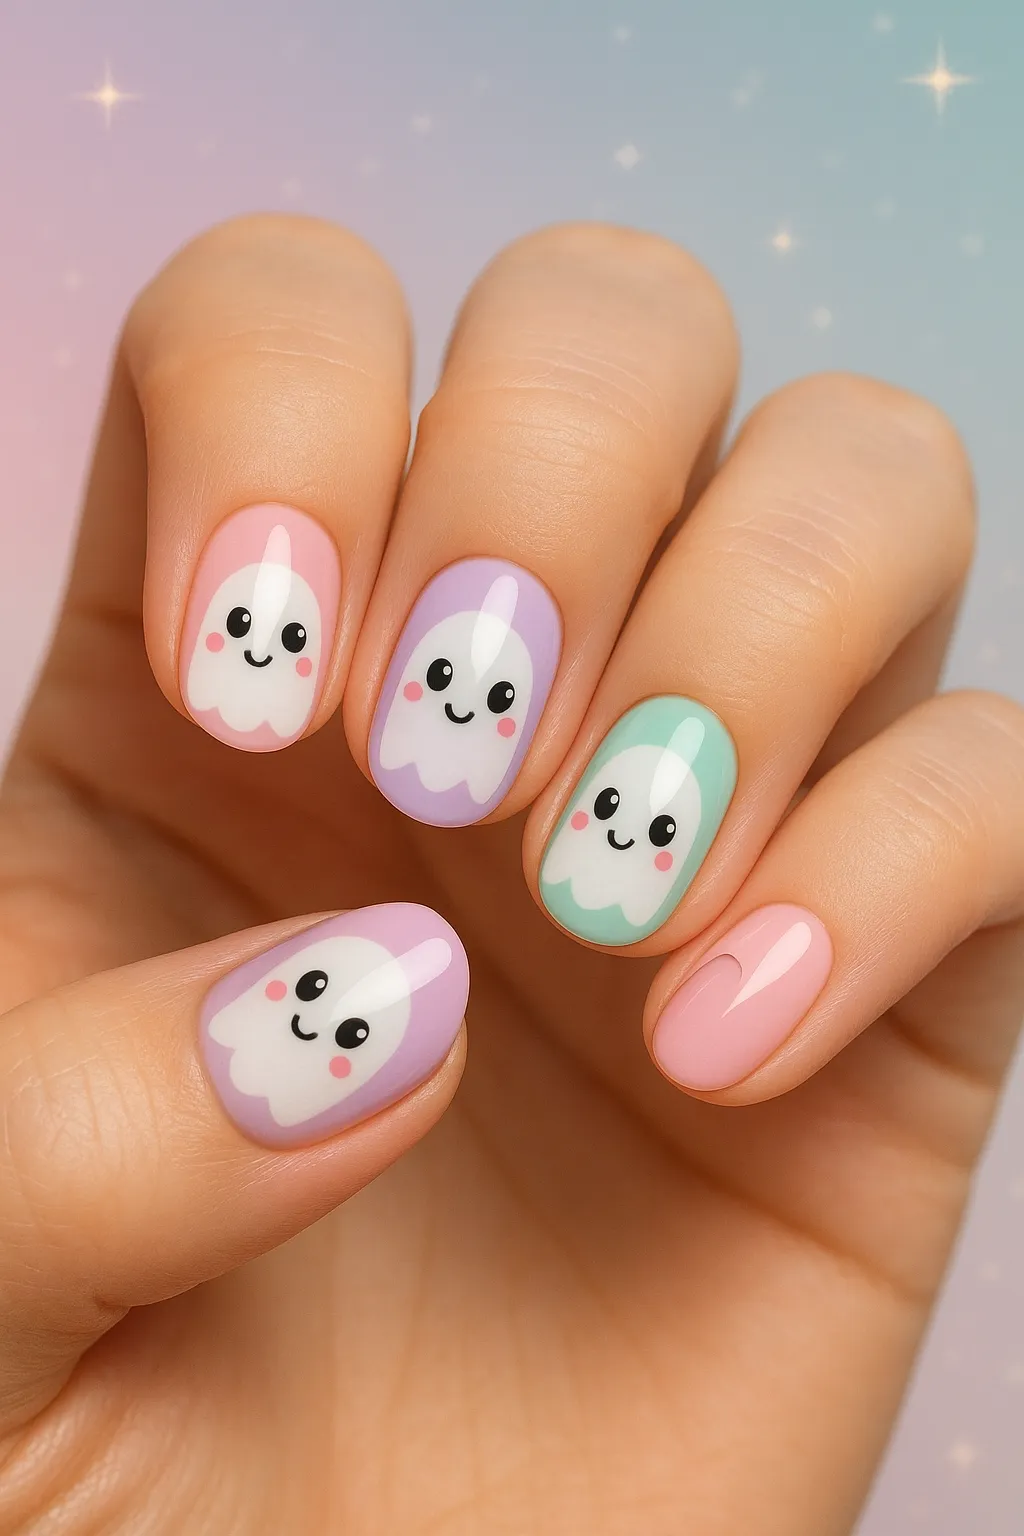
- Kawaii Ghosts: Smiling ghosts with big eyes on pastel pink, lavender, or mint backgrounds. Complexity: Easy. Time: 20–30 minutes.
- Friendly Pumpkins: Happy jack-o’-lanterns with cheerful expressions in bright orange. Complexity: Easy–Medium. Time: 20–40 minutes.
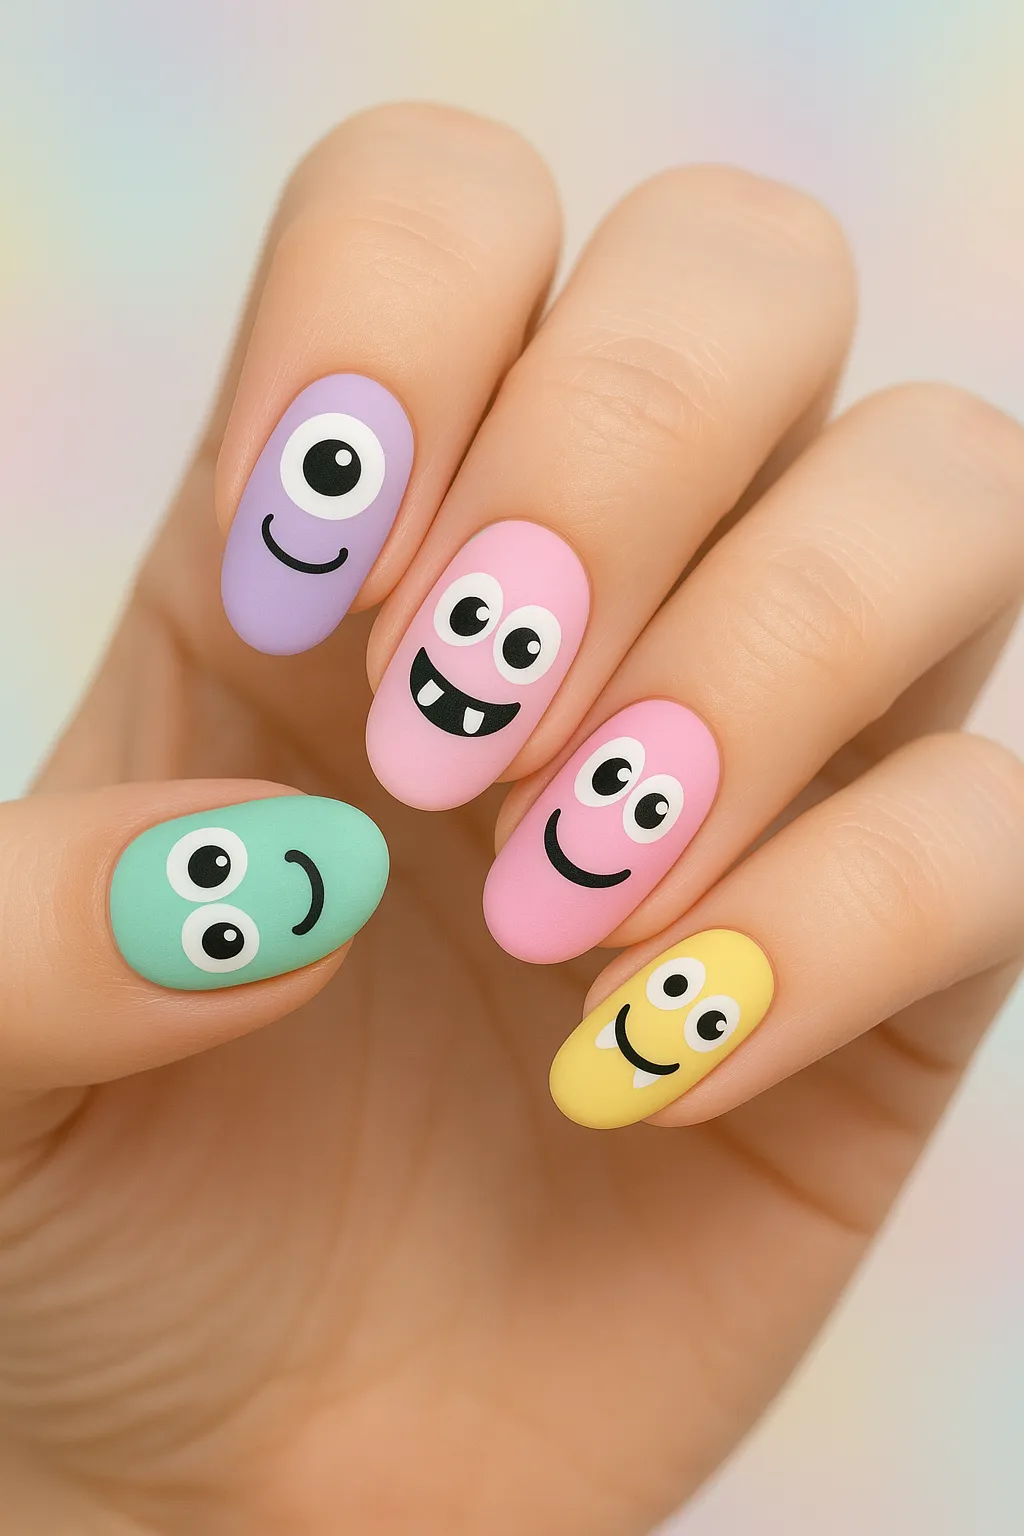
- Cartoon Monsters: Colorful, friendly monsters with googly eyes and silly smiles. Complexity: Easy–Medium. Time: 25–40 minutes.
- Candy Corn Gradient: Soft sponge gradient transitioning from yellow to orange to white. Complexity: Easy. Time: 20–30 minutes.
- Pastel Halloween: Traditional motifs rendered in pink, lavender, and mint instead of traditional dark hues. Complexity: Easy–Medium. Time: 25–40 minutes. See soap nail ideas.
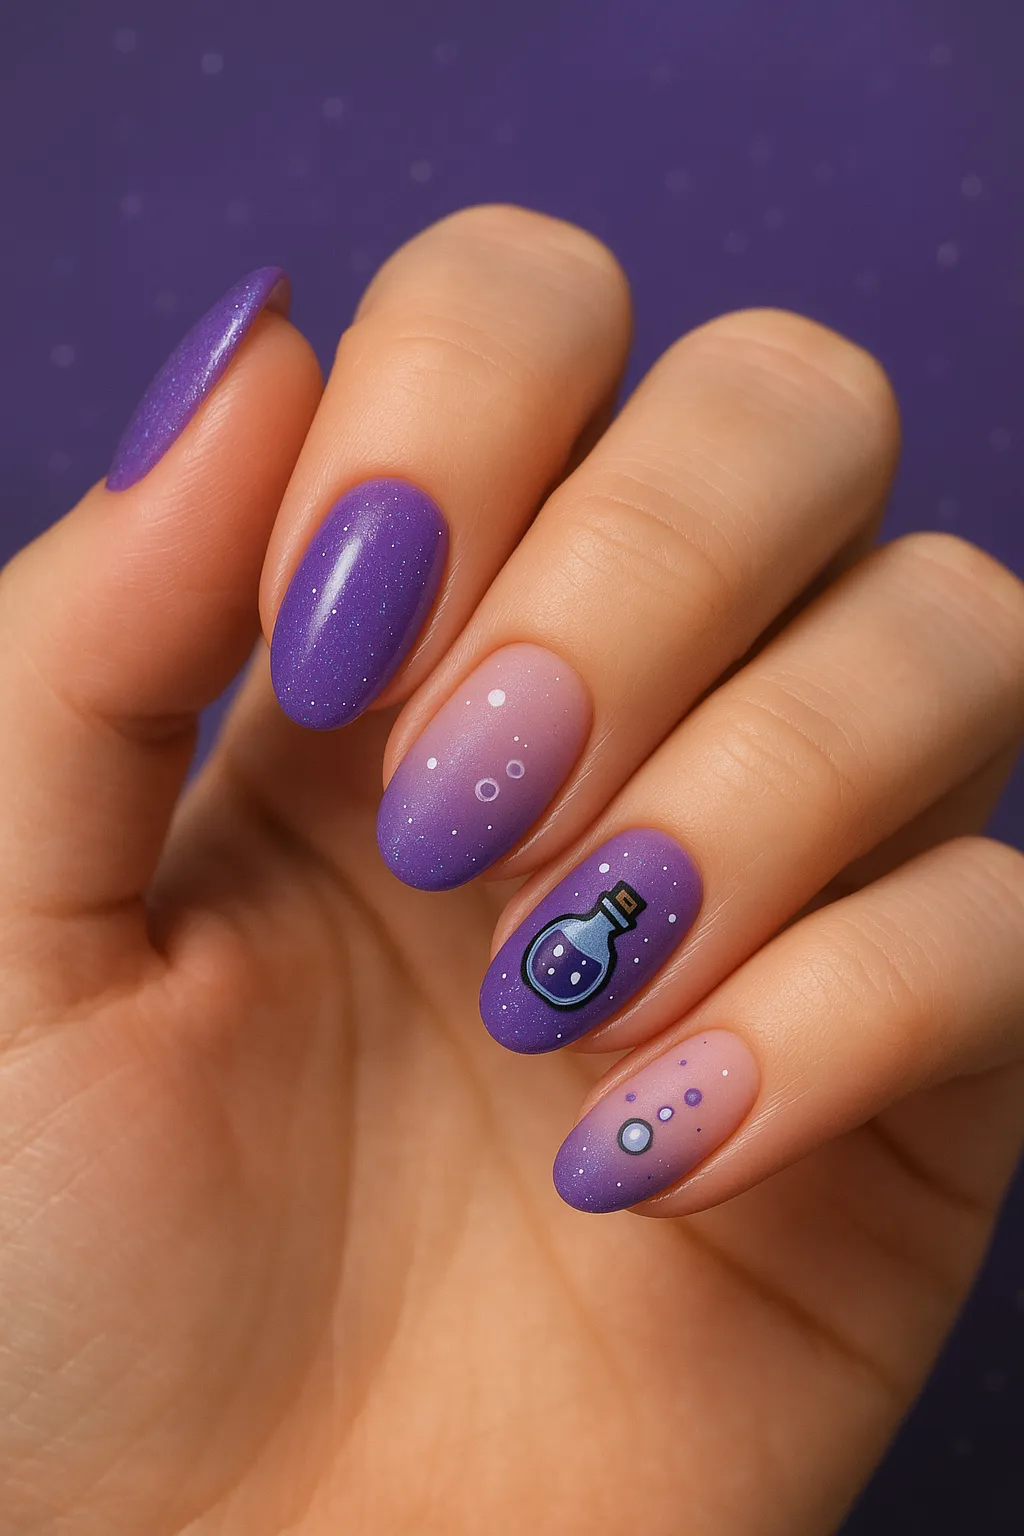
- Witch’s Brew: Purple base with potion bottles, bubbles, and sparkles. Complexity: Easy–Medium. Time: 25–40 minutes.
- Friendly Black Cats: Cute cats with oversized eyes and sweet smiles. Complexity: Easy–Medium. Time: 25–40 minutes.
- Halloween Emoji Nails: Emojis for pumpkin, ghost, and candy rendered as nail art. Complexity: Easy. Time: 15–25 minutes.
- Sticker Designs: Pre-made cute Halloween stickers for instant adorable results. Complexity: Easy. Time: 15–25 minutes.
- Glitter Magic: Holographic or chunky glitter with simple Halloween shapes. Complexity: Easy. Time: 15–25 minutes.

Horror Movie & Pop Culture Inspired Designs (10+ Fan-Favorite Looks)
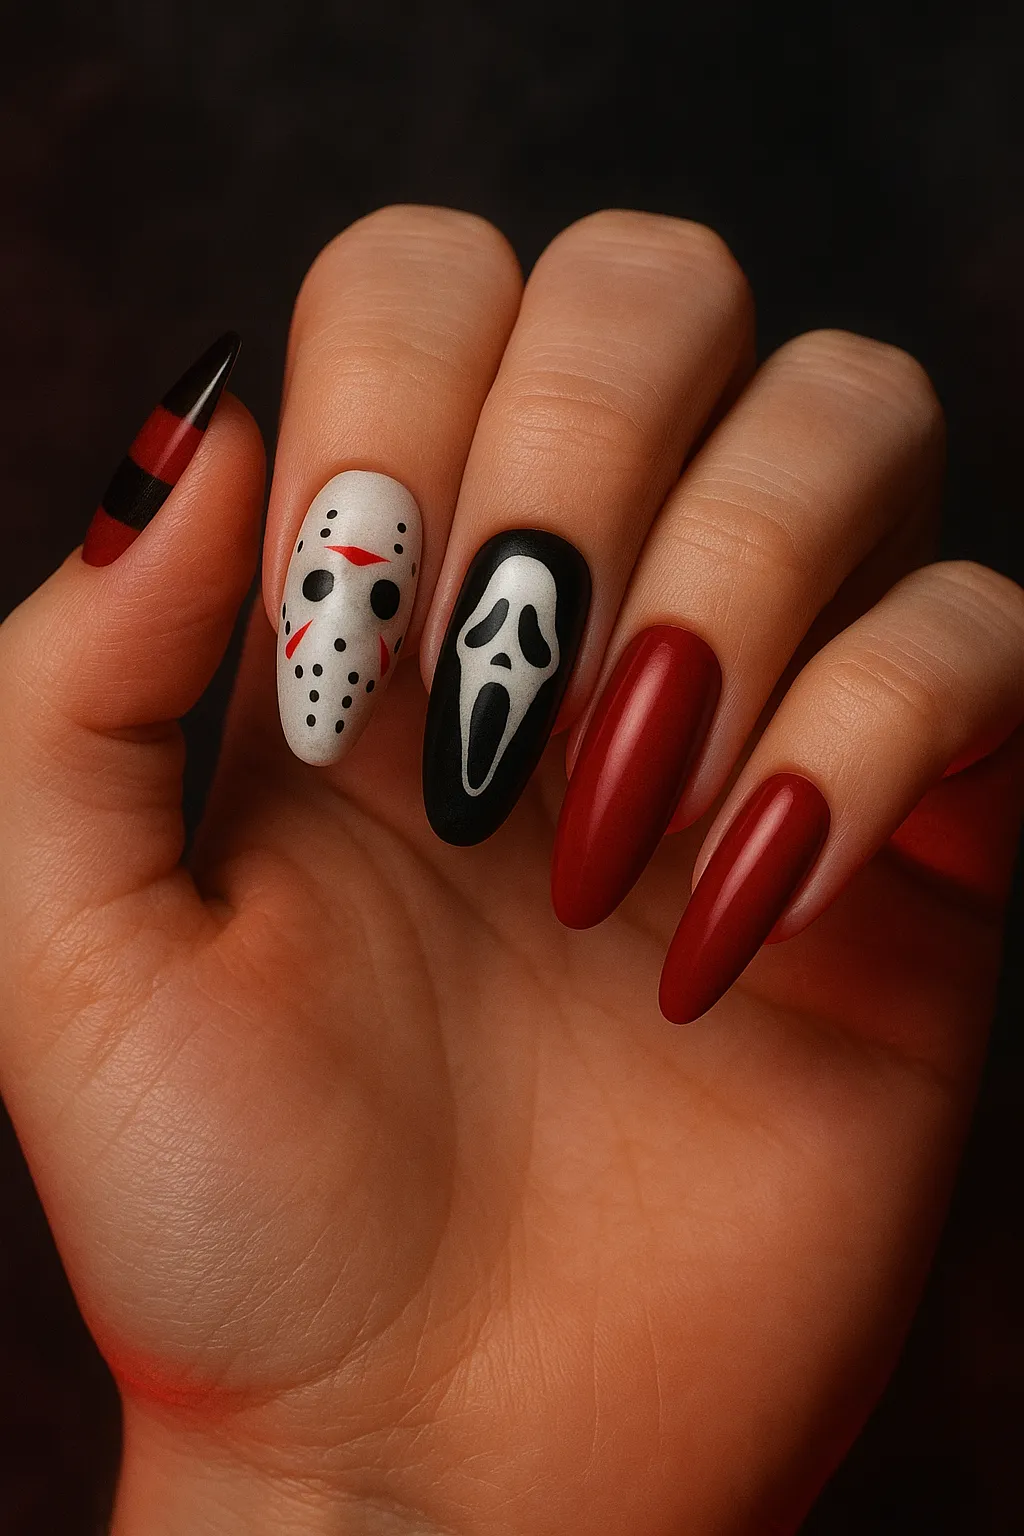
- Classic Horror Icons: Freddy Krueger stripes, Jason hockey mask, or Ghostface silhouette. Complexity: Medium–Advanced. Time: 40–60 minutes.
- Addams Family Gothic: Wednesday’s signature black with Thing hand accents crawling across nails. Complexity: Medium–Advanced. Time: 40–70 minutes.
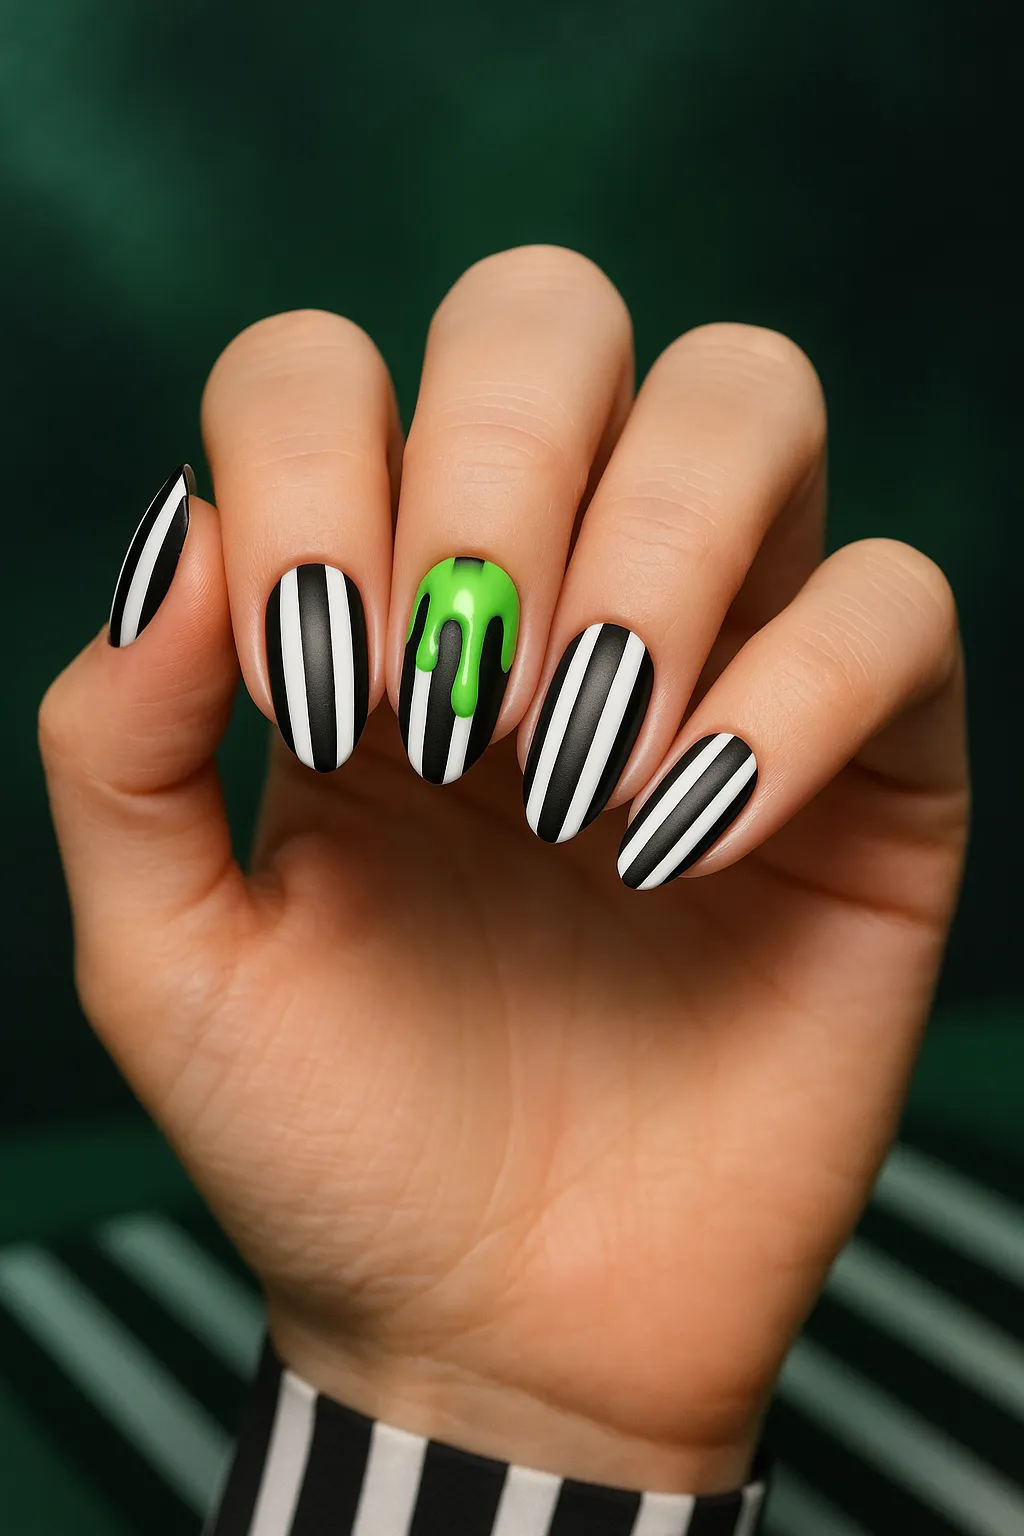
- Beetlejuice Stripes: Bold black and white vertical lines with green accent details. Complexity: Medium. Time: 30–50 minutes.
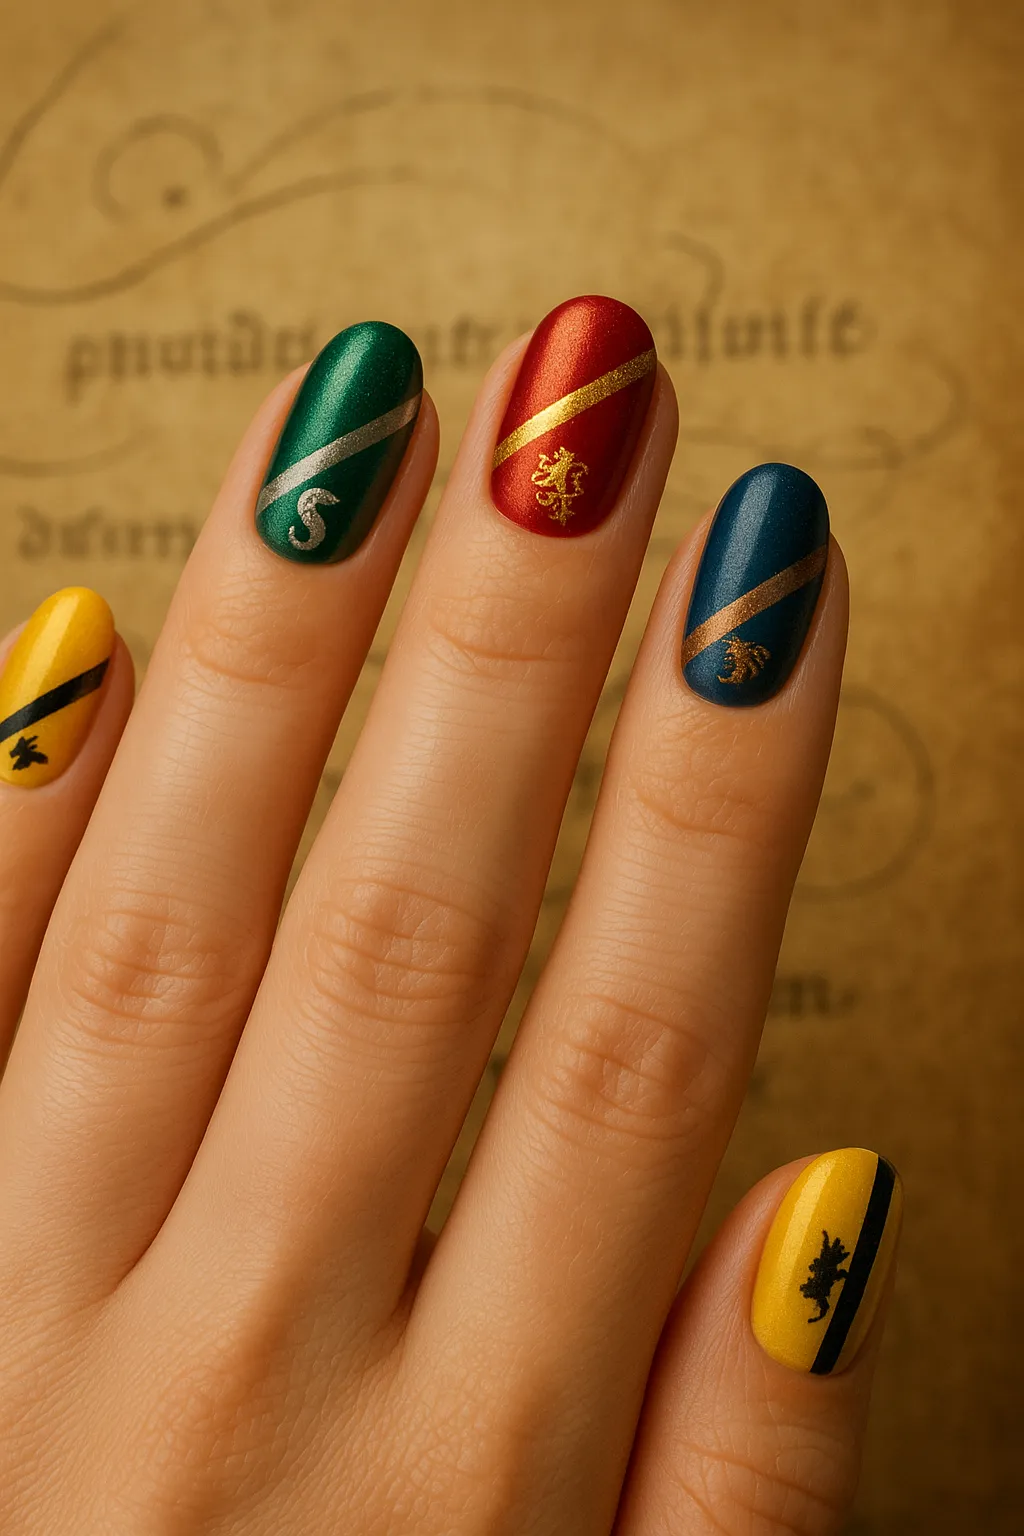
- Harry Potter House Colors: Slytherin green and silver or Gryffindor scarlet and gold with house crests. Complexity: Easy–Medium. Time: 30–60 minutes.
- Tim Burton Aesthetic: Edward Scissorhands, Corpse Bride, or Nightmare Before Christmas-inspired whimsy. Complexity: Advanced. Time: 60–90 minutes.
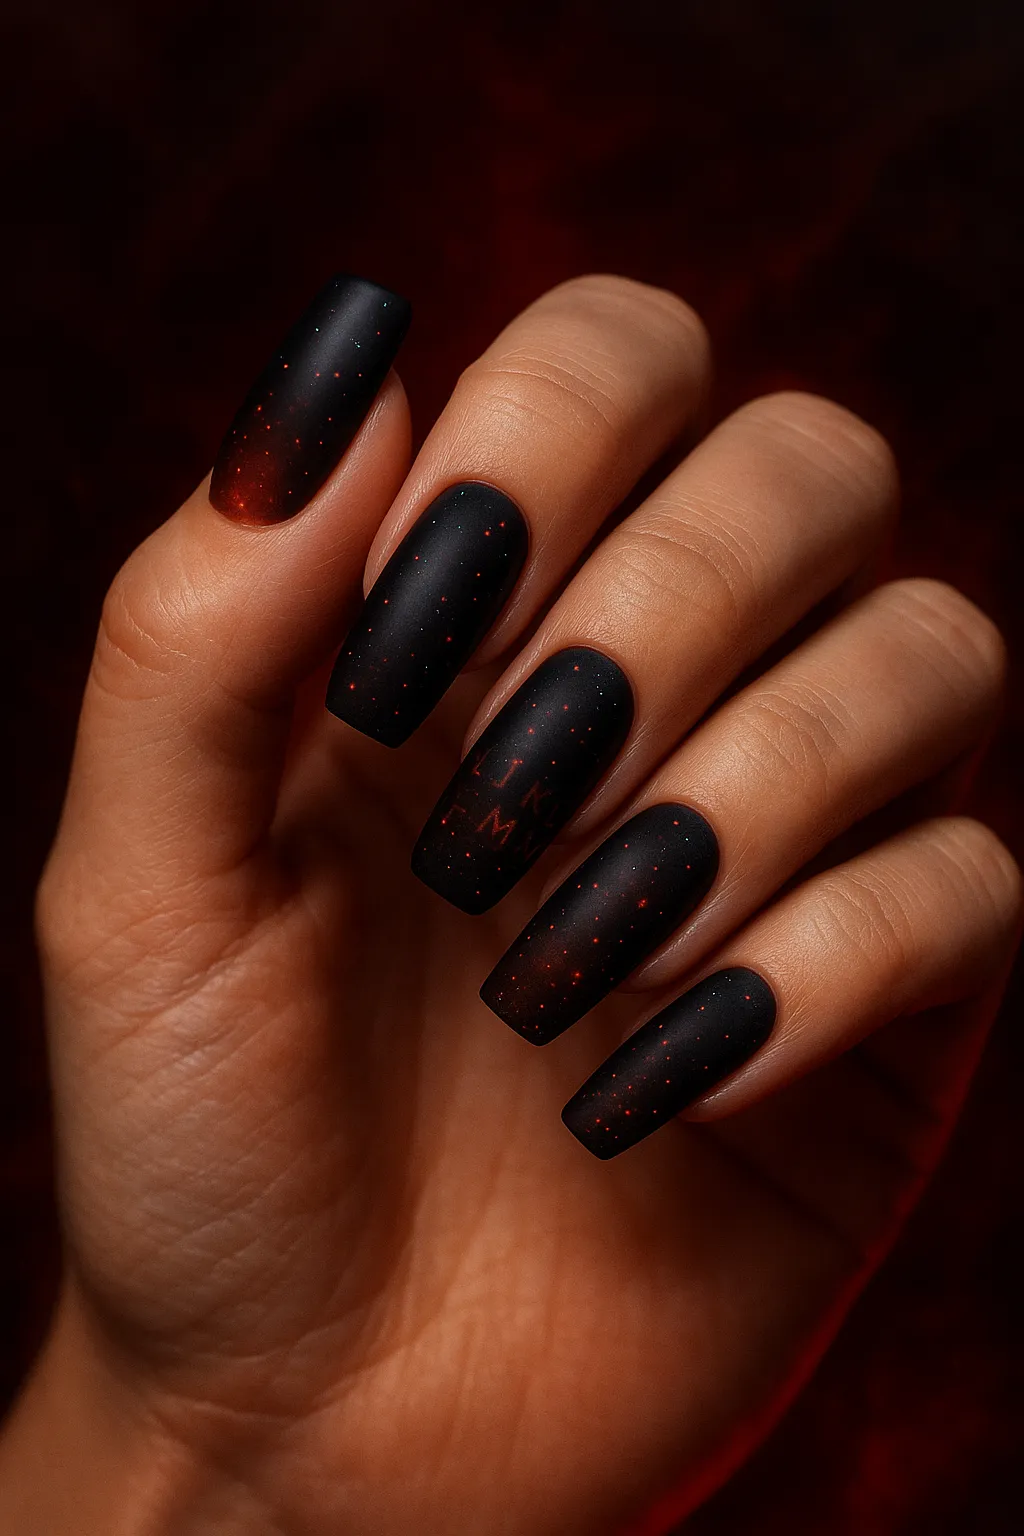
- Stranger Things Upside Down: Dark, moody designs with red glow effects and particle details. Complexity: Medium–Advanced. Time: 40–70 minutes.
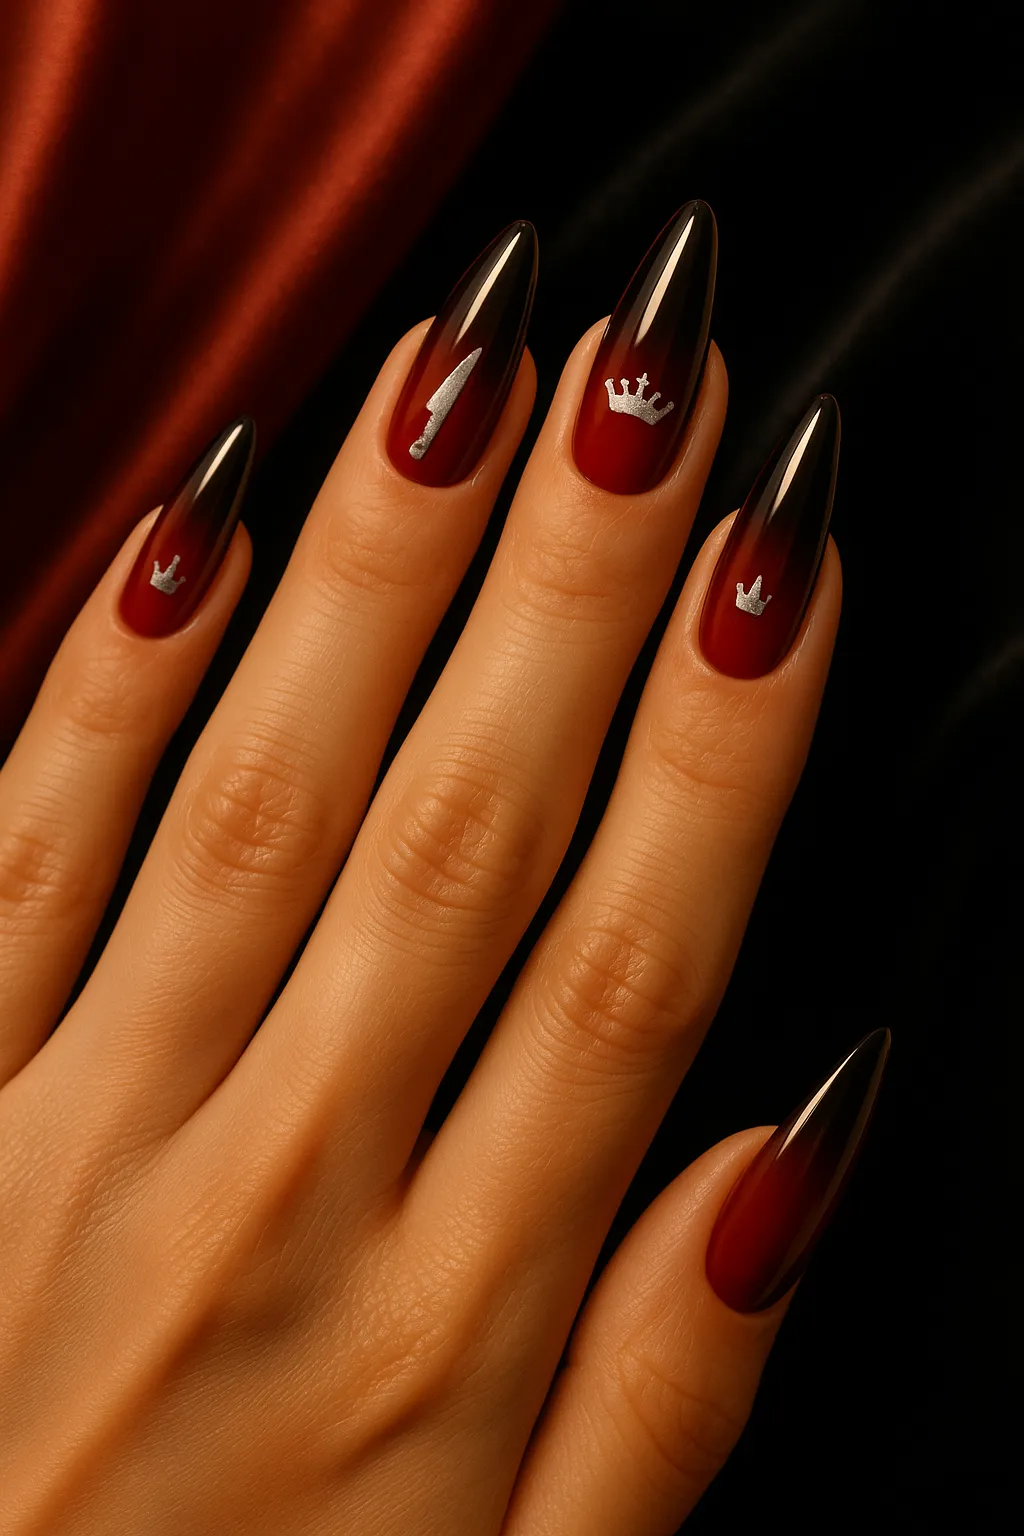
- Scream Queens: Dramatic red and black with crown details or knife silhouettes. Complexity: Medium–Advanced. Time: 50–70 minutes.
- Hocus Pocus Magic: Purple, green, and black with spell book motifs and witchy details. Complexity: Easy–Medium. Time: 30–50 minutes.
- Wednesday Netflix: Modern gothic all-black with subtle cello or typewriter details. Complexity: Easy–Medium. Time: 30–50 minutes.
- Twilight Vampire: Moody burgundy with subtle bite mark accents and sparkle. Complexity: Medium. Time: 40–60 minutes.

Personalization is absolutely key here—these designs let you showcase your favorite movie or character while celebrating Halloween. I love when clients bring me screenshots from their favorite shows!
Nail Design Ideas by Skill Level
Understanding your skill level helps you choose designs that match your abilities and prevents frustration. I’ve seen too many beginners attempt advanced techniques and give up on nail art entirely!
This section demonstrates a clear progression path from simple techniques to complex art. Each level includes time estimates and tool requirements, plus expert tips to help you succeed.
Beginner-Friendly Halloween Nail Designs
Beginner level is all about simplicity, forgiving techniques, and minimal tool investment. These designs are totally achievable in 20–30 minutes and still photograph beautifully for Instagram!
The secret to beginner success? Focus on clean application and well-sealed edges rather than intricate details. Trust me, a perfectly applied simple design beats a messy complex one every time.
Tools You’ll Need:
- Quality base coat
- 2–4 polish colors (black, orange, white, plus one accent)
- Fast-drying top coat
- Optional: stickers or basic stamping plate
12 Beginner Design Ideas:
- Halloween Sticker Application: Apply pre-printed stickers over a single color base. Seal with two coats of top coat for longevity.
- Press-On Nail Sets: Quick-apply press-ons come in countless Halloween designs. Application takes 15–20 minutes and lasts up to two weeks with proper prep.
- Simple Ombré: Use a makeup sponge to create a gradient from orange to black — forgiving and hides imperfections.
- Dotting Tool Designs: Create pumpkins, ghosts, or spiderwebs using just dots. A bobby pin works perfectly if you don’t have dotting tools yet!
- Striping Tape Art: Use striping tape to create geometric designs or perfect spiderweb lines.
- Single Color + Top Coat Variation: Apply matte black base, then add glossy blood-drip accents with regular top coat for contrast.
- Stamping Plate Designs: Pre-made stamping plates transfer precise images instantly.
- Glitter Accent Nails: Paint four nails orange, make one black glitter — simple but effective.
- Simple French Tips: Black or orange tips on nude nails using striping tape as a guide.
- Water Decals: Transfer decals create clean, detailed images without painting skills. Just soak, slide, and seal!
- Two-Tone Nails: Alternate nails in orange and black, or create a checkerboard pattern.
- Nail Wraps: Full-coverage Halloween pattern wraps that require no drying time.
Expert Tip: Start with your non-dominant hand first. You’ll refine your technique before tackling the hand everyone sees!
Research shows 65% of DIY Halloween nails use stickers or press-ons as their foundation. There’s zero shame in taking shortcuts — the goal is beautiful nails, not proving your painting prowess! More on simple nail designs.
Intermediate Halloween Nail Art
Ready to level up? Intermediate designs require basic painting skills, a steady hand, and patience for detail work.
Essential Tools:
- Thin detail brushes (sizes 0, 00, 000)
- Multiple dotting tool sizes
- Striping tape
- Cleanup brush with acetone
- 5–8 polish colors
- Optional: gel system for longer wear
Time Investment: Most intermediate designs take 45–60 minutes. Set aside an evening, put on your favorite show, and enjoy the creative process!
- Freehand Spiderwebs: Hand-paint delicate webs using a thin liner brush. Start with anchor points, then connect with curved lines.
- Simple Character Faces: Give your ghosts, pumpkins, or cats distinct personalities with varied expressions.
- Gradient Backgrounds with Details: Create ombré backgrounds, then layer silhouettes on top for depth.
- Detailed Accent Nail Art: Paint one intricate Halloween scene while keeping other nails neutral.
- Color Blocking: Geometric Halloween patterns using tape guides for clean lines.
- Simple Landscapes: Cemetery silhouettes, haunted houses on hills, and bare tree branches.
- Stamping + Hand-Painting Combo: Use stamping for base images, then enhance with hand-painted details and shading.
- Dripping Effect: Master controlled drips for blood, slime, or paint effects — pressure control is everything.
- Marble with Halloween Twist: Water marble or dry-brush marble in Halloween colors creates organic, unique patterns.
- Layered Looks: Combine gradients, stamping, and hand-painted dots in one cohesive design.
- French Tips with Art: Create French tips, then add tiny Halloween details to each tip.
- Basic Lace Patterns: Simple lace via stamping or hand-painting borders and corners.
Skill-Building Tip: Practice new designs on paper or practice wheels before applying to your nails. I keep a nail art journal where I test color combinations and techniques — it’s saved me from so many disasters!
Advanced & Professional-Level Halloween Nail Art
Welcome to the big leagues! Advanced nail art demands professional painting skills, 3D work, encapsulation techniques, and sophisticated color theory knowledge.
Professional Tools:
- Complete brush set (liners, shaders, flats)
- Builder gel and sculpting medium
- Chrome powders and application tools
- UV/LED lamp (48W minimum)
- Color mixing palette
- Advanced stamping plates
- Rhinestones, foils, and embellishment supplies
- Hand-Painted Horror Scenes: Detailed cemeteries, haunted houses with architectural details, atmospheric skies with shading and highlights.
- Realistic Portraits: Character faces with shading, highlights, and dimension — think horror movie villains rendered photographically.
- 3D Sculpted Elements: Builder gel pumpkins, ghosts, or spiders that rise off the nail surface.
- Encapsulated Art: Layer Halloween motifs between gel coats for depth and protection.
- Advanced Lace Work: Intricate patterns requiring steady hands and micro-detail painting.
- Mixed Media Magic: Combine painting, 3D elements, chrome powder, gems, and foiling in one cohesive masterpiece.
- Multi-Color Ombré with Details: Three to five color gradients with intricate overlay patterns.
- Advanced Chrome Techniques: Chrome powder application over sculptural elements for futuristic effects.
- Reverse Stamping: Color in stamped images, add shading, then transfer for dimensional results.
- Micro-Painting: Tiny detailed scenes or characters — think entire haunted house rendered on one nail!
- Sculpted Nail Shapes: Combine stiletto or coffin sculpting with Halloween art.
- Realistic Blood Effects: Multi-dimensional blood with depth, shading, and glossy-to-matte variation.
Professional Insight: Advanced nail art requires serious time investment — plan 1.5 to 2+ hours for complex designs. Many advanced techniques require gel systems for structural integrity and longevity.
Step-by-Step Halloween Nail Tutorials
Ready to get hands-on? These tutorials cover the most-requested Halloween nail designs of 2025, ordered from simpler to more complex.
Each tutorial includes clear steps, specific product suggestions, timing estimates, and troubleshooting tips for common problems. Practice on paper or nail wheels first if you’re trying a new technique.
Tutorial 1: Classic Spiderweb Nails (Beginner–Intermediate)
Time Required: 30–40 minutes for both hands
Difficulty: Beginner–Intermediate
Tools & Products Needed:
- Base coat (try a good bond-enhancing base like Orly Bonder)
- Background color: nude, orange, purple, or black creme polish
- Black or white creme polish for webbing
- Very thin striping brush (size 0 or 00)
- Quality top coat (Seche Vite or similar)
- Cleanup brush with acetone
- Optional: small spider stickers or a hand-painted spider accent
Preparation Steps:
- Clean your nails and push back cuticles. Lightly buff the nail plate for adhesion.
- Apply one thin coat of base coat and cure or dry per product instructions.
- Apply two thin coats of your chosen background color, allowing full dry time between coats.
Web Painting Technique:
- Using a very thin striping brush, start by painting a small dot where you want the center of the web to be.
- Draw 4–6 thin lines radiating out from the center dot to the edges of the nail.
- Connect these lines with small curved lines (like concentric arches) to form the web. Keep each stroke light — imperfections read as organic texture.
- If desired, add a tiny spider sticker or hand-painted spider on an accent nail.
- Finish with a top coat. For longevity, seal free edges and cure as needed.
Troubleshooting: If lines look shaky, thin your polish slightly with the brand’s thinner or use a gel liner for smoother strokes. Practice on a wheel first.
FAQ
How long do Halloween nail designs typically last?
Longevity depends on the system used: regular polish with careful top-coating lasts about 5–10 days; gel systems can last 2–3 weeks. 3D elements and heavy embellishments often need salon-grade application and maintenance.
Can beginners achieve these looks at home?
Absolutely. Start with sticker-based designs, press-ons, or negative-space art. Work your way up to intermediate techniques as your brush control improves.
What are budget-friendly tools to begin with?
A quality base/top coat, 3–5 polish colors, a dotting tool set (or bobby pins), and striping tape offer huge creative returns for a small investment.
Are any of these designs safe for natural nails?
Yes — most designs translate perfectly to natural nails with proper prep and top-coating. For sculpted 3D work, consider salon gel or acrylic services for durability.
Conclusion
Whether you crave gothic glamour, minimalist chic, or playful kawaii ghosts, Halloween 2025 is all about versatility and personal expression. Start simple, practice deliberately, and don’t be afraid to mix techniques — the best looks often blend classic motifs with modern finishes.
For more inspiration and product lists, explore the linked resources throughout this guide and bookmark your favorites for easy salon reference. Happy creating — may your nails be spooky, stylish, and totally you!